

Your Articles Dashboard
When you open SEO Content > Articles, you’ll see a list of all the articles you’ve generated. Each entry shows the target keyword, the generation status, the creation date, and the available actions.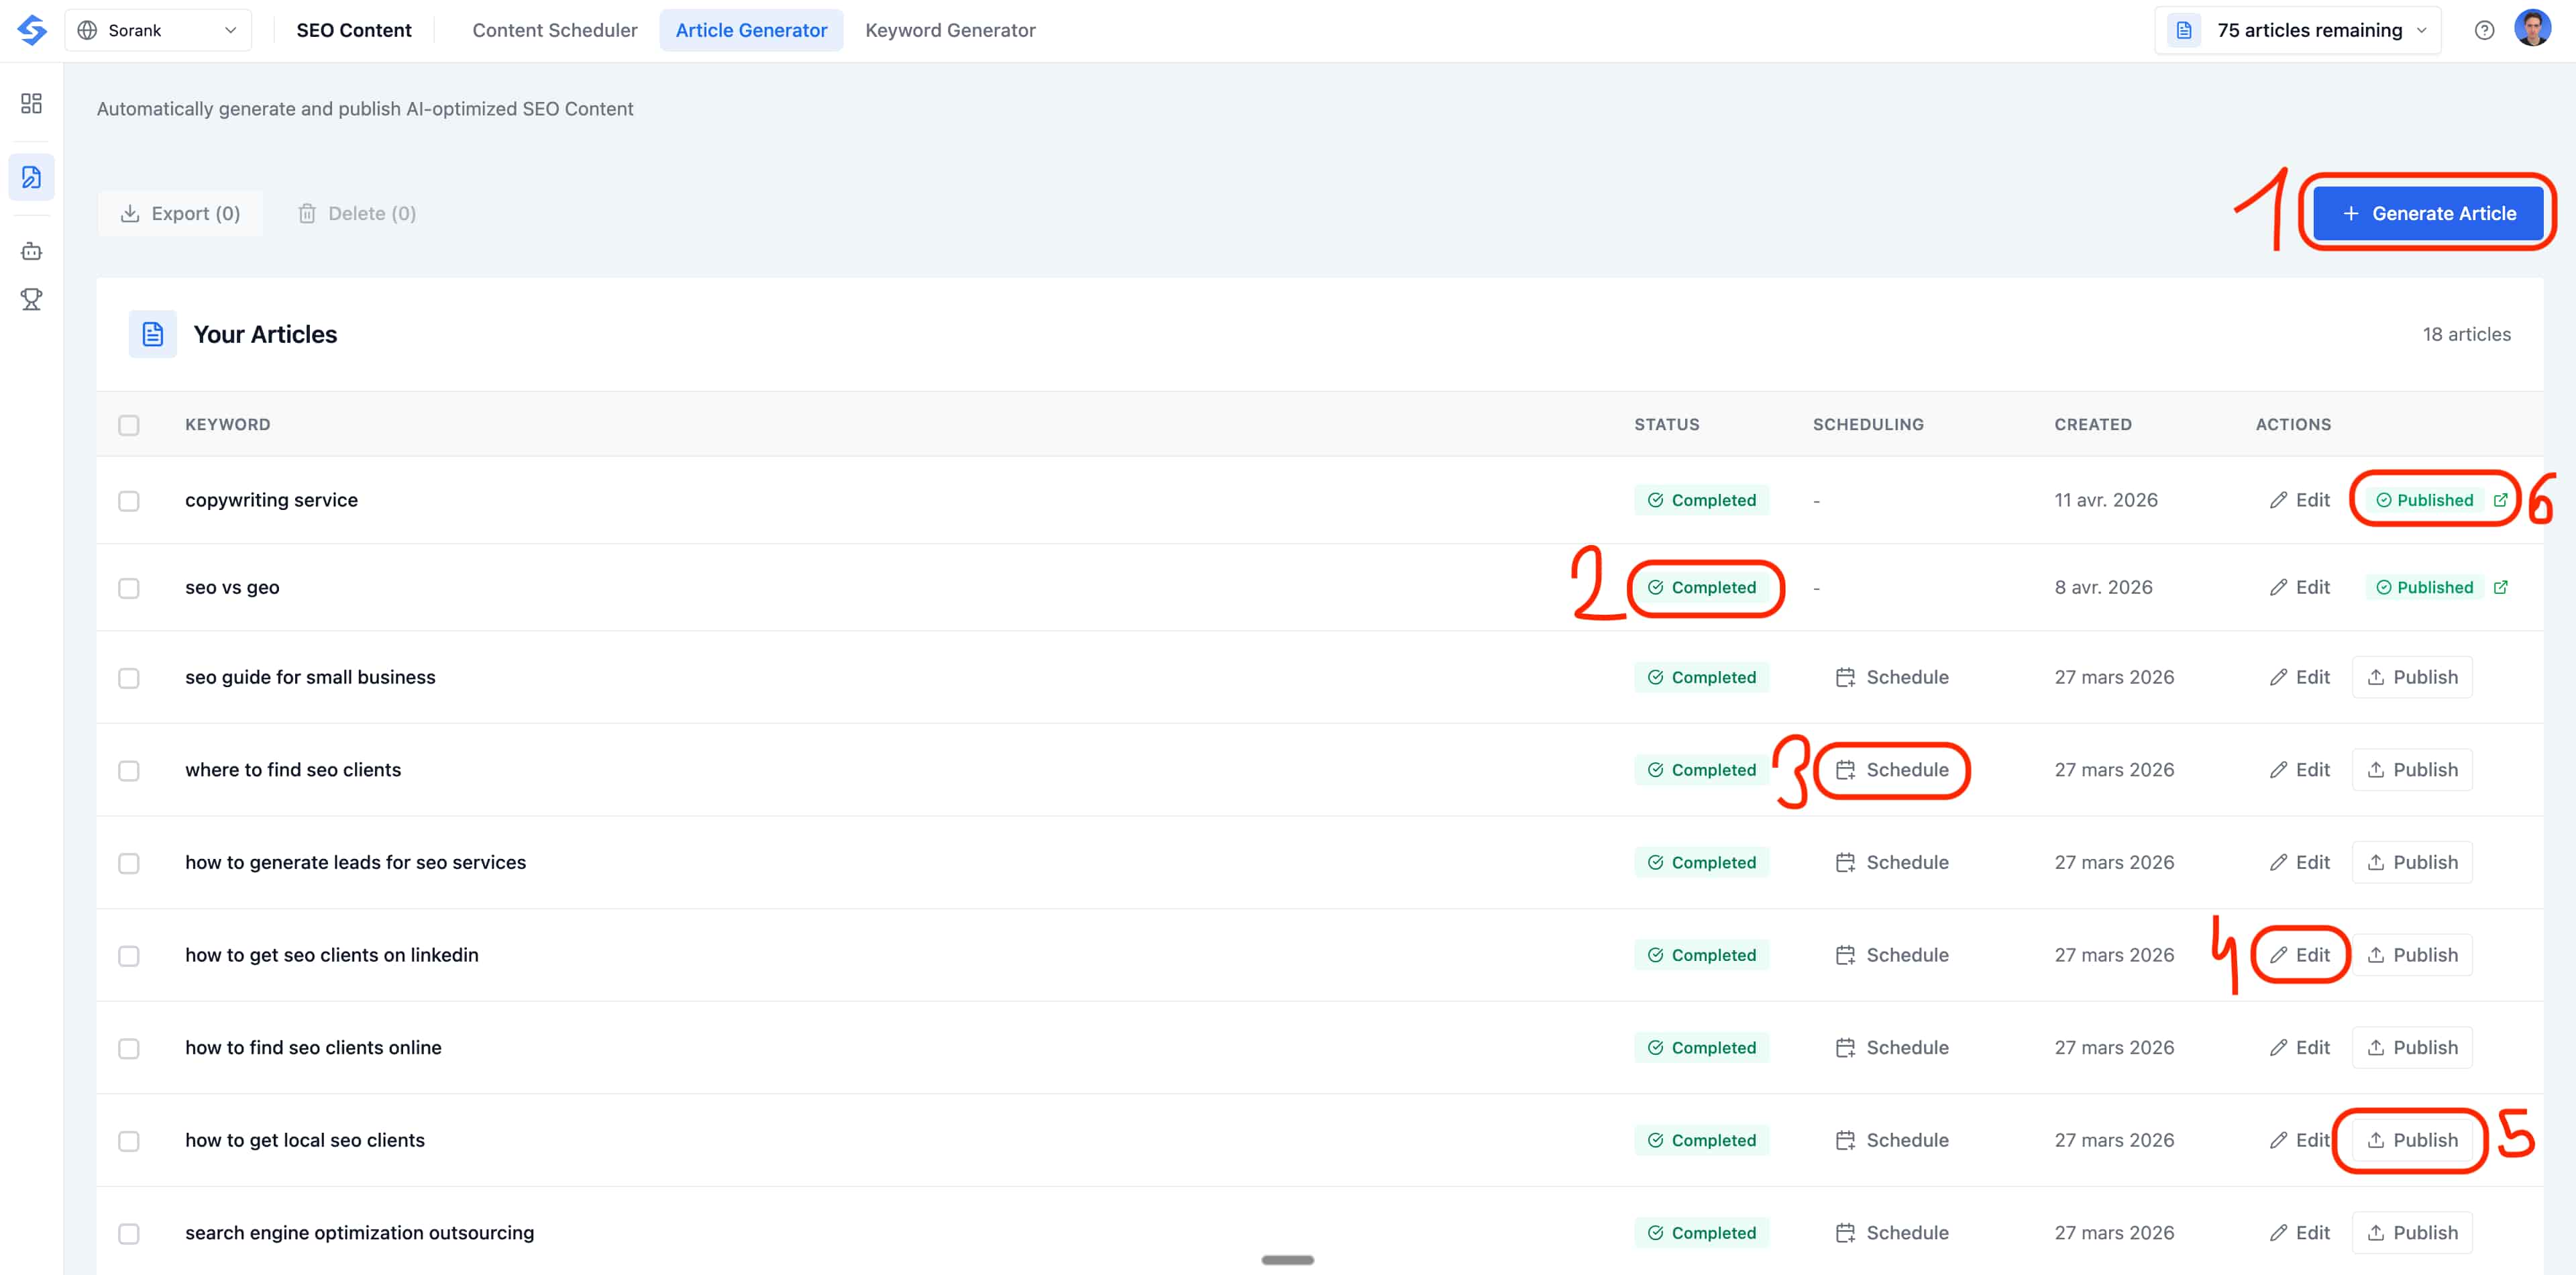
- Generate Article, click the blue button in the top-right corner to open the article creation dialog and start a new batch.
- Status, at a glance, see whether each article is Completed, pending, or already Published. Click the badge to filter the list.
- Schedule, open the scheduling picker on any completed article to queue it for automatic publishing on a specific day and time.
- Edit, open the full article editor to review, rewrite, and fine-tune the AI-generated content before sending it live.
- Publish, push a completed article directly to your connected CMS in one click.
- Published, once an article is live, the badge turns into a shortcut: click it to open the published article on your website in a new tab.
Step 1: Start a New Article
Click the + Generate Article button in the top-right corner of the Articles page. This opens the Generate New Article dialog, where you’ll configure everything before the AI starts writing.Step 2: Add Your Target Keywords
The first thing you need to do is enter the keywords you want to target. Type a keyword into the input field and press Enter or click the + button to add it. Each keyword will generate one separate article. You can add multiple keywords at once, meaning you can batch-generate dozens of articles in a single go. Once added, your keywords will appear as tags above the input field.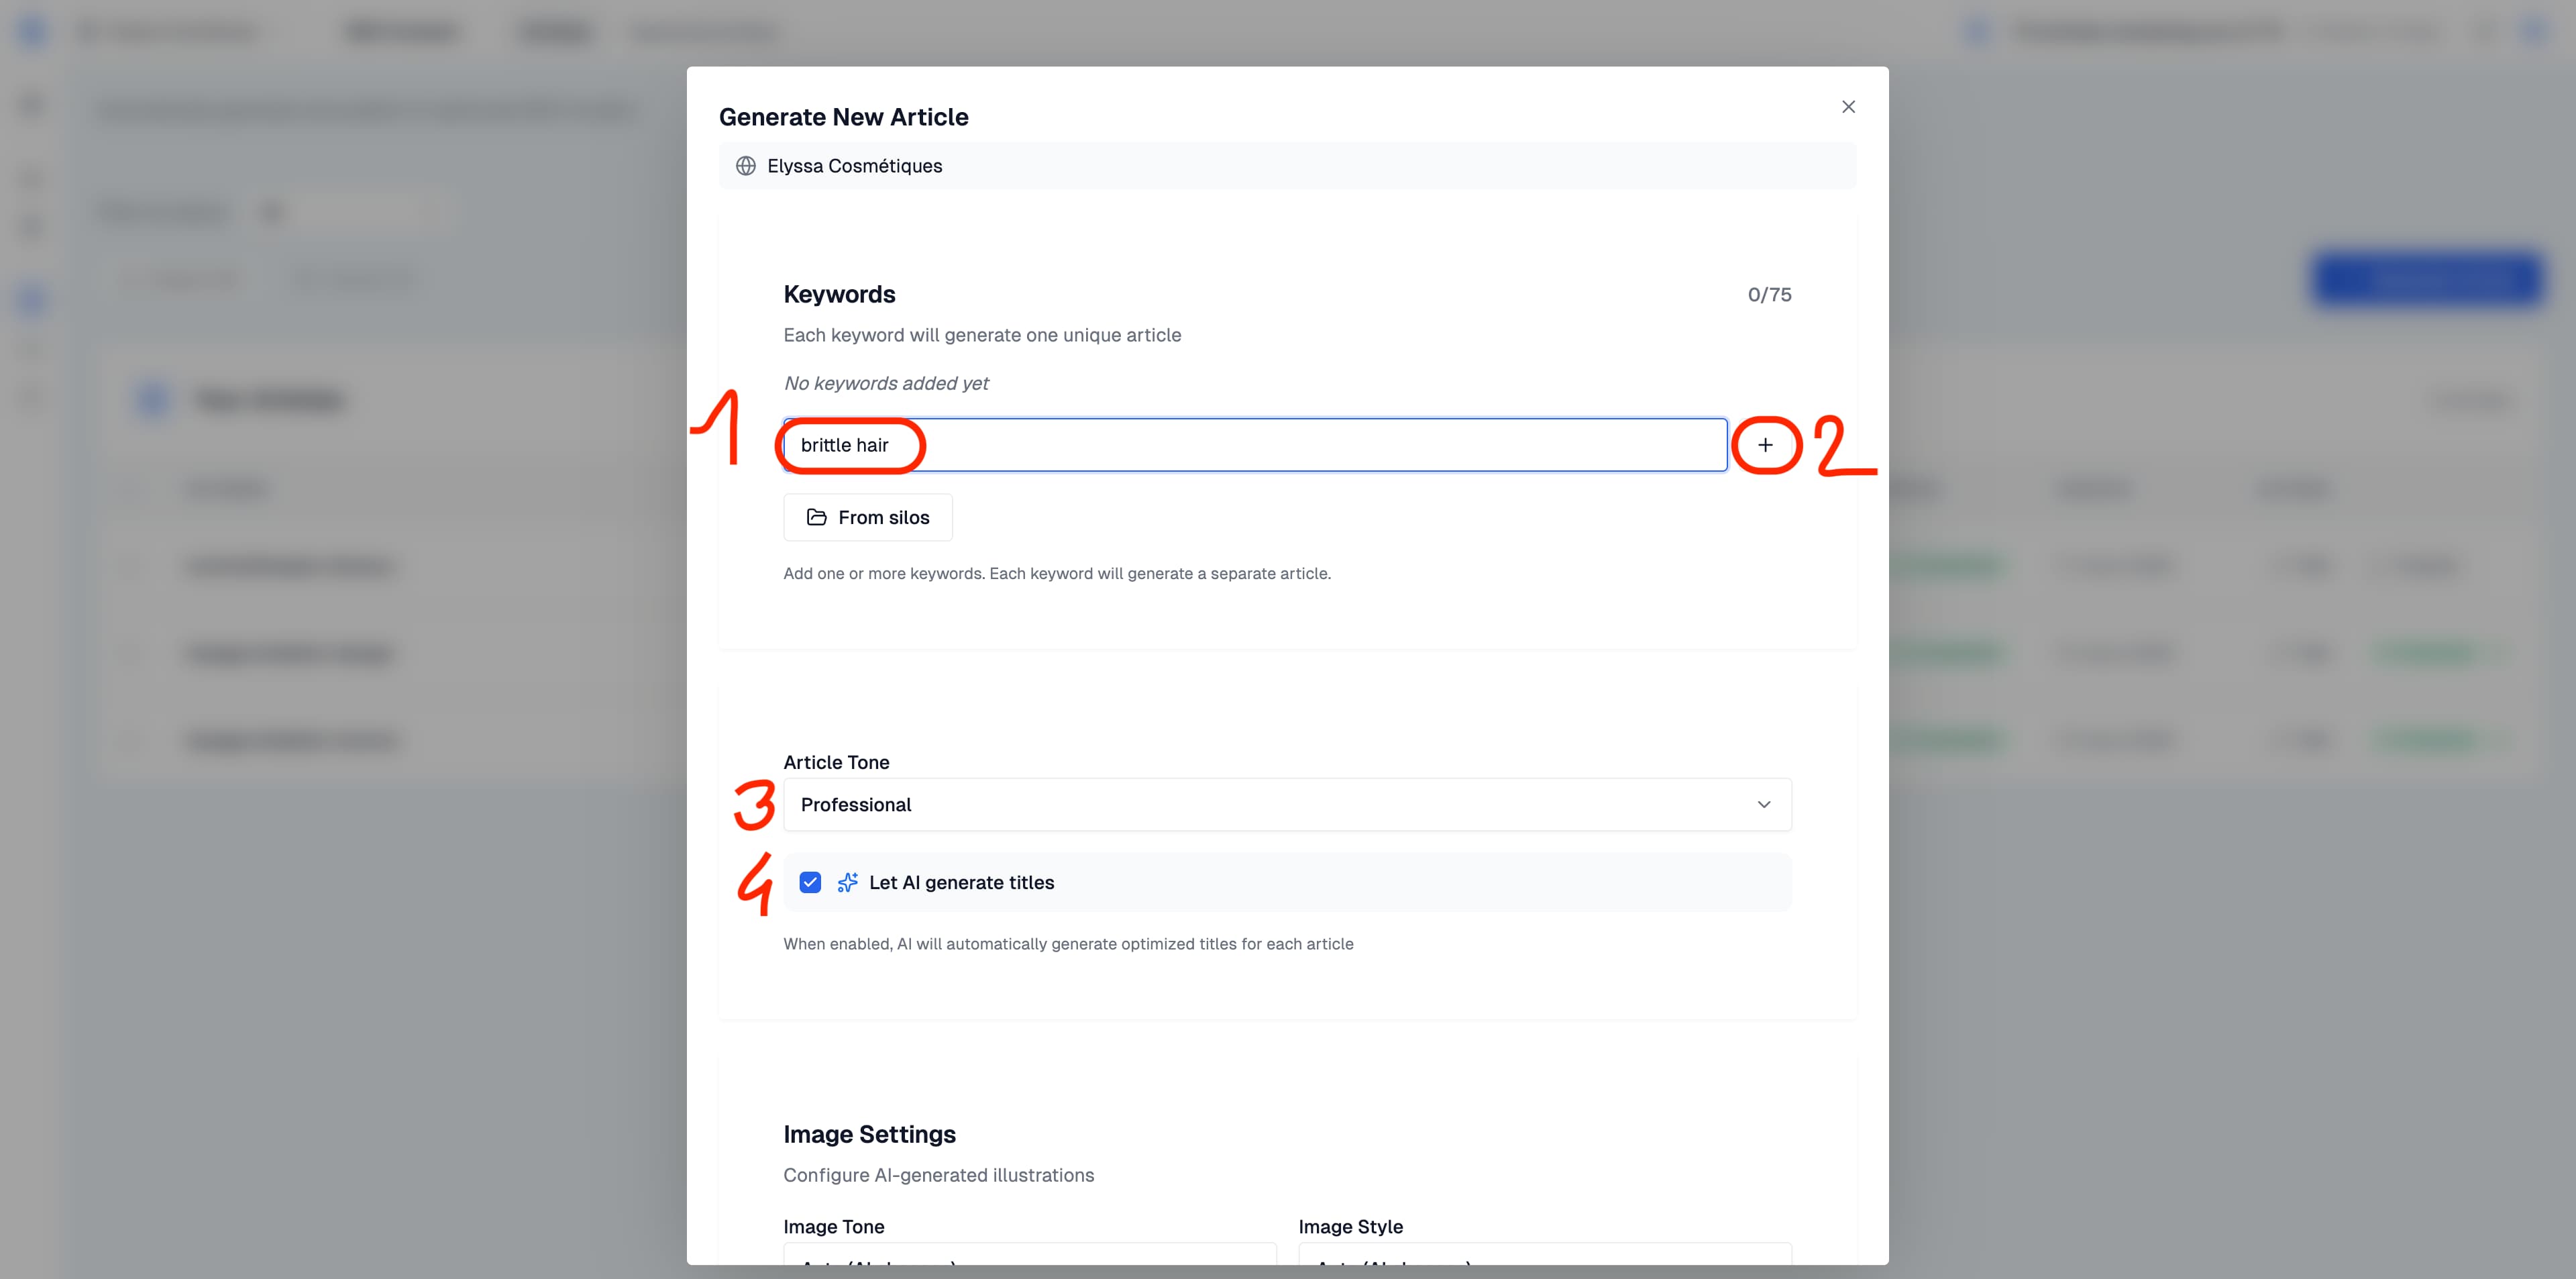
Import Keywords from Your Silos
If you’ve already set up keyword silos in the Keywords & Silos section, you don’t need to type anything manually. Click the From silos button to browse your silos and pick keywords directly.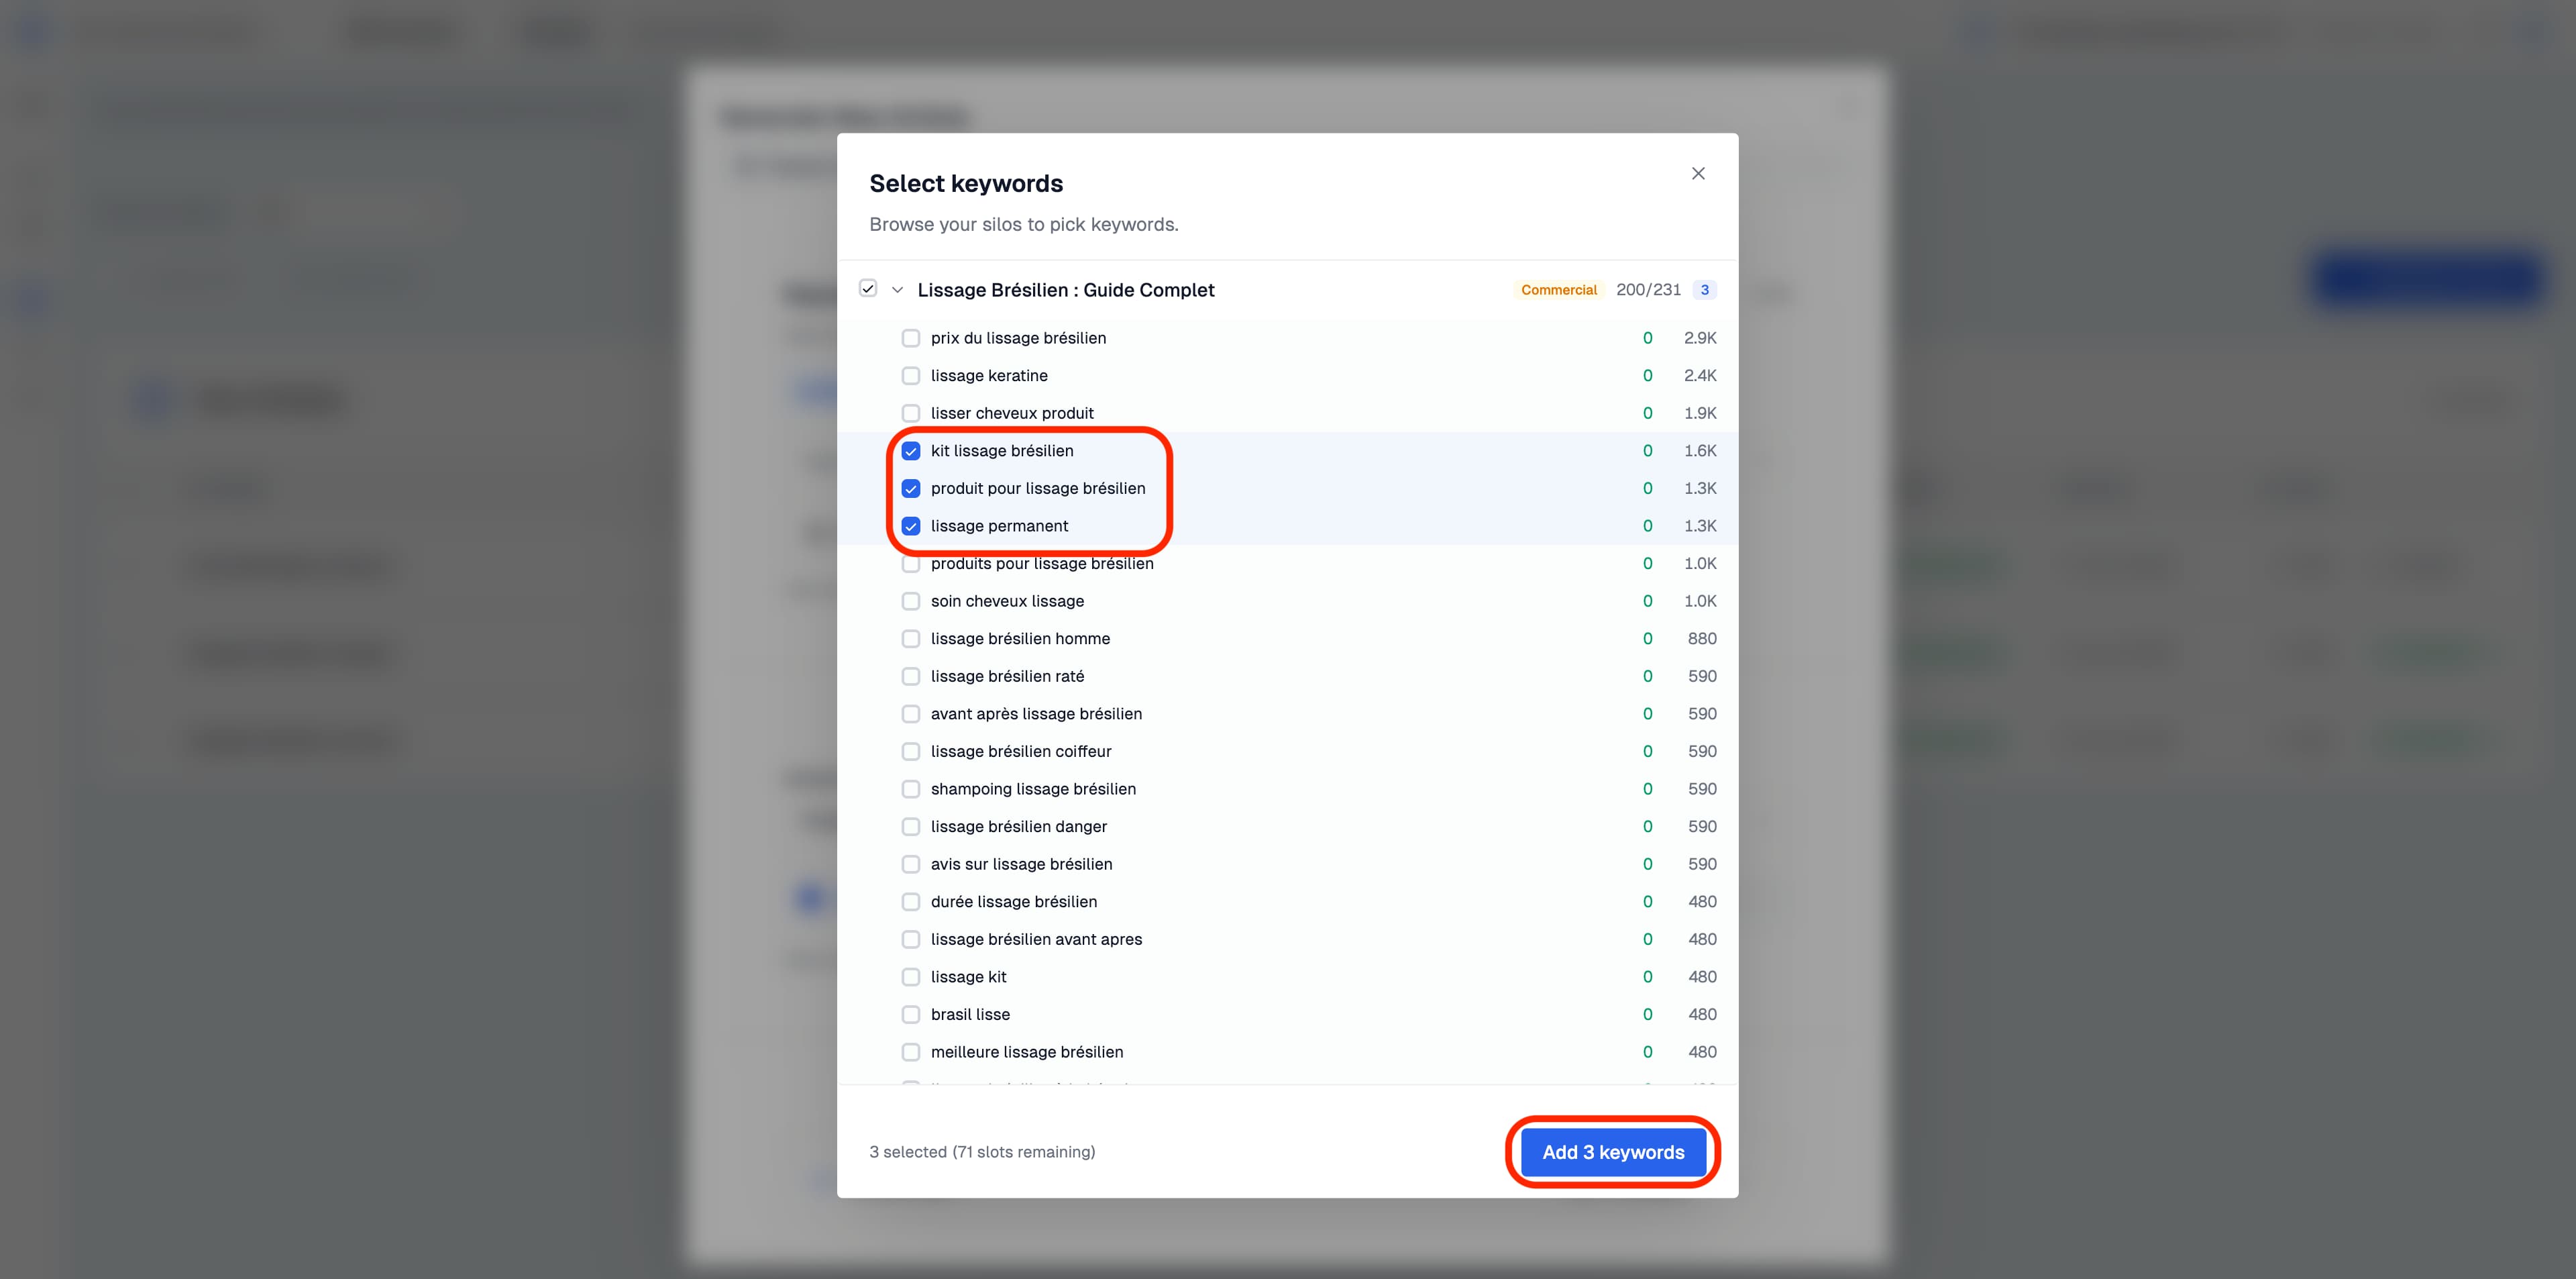
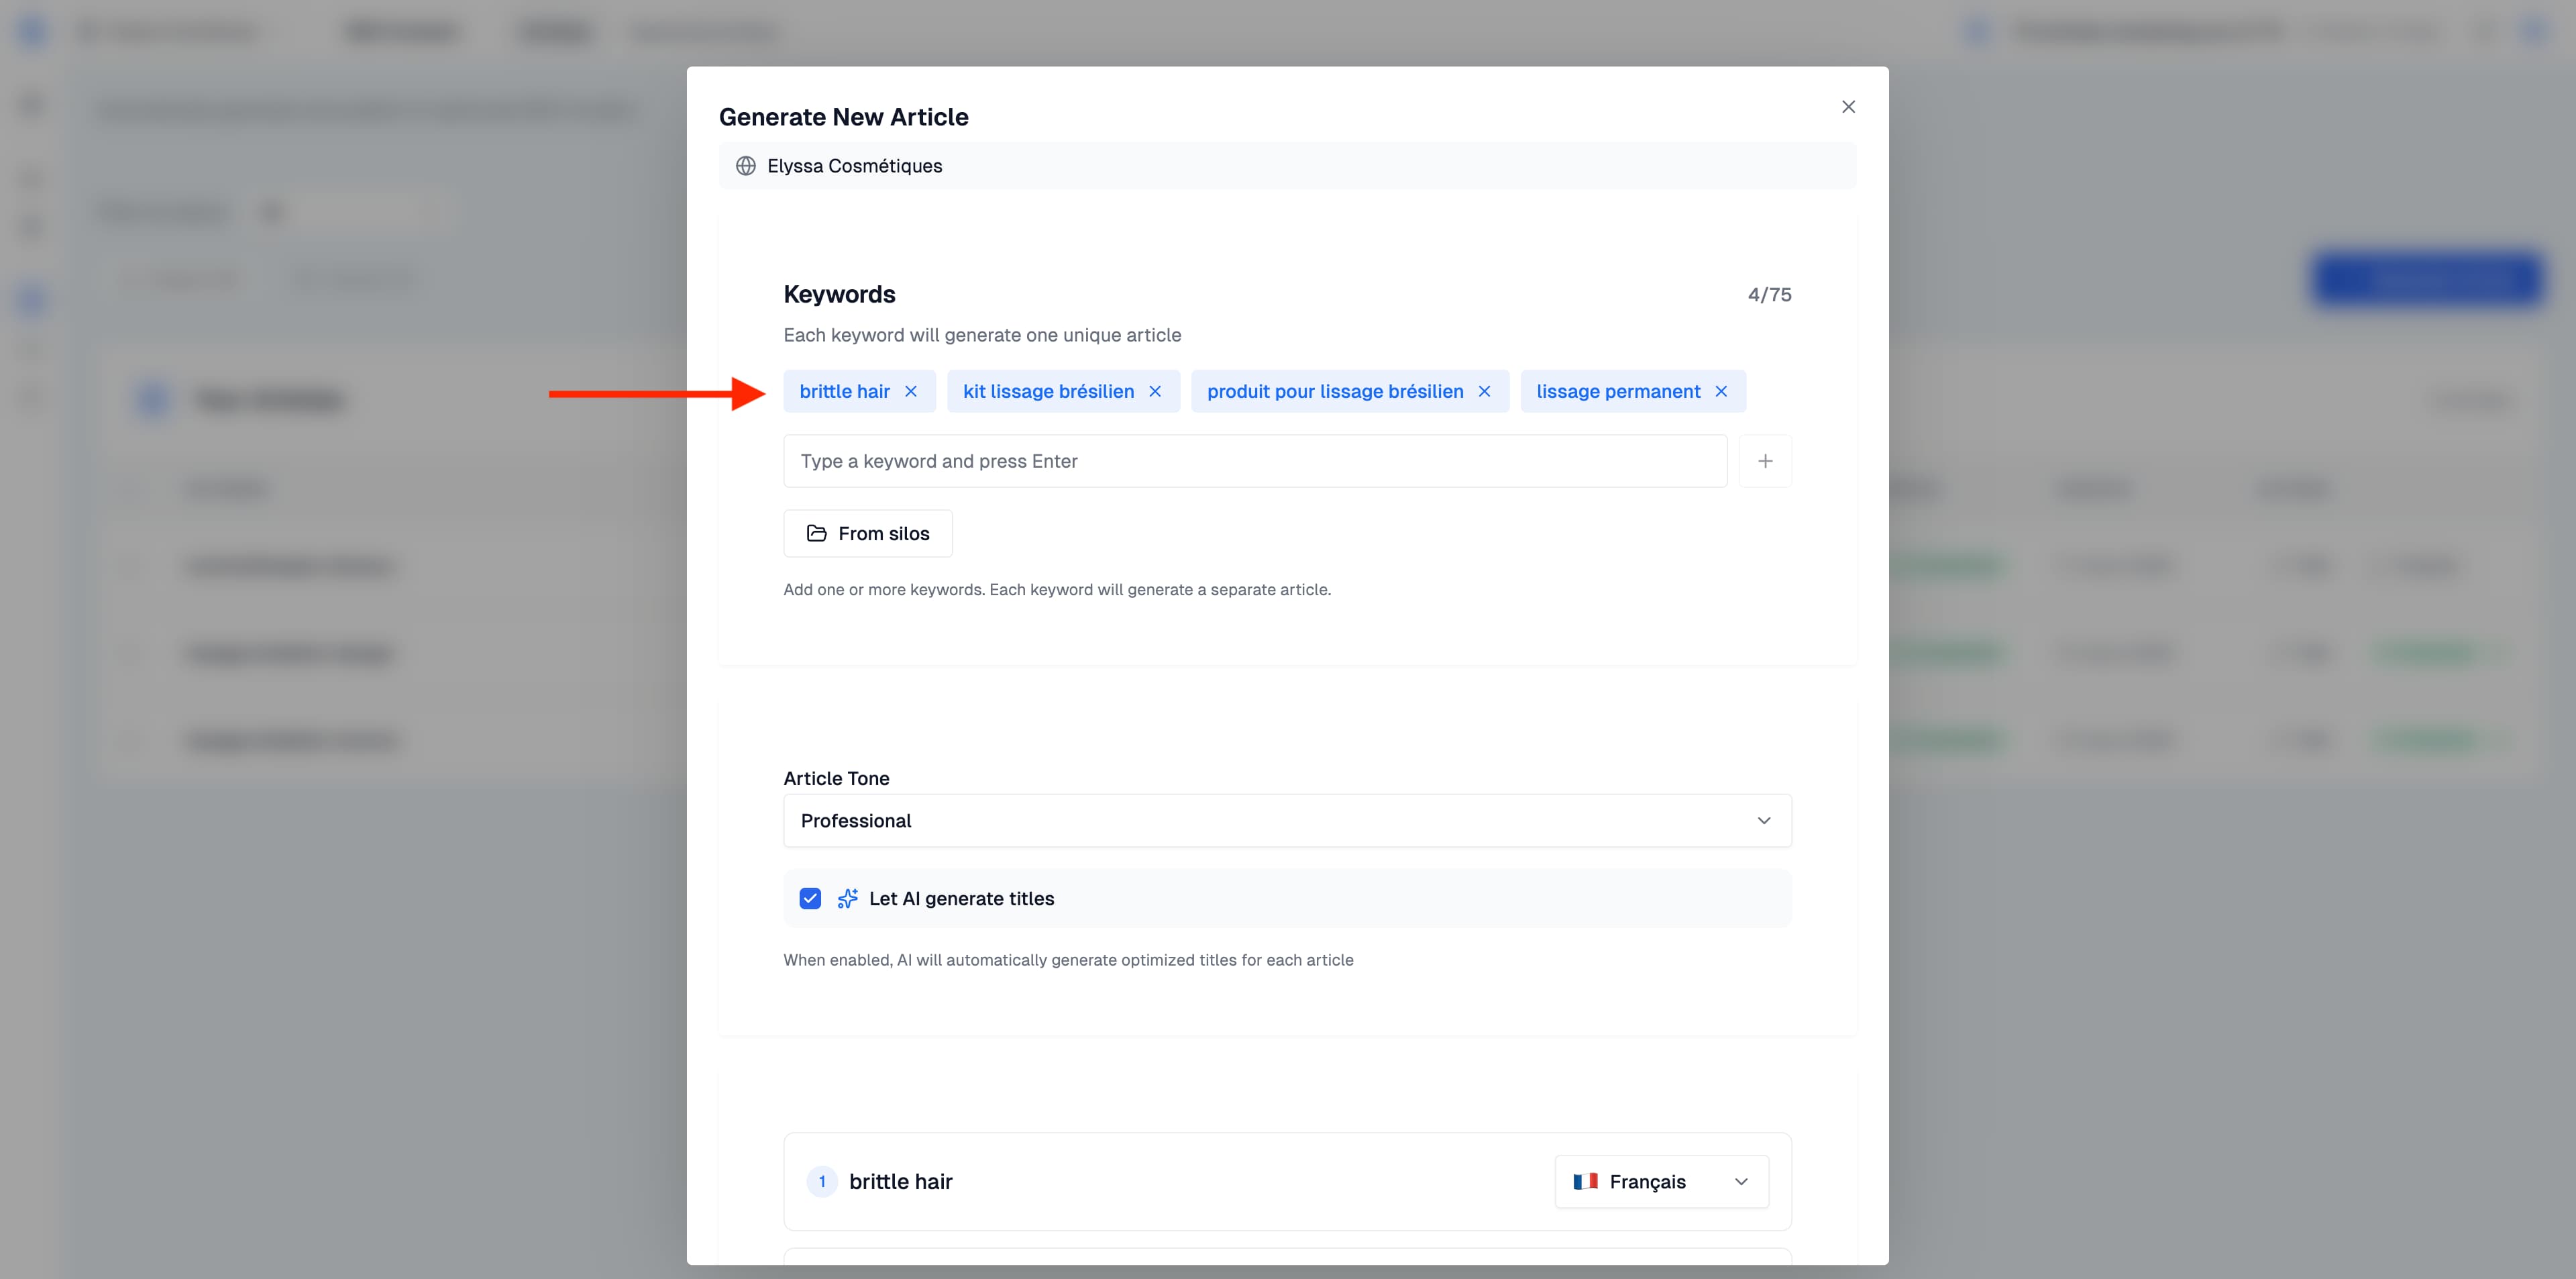
Step 3: Configure Article Settings
Below the keywords section, you have several options to customize how your articles will be generated.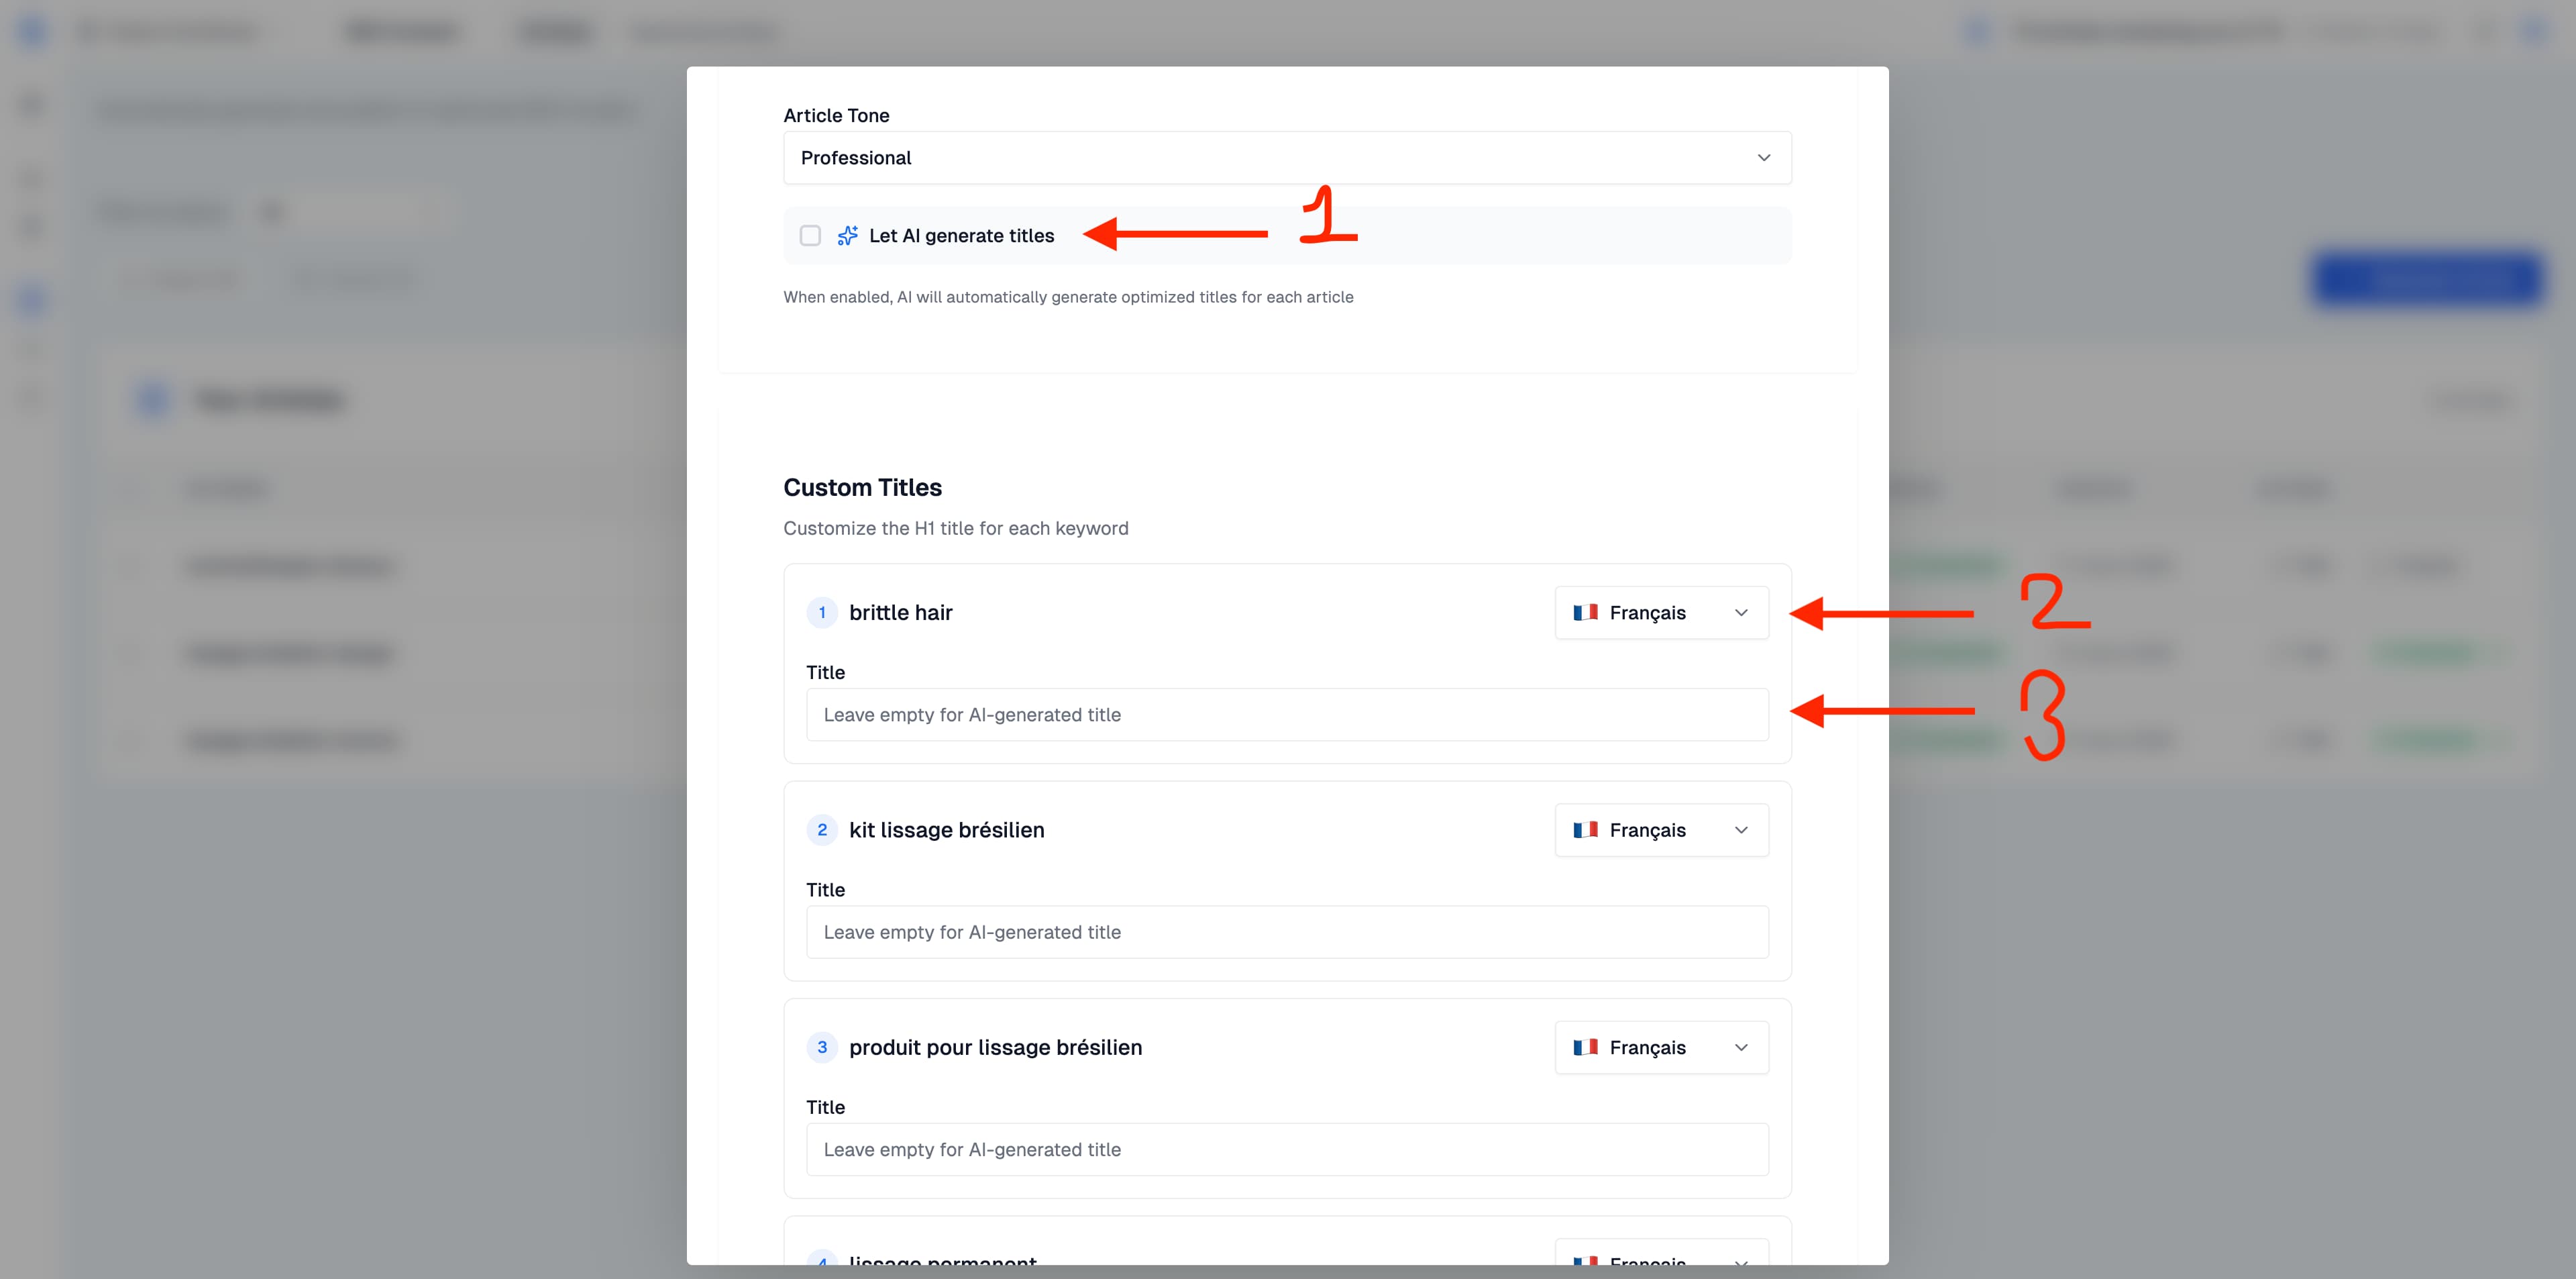
Article Tone
Choose the writing style that matches your brand. The default is Professional, but you can switch to other tones depending on your audience and content strategy.Let AI Generate Titles
When this checkbox is enabled, the AI will automatically create an optimized H1 title for each article based on competitor analysis and SEO best practices. If you prefer to control the title yourself, uncheck this option and a Title field will appear for each keyword where you can type your own.Language per Keyword
Each keyword has its own language selector. This means you can generate articles in different languages within the same batch. For example, one article in French and another in English, all in one go.Step 4: Configure Image Settings
Scroll down to the Image Settings section to control the AI-generated illustrations that will be included in your article.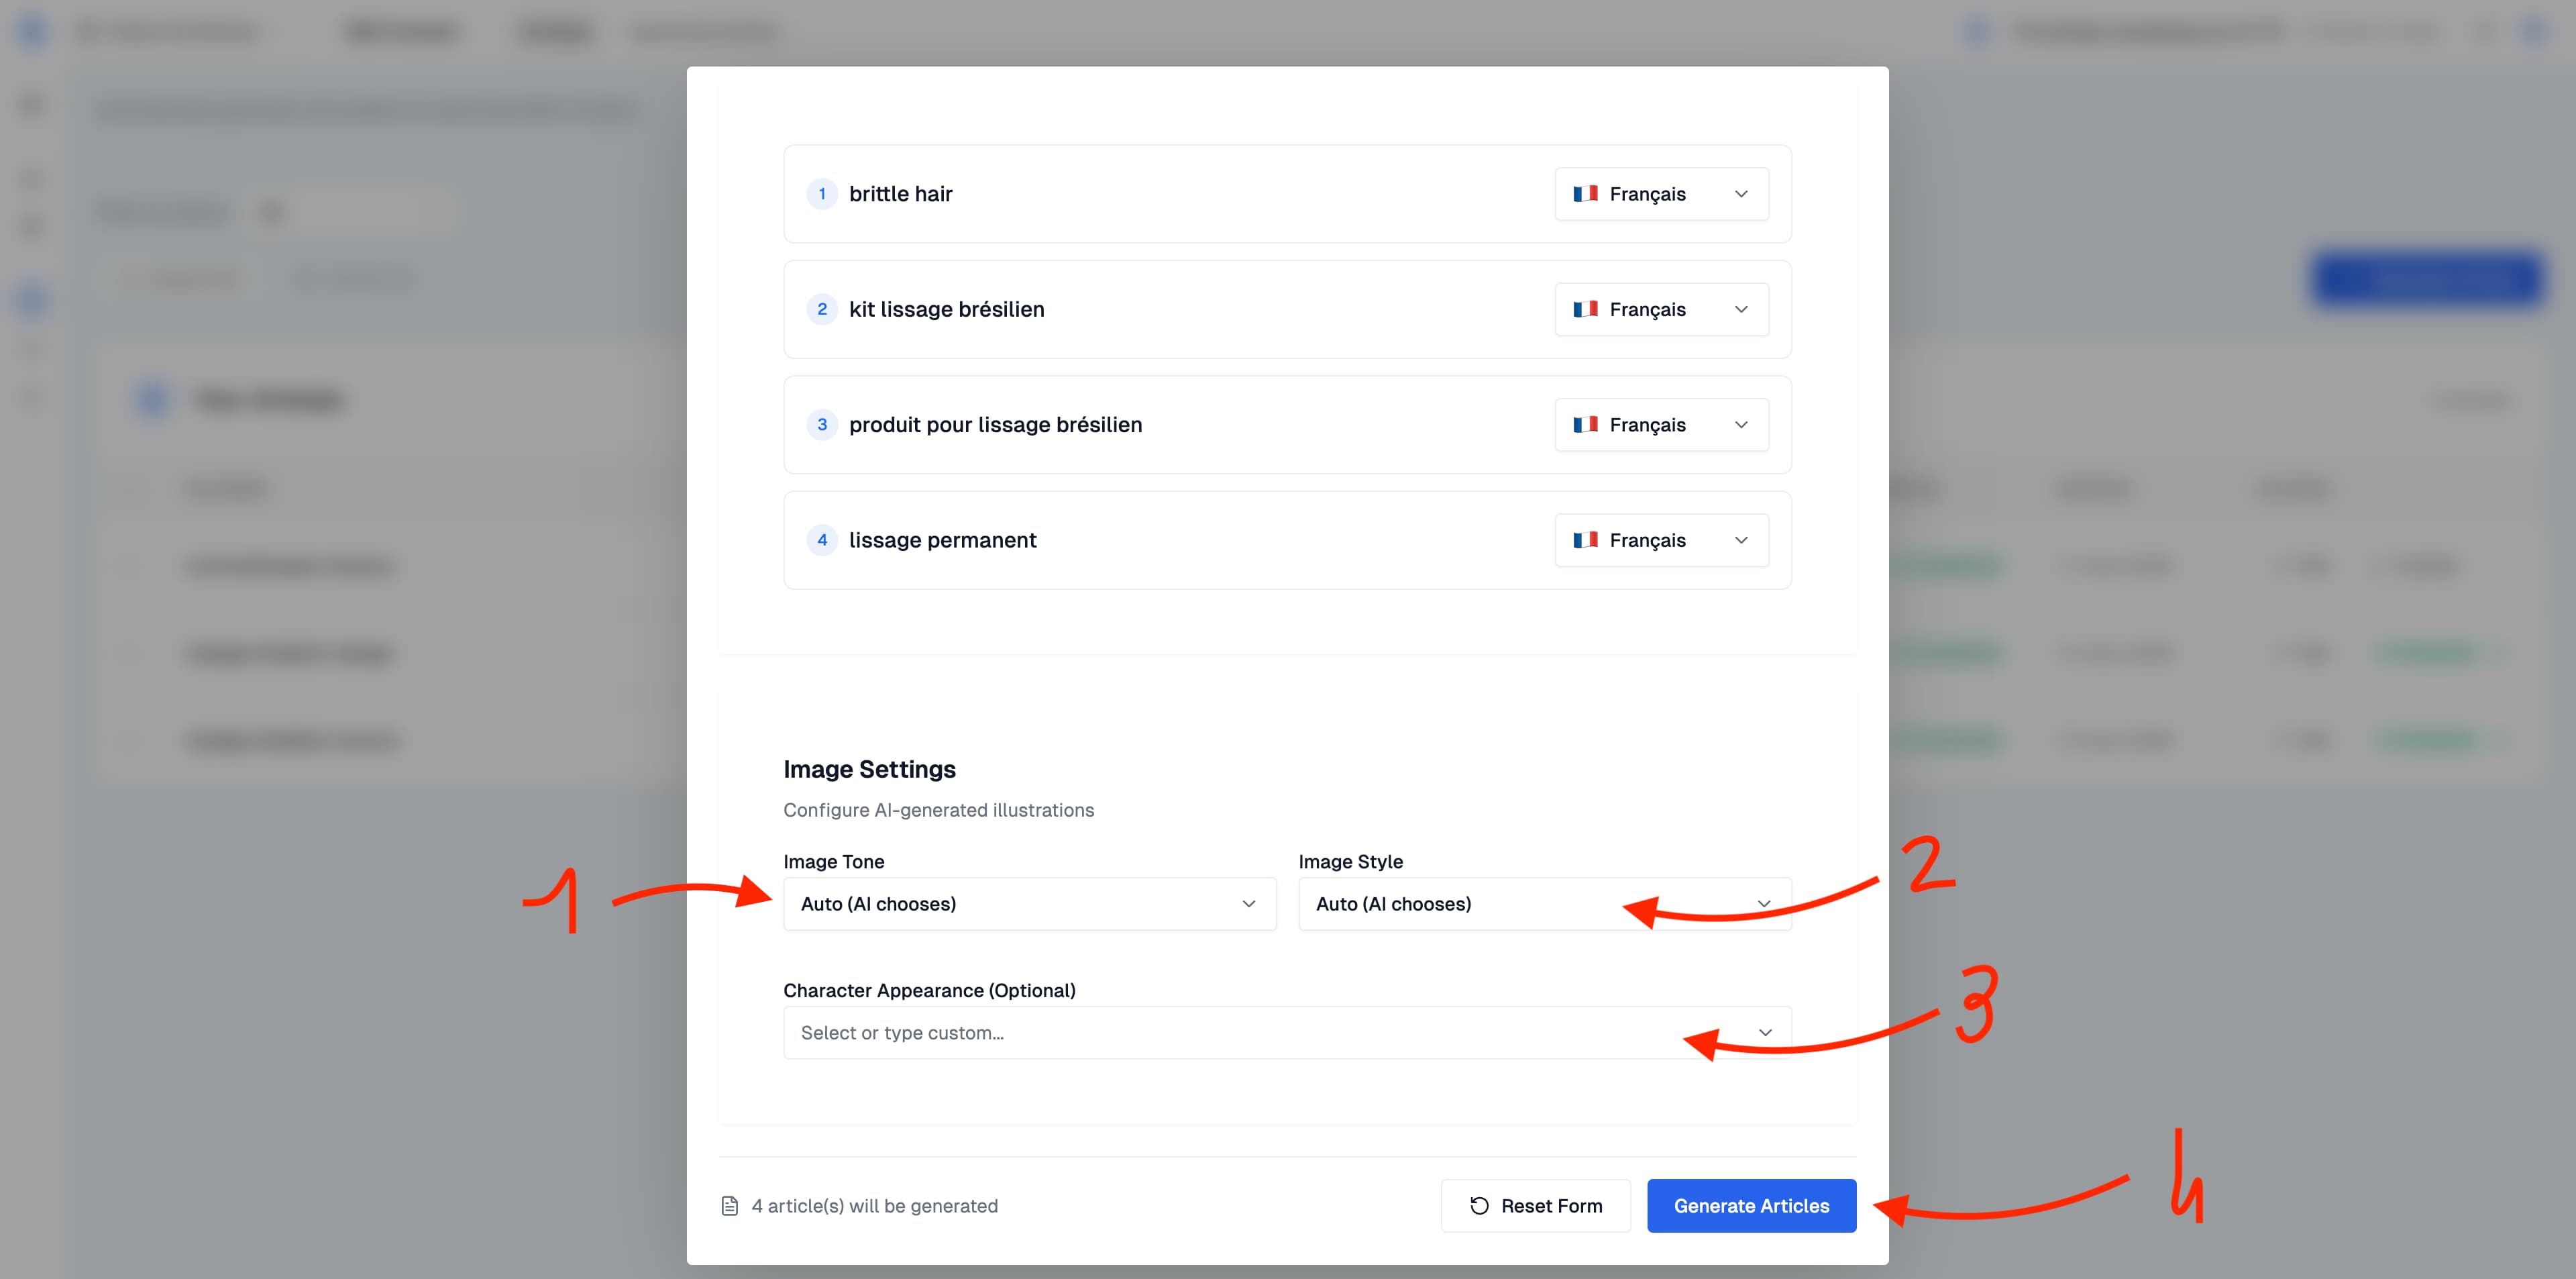
- Image Tone controls the mood of the generated visuals (e.g. warm, clinical, vibrant). Set to “Auto” to let the AI decide based on the article topic.
- Image Style controls the artistic style (e.g. photorealistic, illustrated, minimalist). “Auto” works well for most use cases.
- Character Appearance (Optional) lets you describe how people should look if your article features them, helping you maintain visual consistency across your content.