
Preferences

Privacy is important to us, so you have the option of disabling certain types of storage that may not be necessary for the basic functioning of the website. Blocking categories may impact your experience on the website. More information

Accept all cookies
You are here
All guides
Need Help ?
Host your blog on Sorank

Not a developer and your platform has no API to connect? Sorank can host your entire blog for you, on your own domain name, so your articles go live automatically with zero code.

How it works

You connect your domain name to Sorank, and we host your whole blog under it. Everything lives on your domain (for example blog.yourdomain.com or yourdomain.com/blog), so the SEO authority you build flows back to your own domain — not to a third-party platform.

  • It costs you nothing extra. Hosting your blog on Sorank is included — you won't pay a single cent more than your subscription.
  • It's attached to your domain name so every article you publish strengthens your domain's authority and SEO.
  • You stay free to leave. If one day you decide to stop using Sorank, you can simply export your entire blog and re-import it into your own site. Your content is always yours.

Step 1: Open the hosted blog settings

From your Sorank dashboard, go to Settings > Integrations. Scroll down to the Connected hosted blog section at the bottom of the page and click Manage my blog. You can also reach it any time from the Settings entry in your profile menu, top-right.

Open Settings then Integrations and click Manage my blog

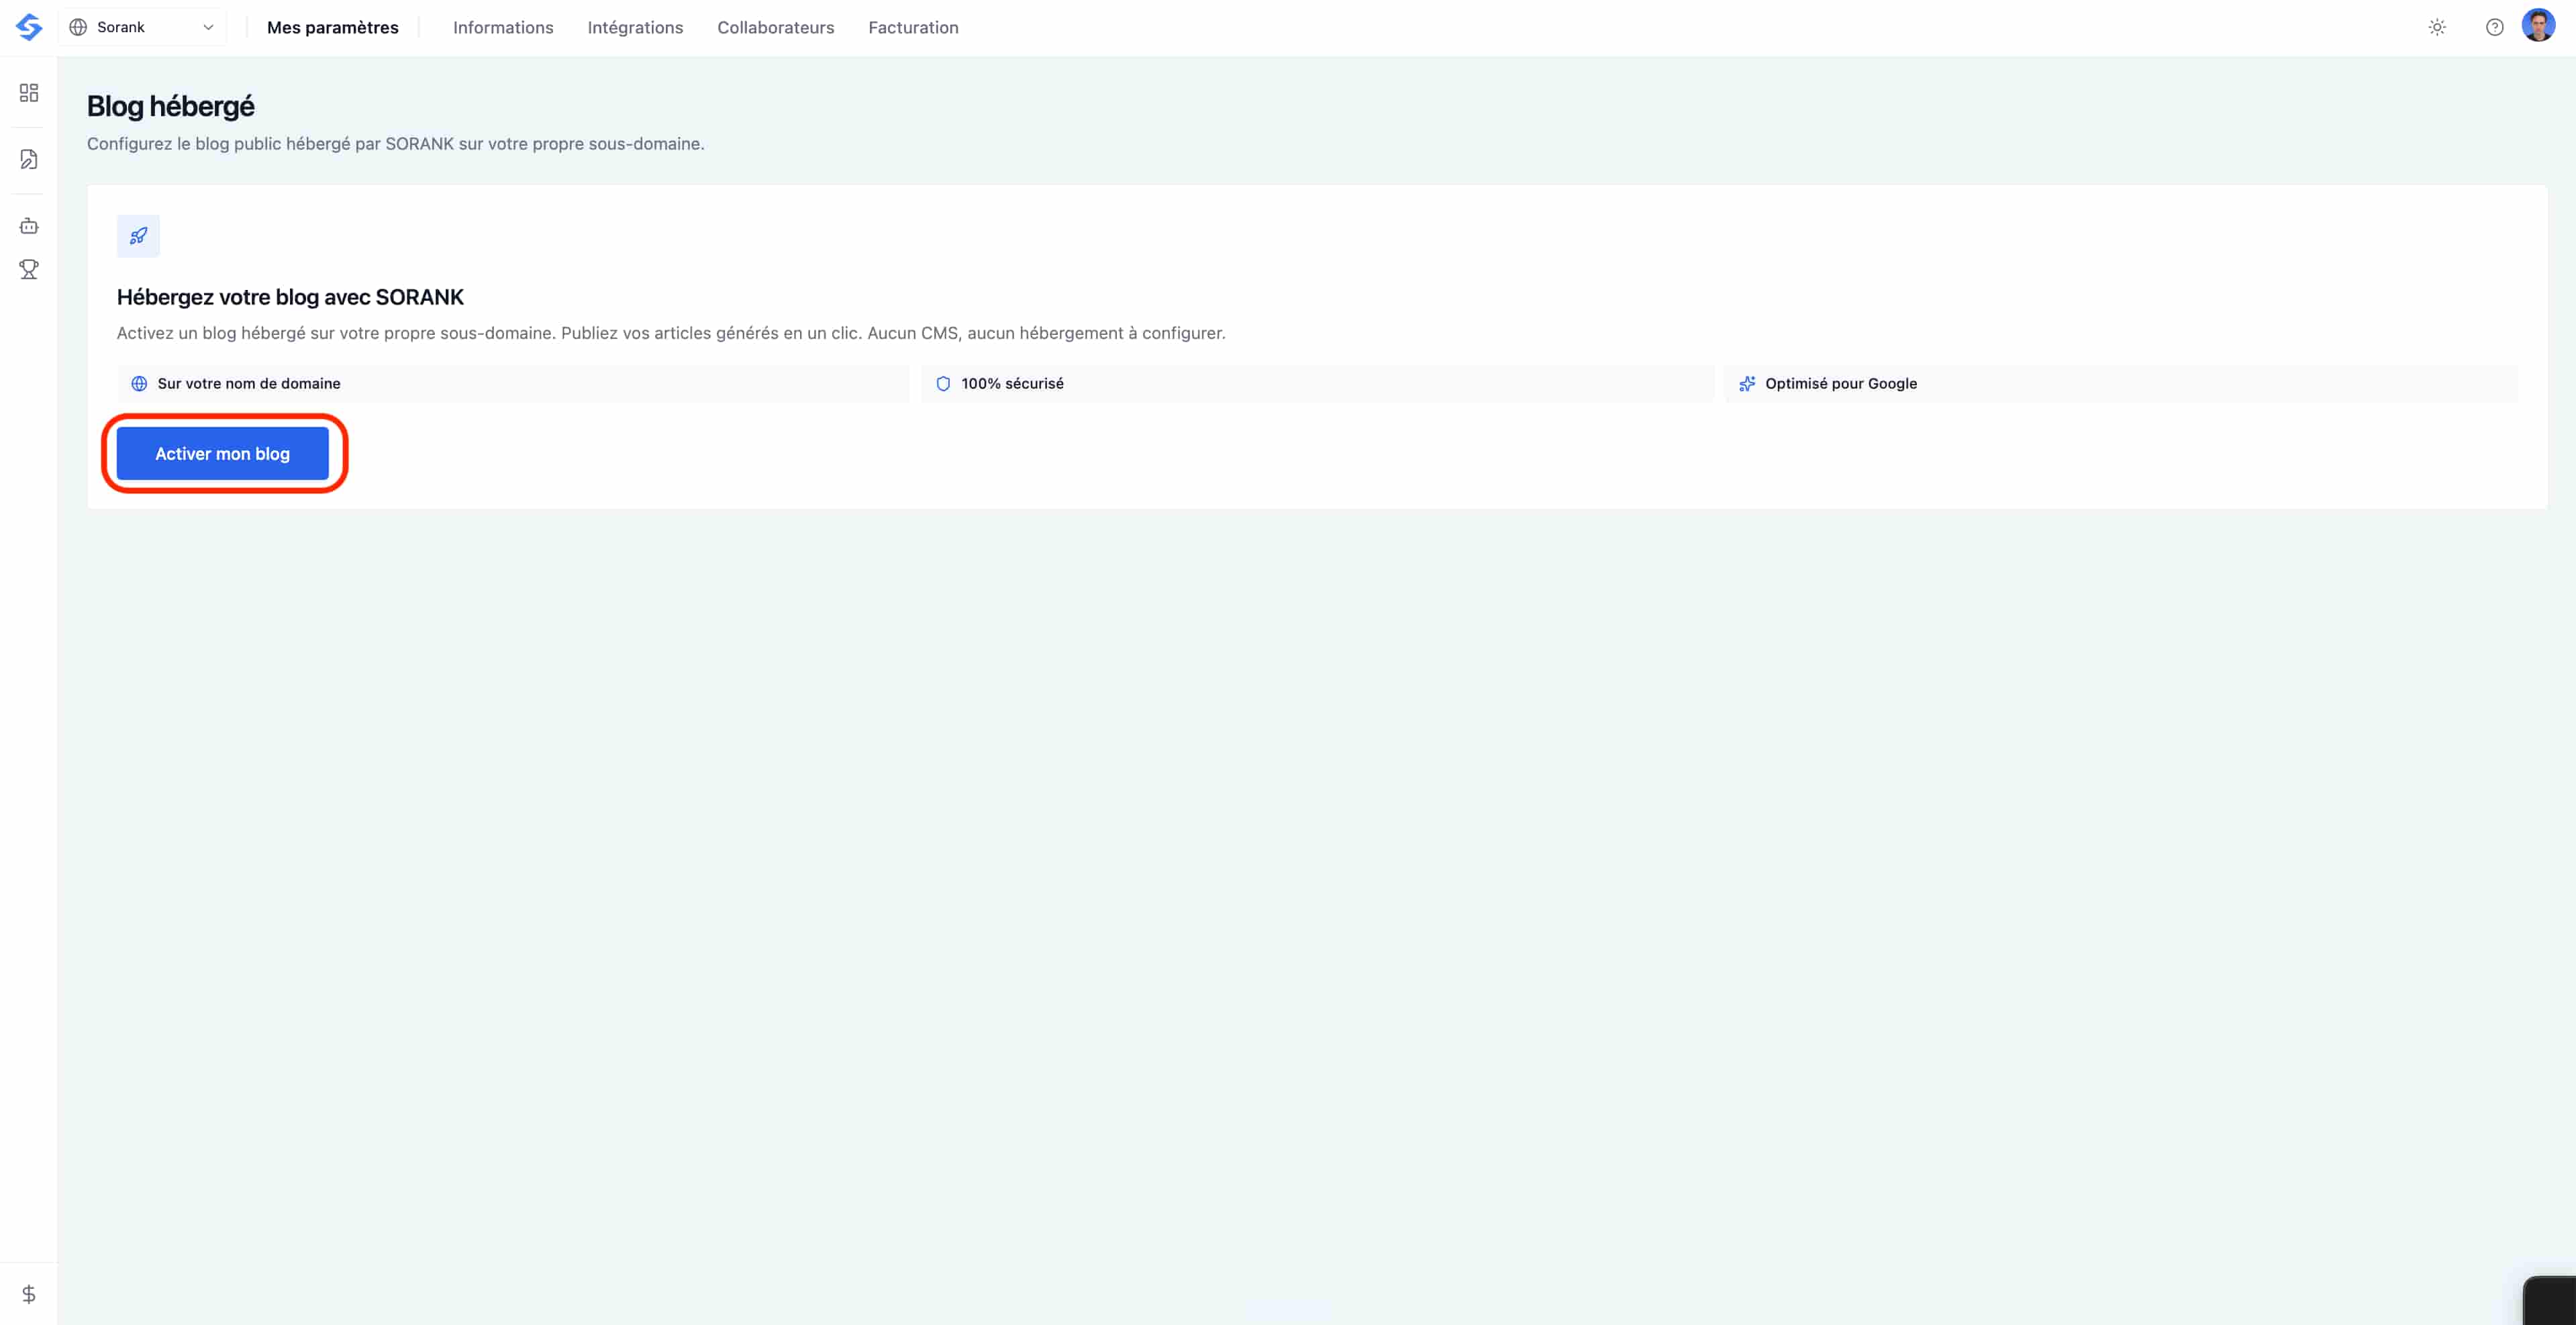
Step 2: Activate your blog

On the Hosted blog page, click Activate my blog. Your blog will be hosted on your own subdomain, fully secured with HTTPS and optimized for Google out of the box — no CMS and no hosting to configure.

Click Activate my blog on the Hosted blog page

Step 3: Add the DNS record and verify

Sorank now gives you the DNS records to add at your domain provider so your blog can go live on your own subdomain (for example blog.yourdomain.com).

  1. Add the CNAME record shown under DNS instructions, copying the Type, Name and Value exactly as displayed (marked 1 in the screenshot).
  2. If your provider requires it, also add the TXT ownership-verification record listed just below the CNAME.
  3. Need help finding where to paste them? Use the DNS provider guides for Cloudflare, GoDaddy and Namecheap (marked 2).
  4. Once the records are saved at your provider, come back and click I've added the record, verify (marked 3).
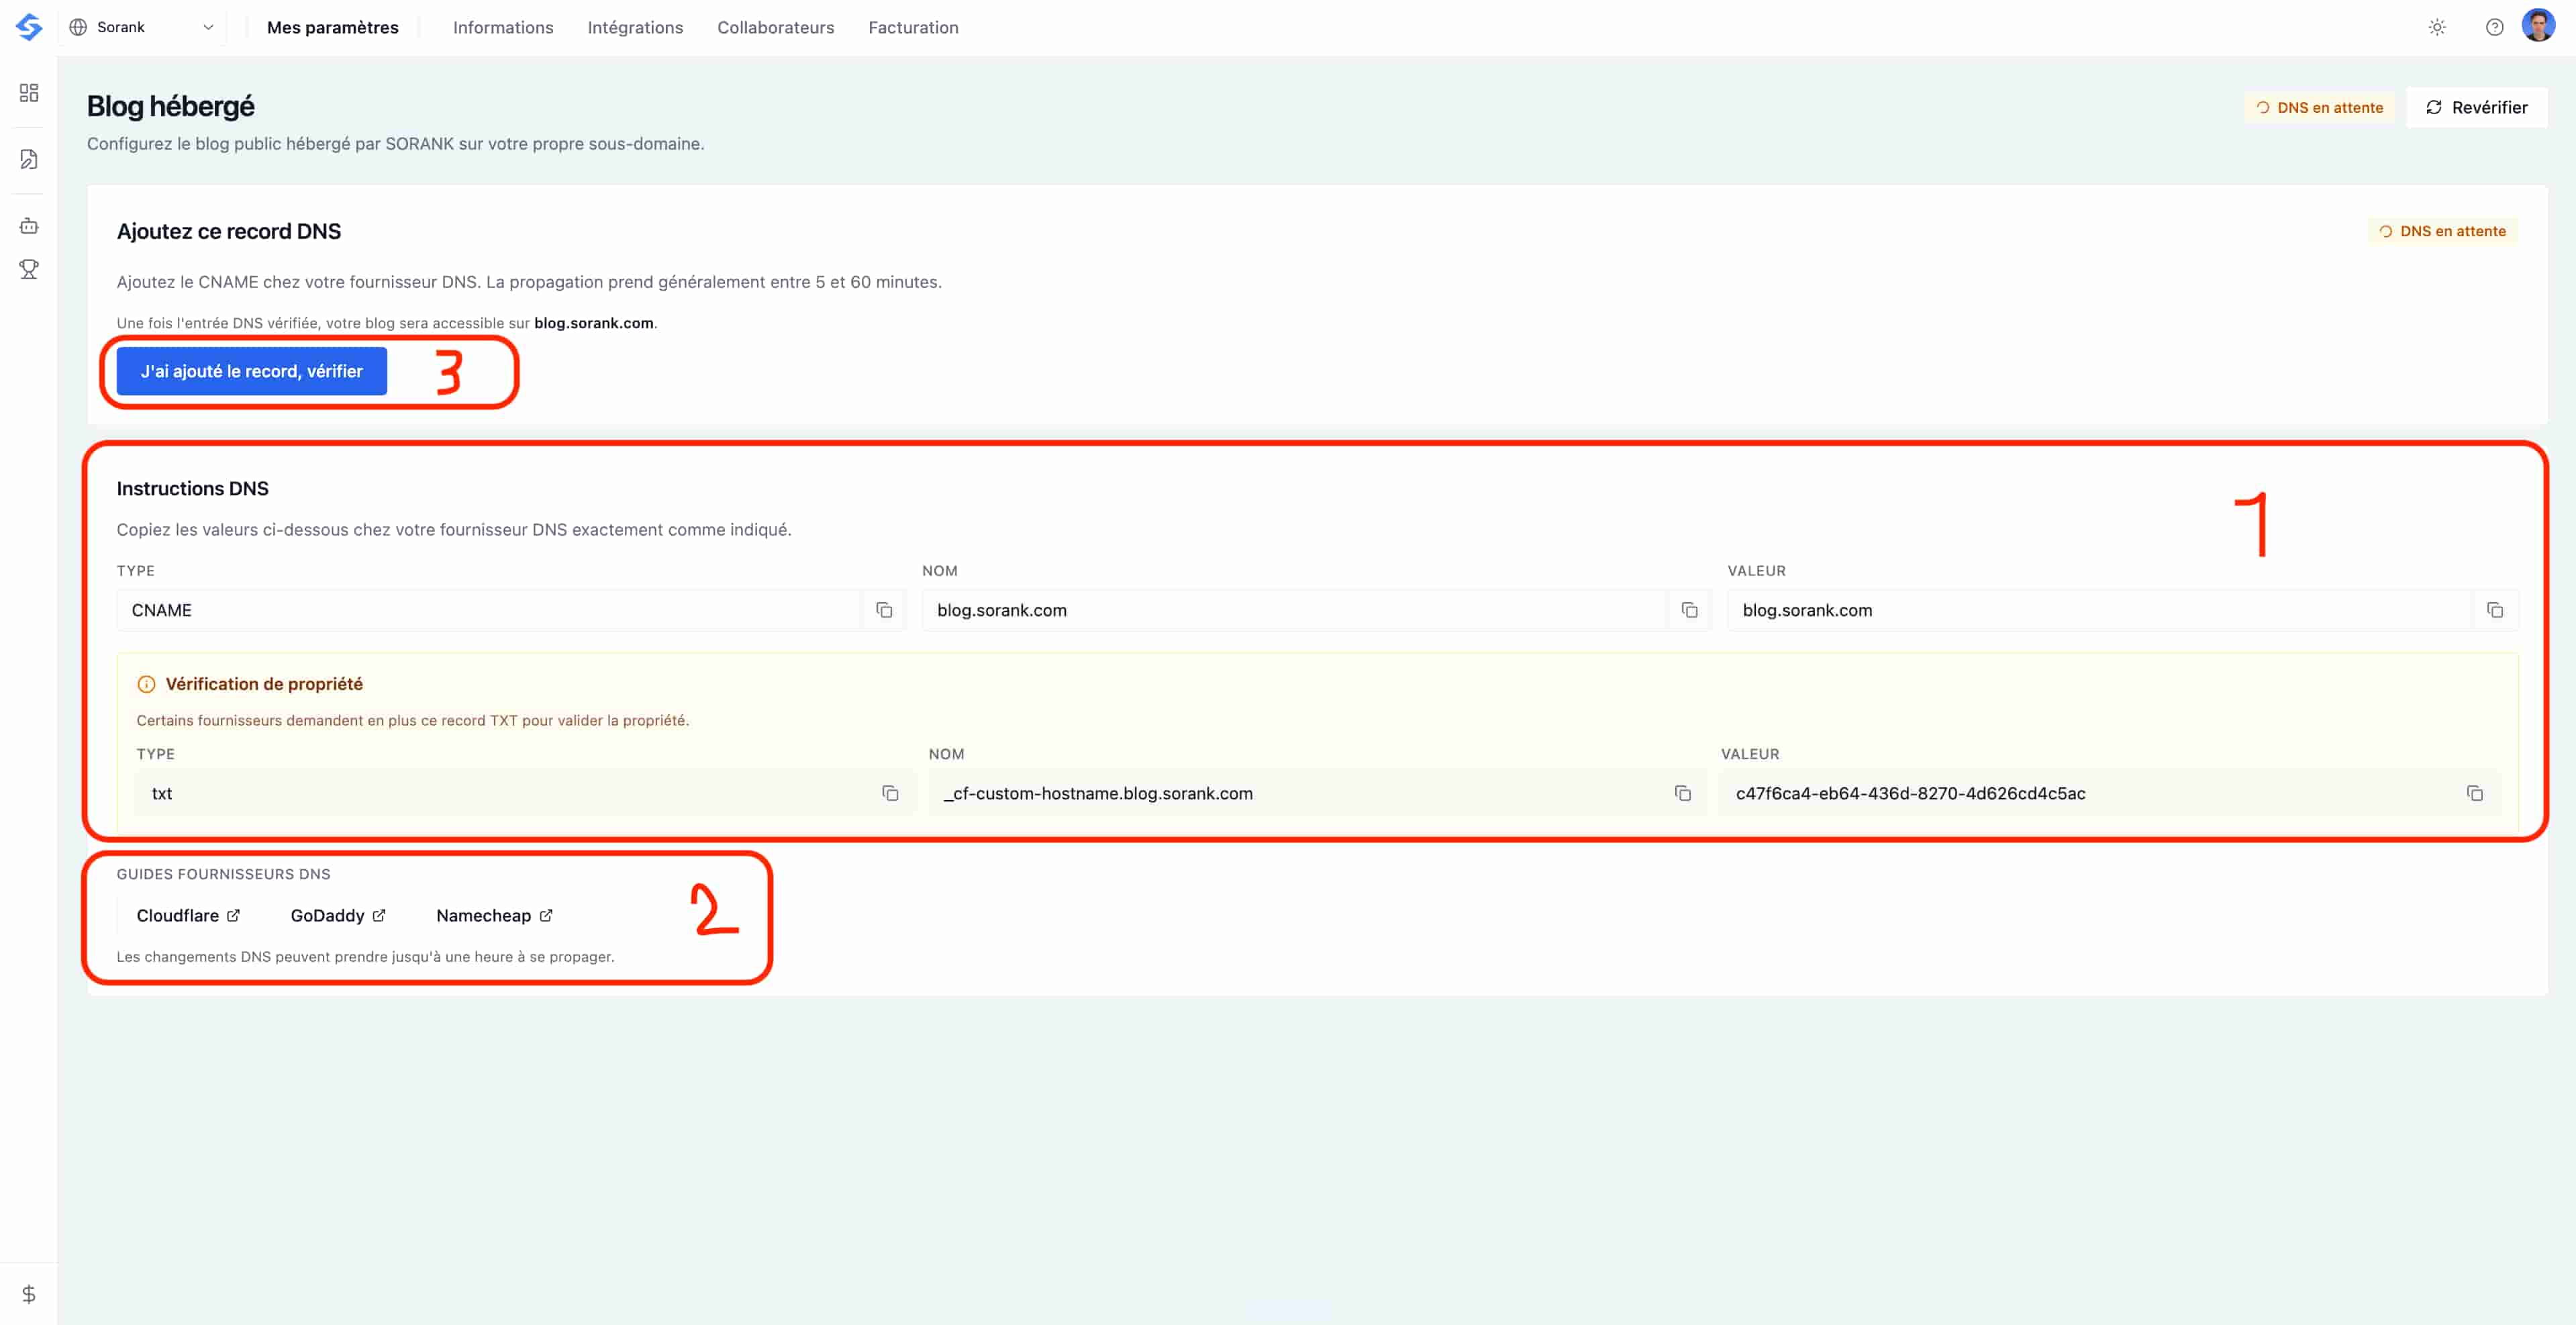
Add the CNAME and TXT DNS records then click I have added the record verify

DNS propagation usually takes between 5 and 60 minutes (and up to an hour in some cases). While it propagates, the status stays on DNS pending; you can click Re-verify at the top-right at any time. As soon as the record is detected, your blog goes live on your subdomain.

Who is this for?

This is the fastest solution for anyone who built their site with a developed, no-code or AI tool but isn't a developer — such as Lovable, Base44 or Claude Code — or for platforms that don't offer an API integration, like Systeme.io or Framer. Instead of building and maintaining a custom endpoint to catch a webhook, you let Sorank handle the hosting and publishing for you.

Already on a supported CMS?

If your platform has a native connector, that's usually the simplest route. Check our guides for Webflow, Shopify, WordPress.org, WordPress.com and Wix.

Get started

Once your DNS record is verified, your articles publish to your hosted blog in one click. If you'd like a hand connecting your domain, reach out to our team and we'll set everything up for you.