> ## Documentation Index
> Fetch the complete documentation index at: https://sorank.com/llms.txt
> Use this file to discover all available pages before exploring further.
# חיבור Shopify אל Sorank
> Doc Sorank - Shopify
## פתיחת עמוד האינטגרציות ב-Sorank
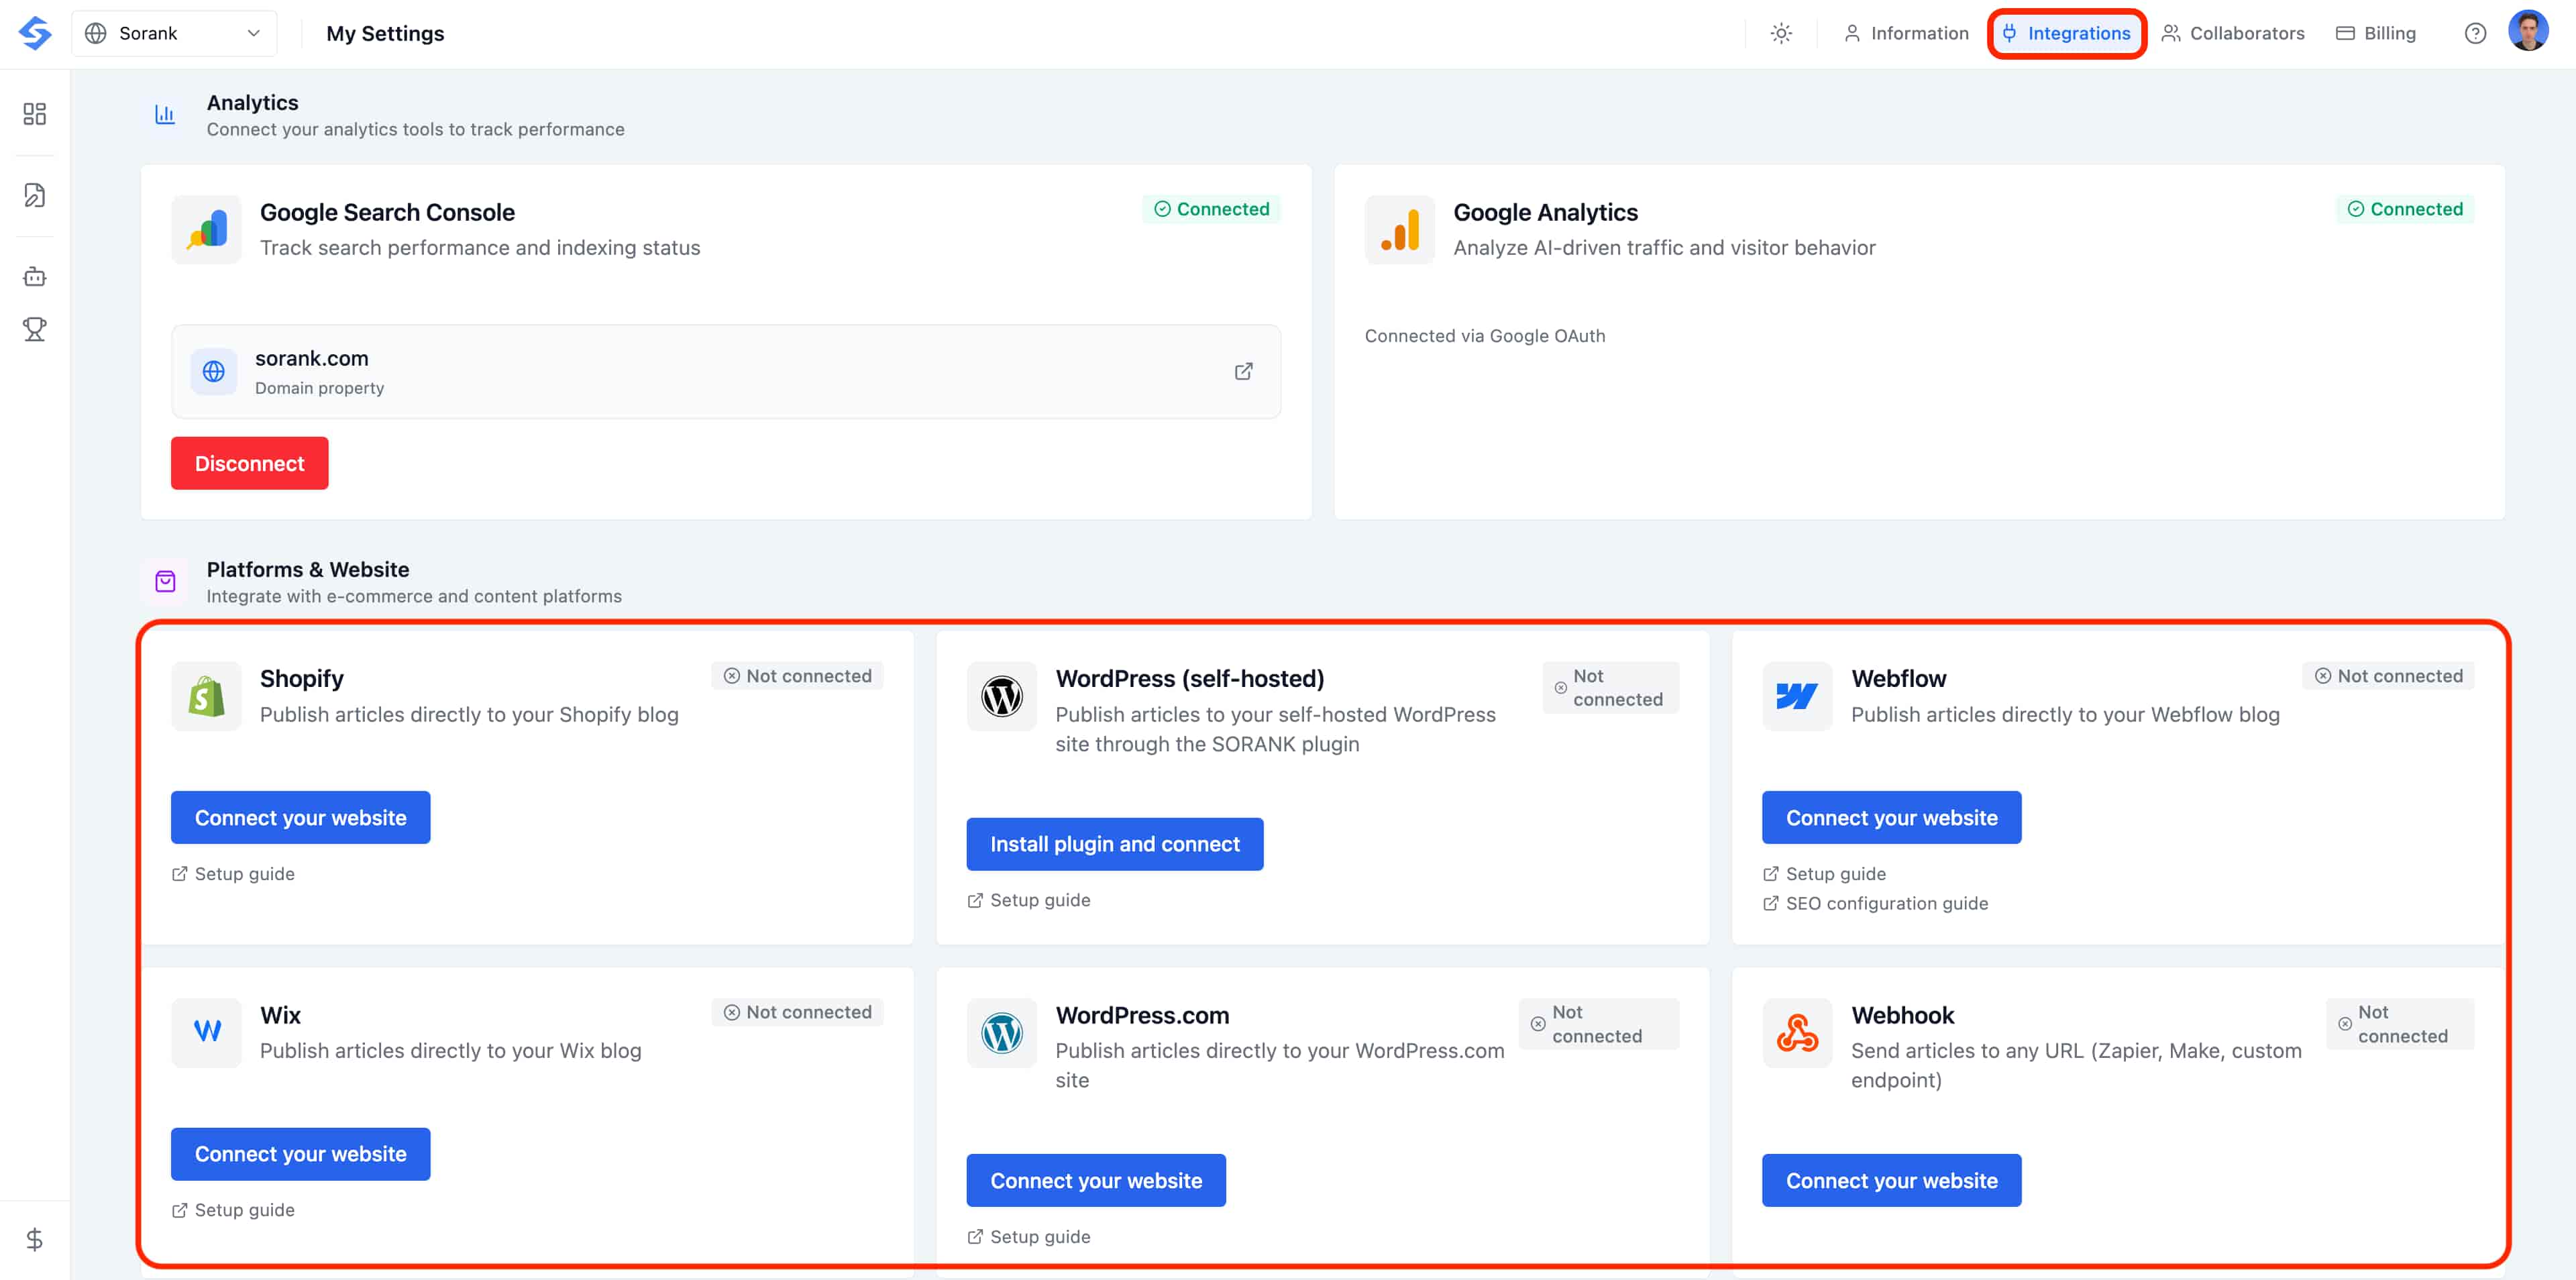
לפני חיבור ה-CMS שלכם, גשו לעמוד **Integrations** ב-Sorank. לחצו על **אווטאר הפרופיל** בפינה הימנית העליונה של הדשבורד, ואז בחרו **Settings**.
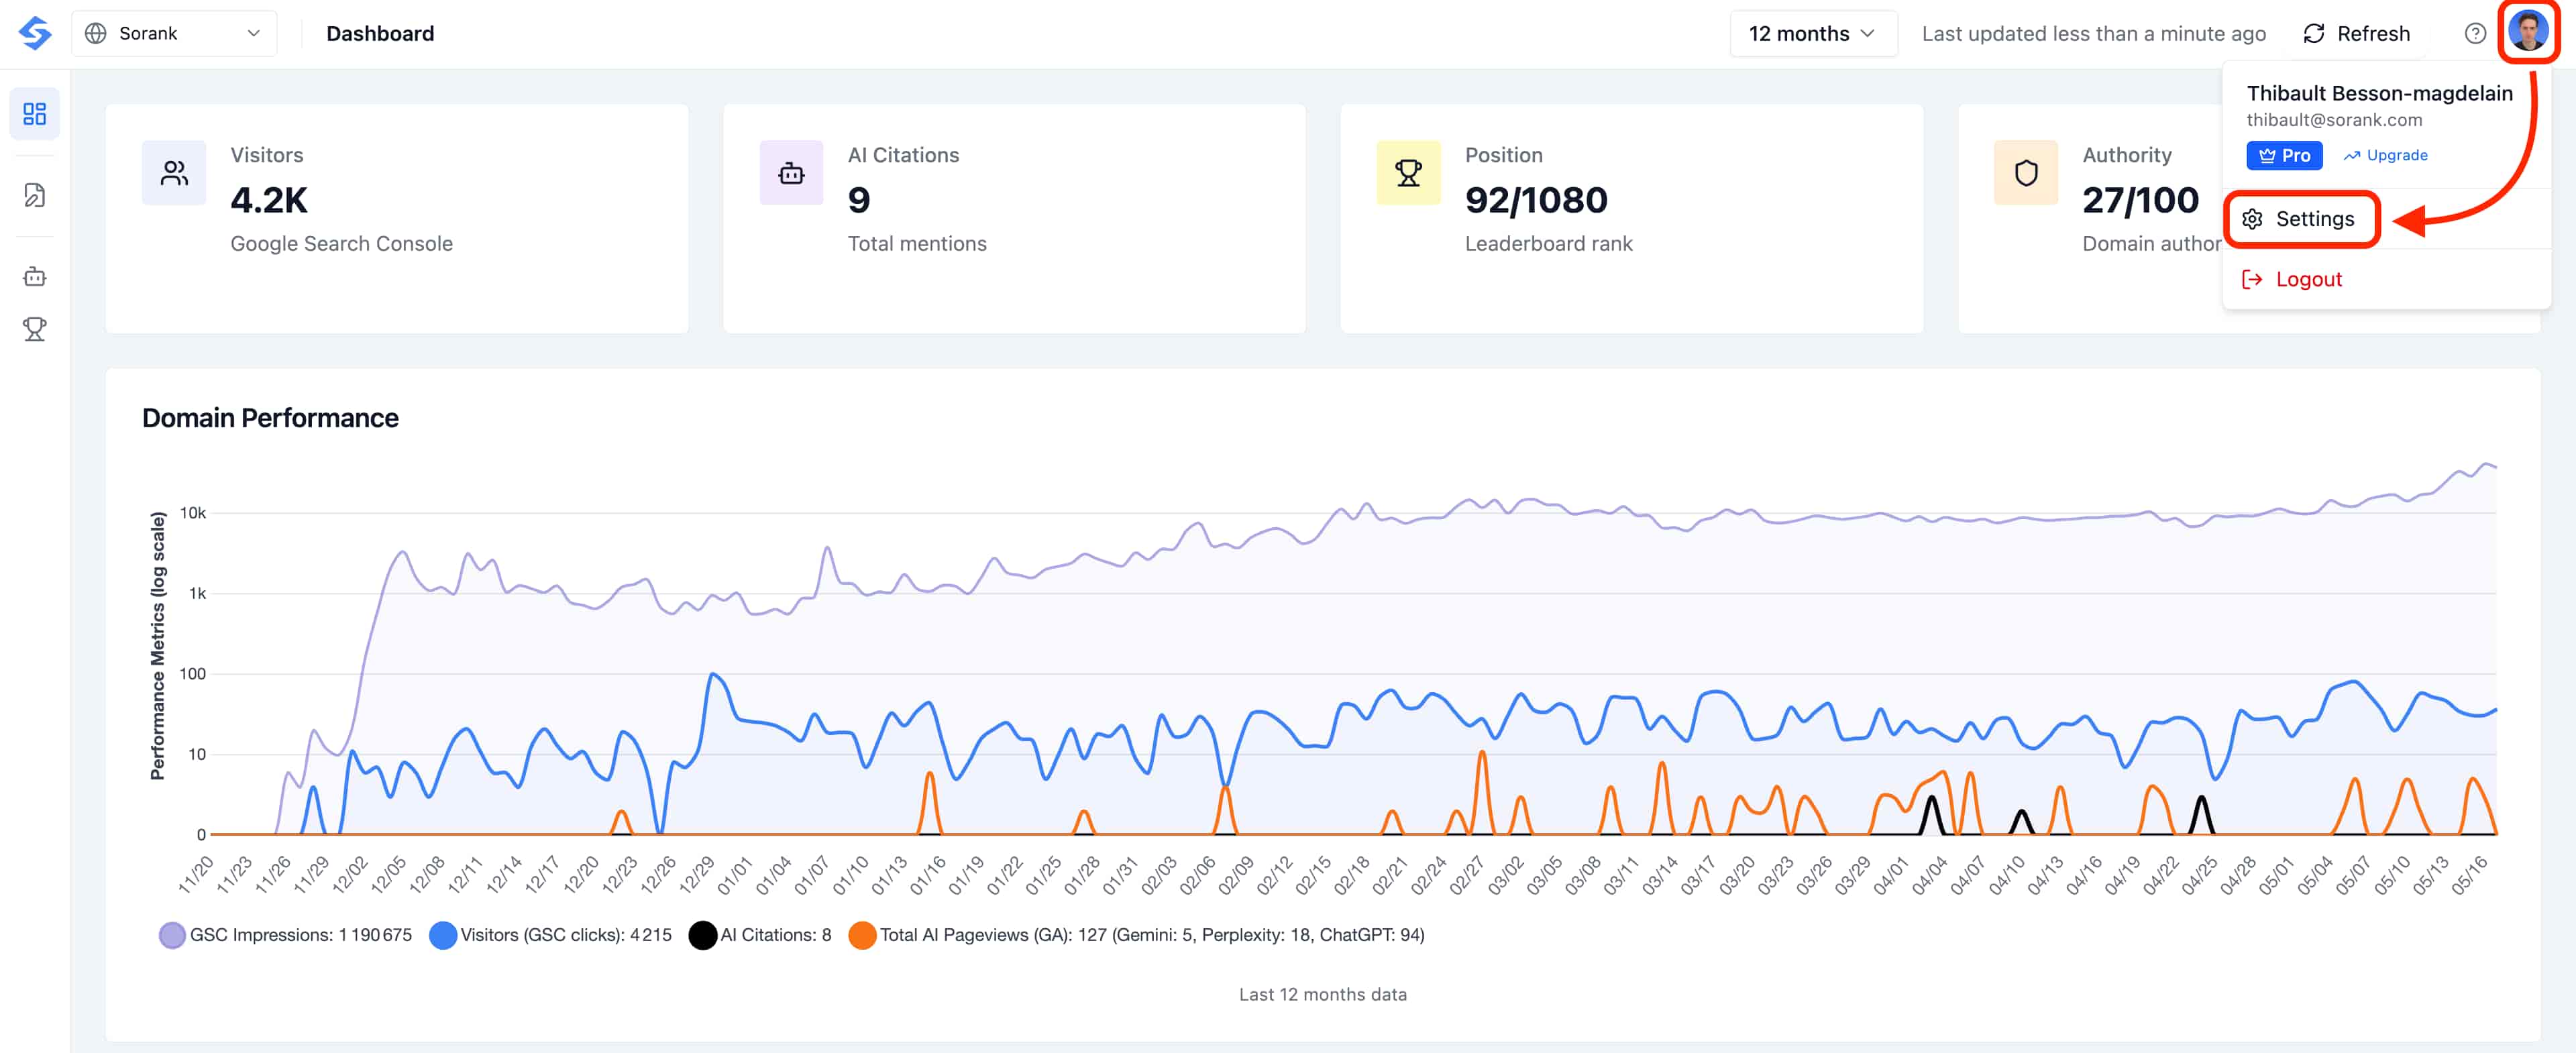
 בעמוד ההגדרות, לחצו על הלשונית **Integrations** בחלק העליון. שם נמצאים כל מחברי ה-CMS.
 במאמר זה נסביר כיצד תוכלו **ליצור** ו**לעדכן** אפליקציית Sorank כדי לאפשר לנו לנהל את מאמרי הבלוג שלכם ולבצע אופטימיזציית SEO/GEO אחרת.
קודם ניצור אפליקציה.
תוכלו **למצוא מדריך לעדכון האפליקציה הקיימת שלכם בתחתית העמוד הזה.**
## יצירת האפליקציה
### שלב 1: גשו להגדרות האינטגרציה שלכם
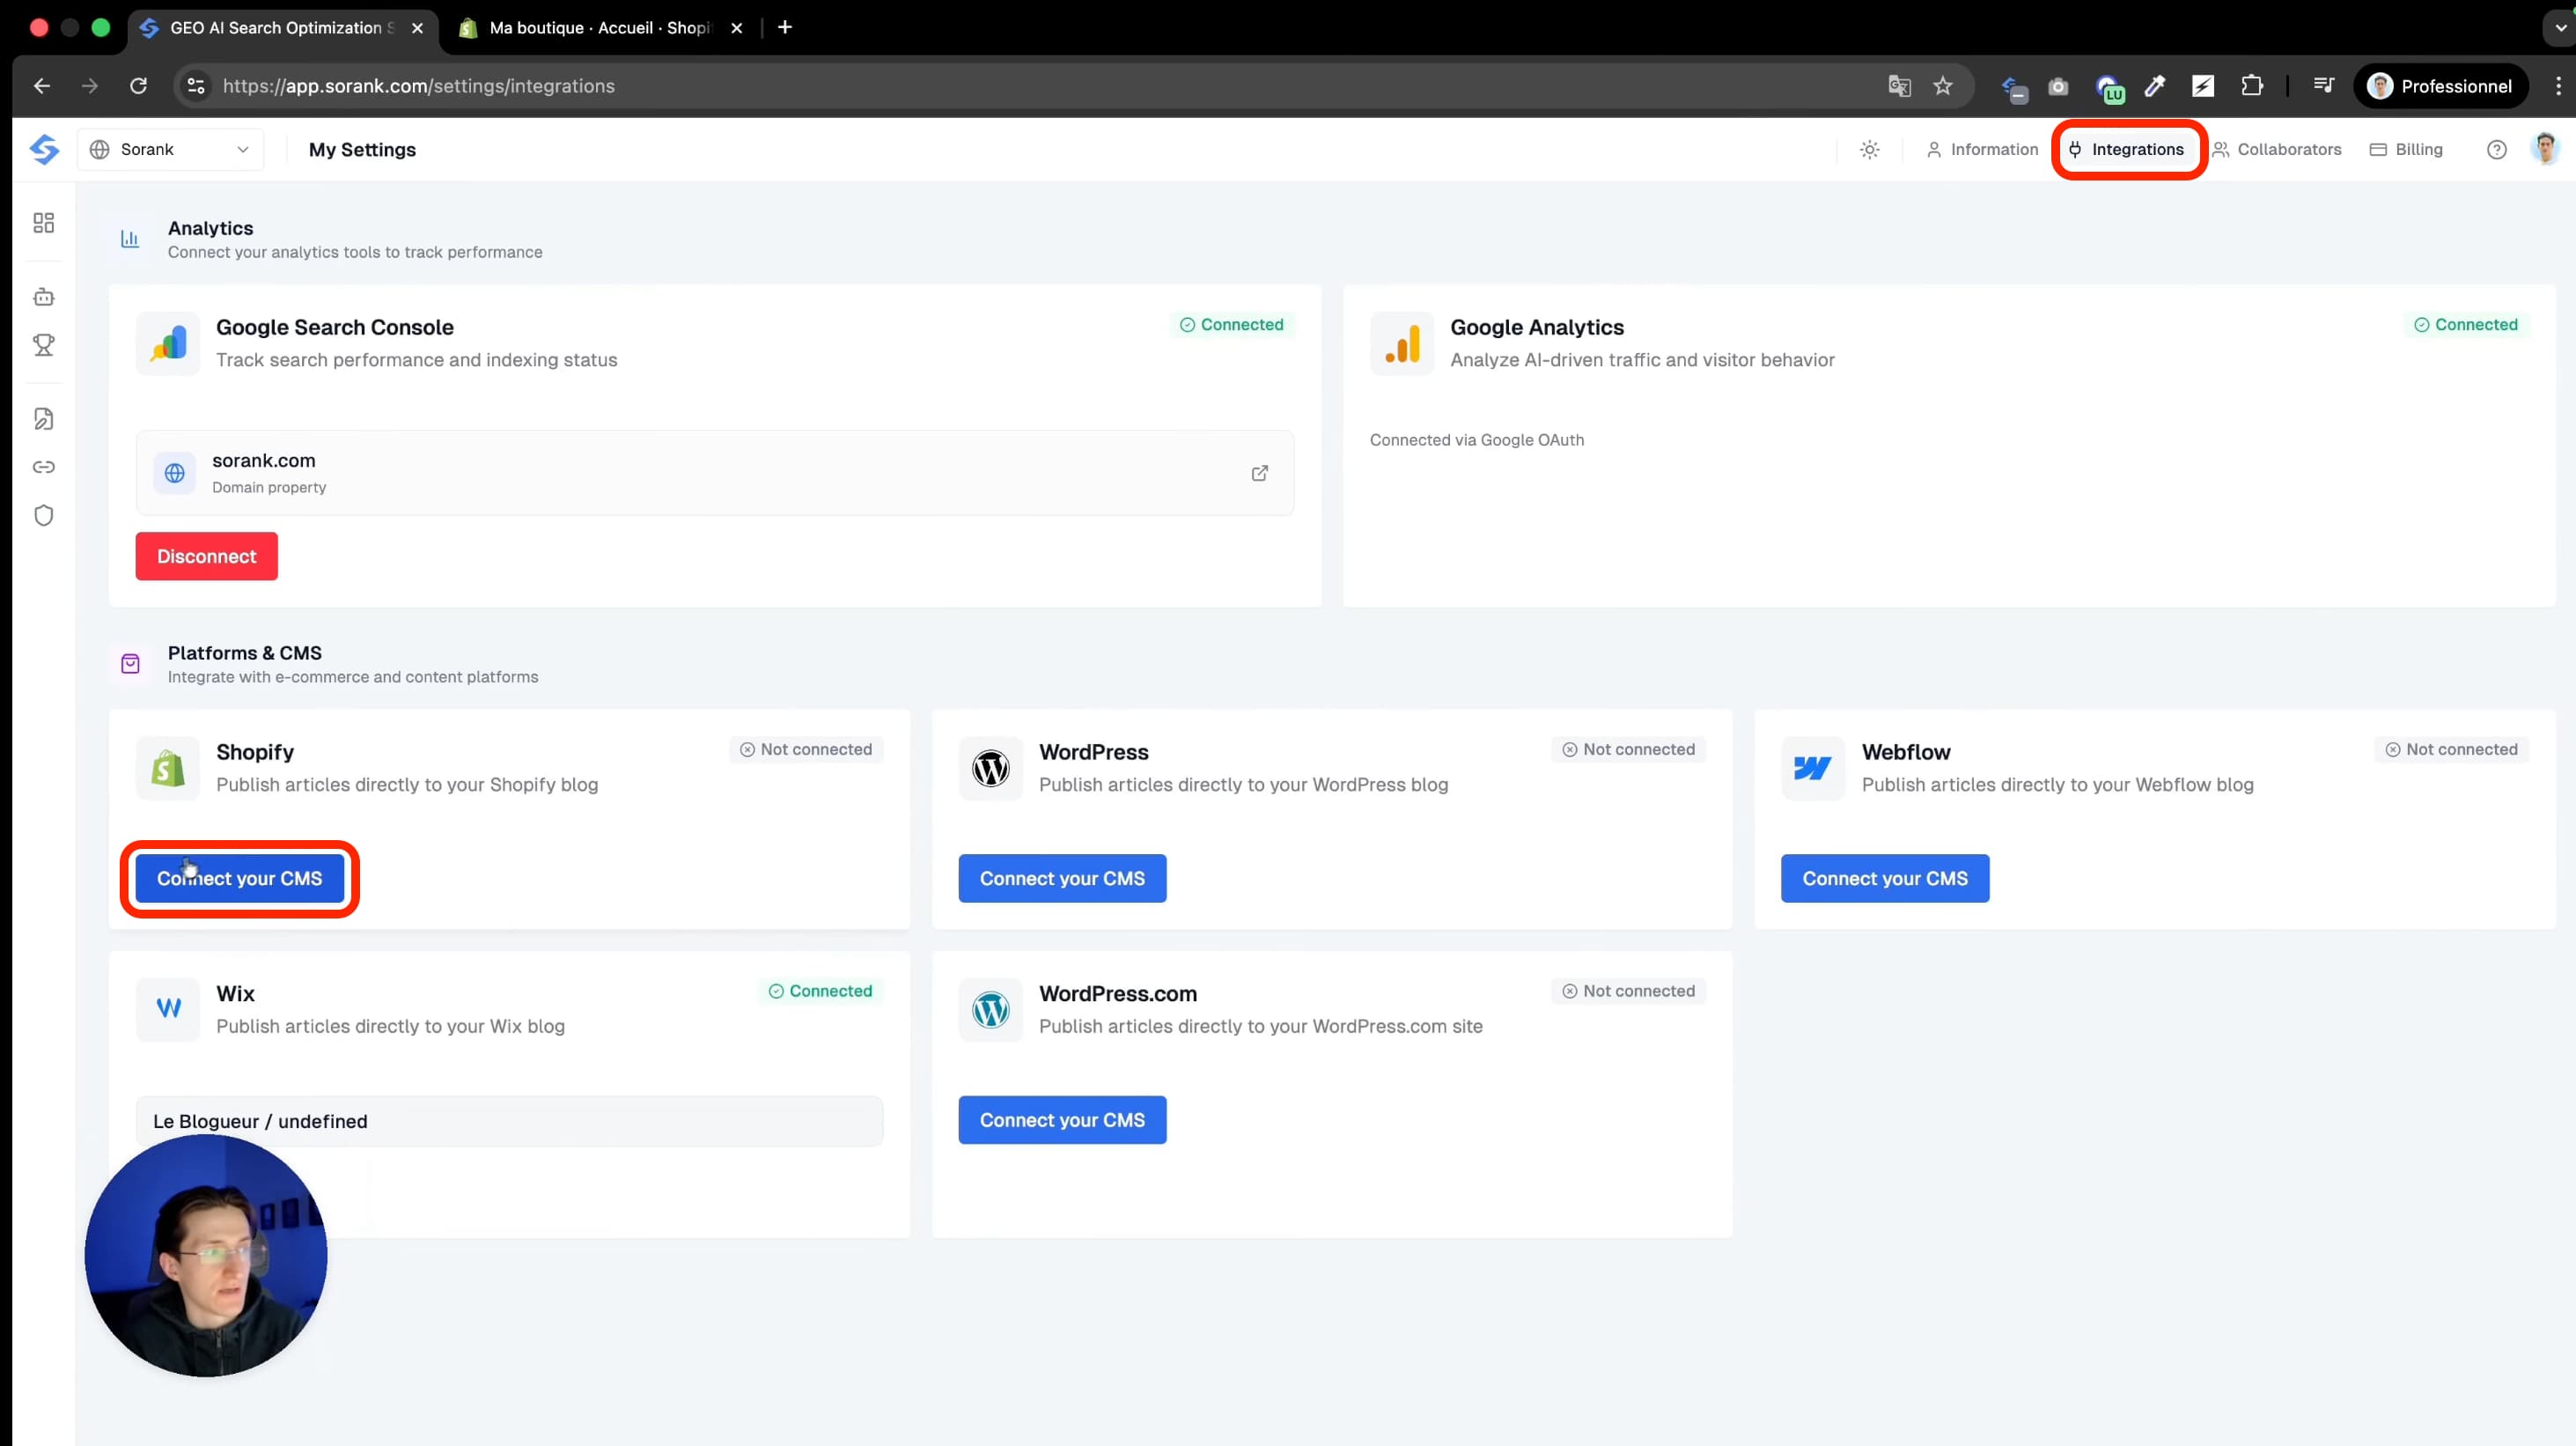
ב-Sorank, לחצו על כפתור הפרסום בעמוד SEO articles או גשו אל Settings > Integration. לחצו על "Connect your CMS" ובחרו Shopify.
במאמר זה נסביר כיצד תוכלו **ליצור** ו**לעדכן** אפליקציית Sorank כדי לאפשר לנו לנהל את מאמרי הבלוג שלכם ולבצע אופטימיזציית SEO/GEO אחרת.
קודם ניצור אפליקציה.
תוכלו **למצוא מדריך לעדכון האפליקציה הקיימת שלכם בתחתית העמוד הזה.**
## יצירת האפליקציה
### שלב 1: גשו להגדרות האינטגרציה שלכם
ב-Sorank, לחצו על כפתור הפרסום בעמוד SEO articles או גשו אל Settings > Integration. לחצו על "Connect your CMS" ובחרו Shopify.
 ### שלב 2: יצירת אפליקציה ב-Shopify
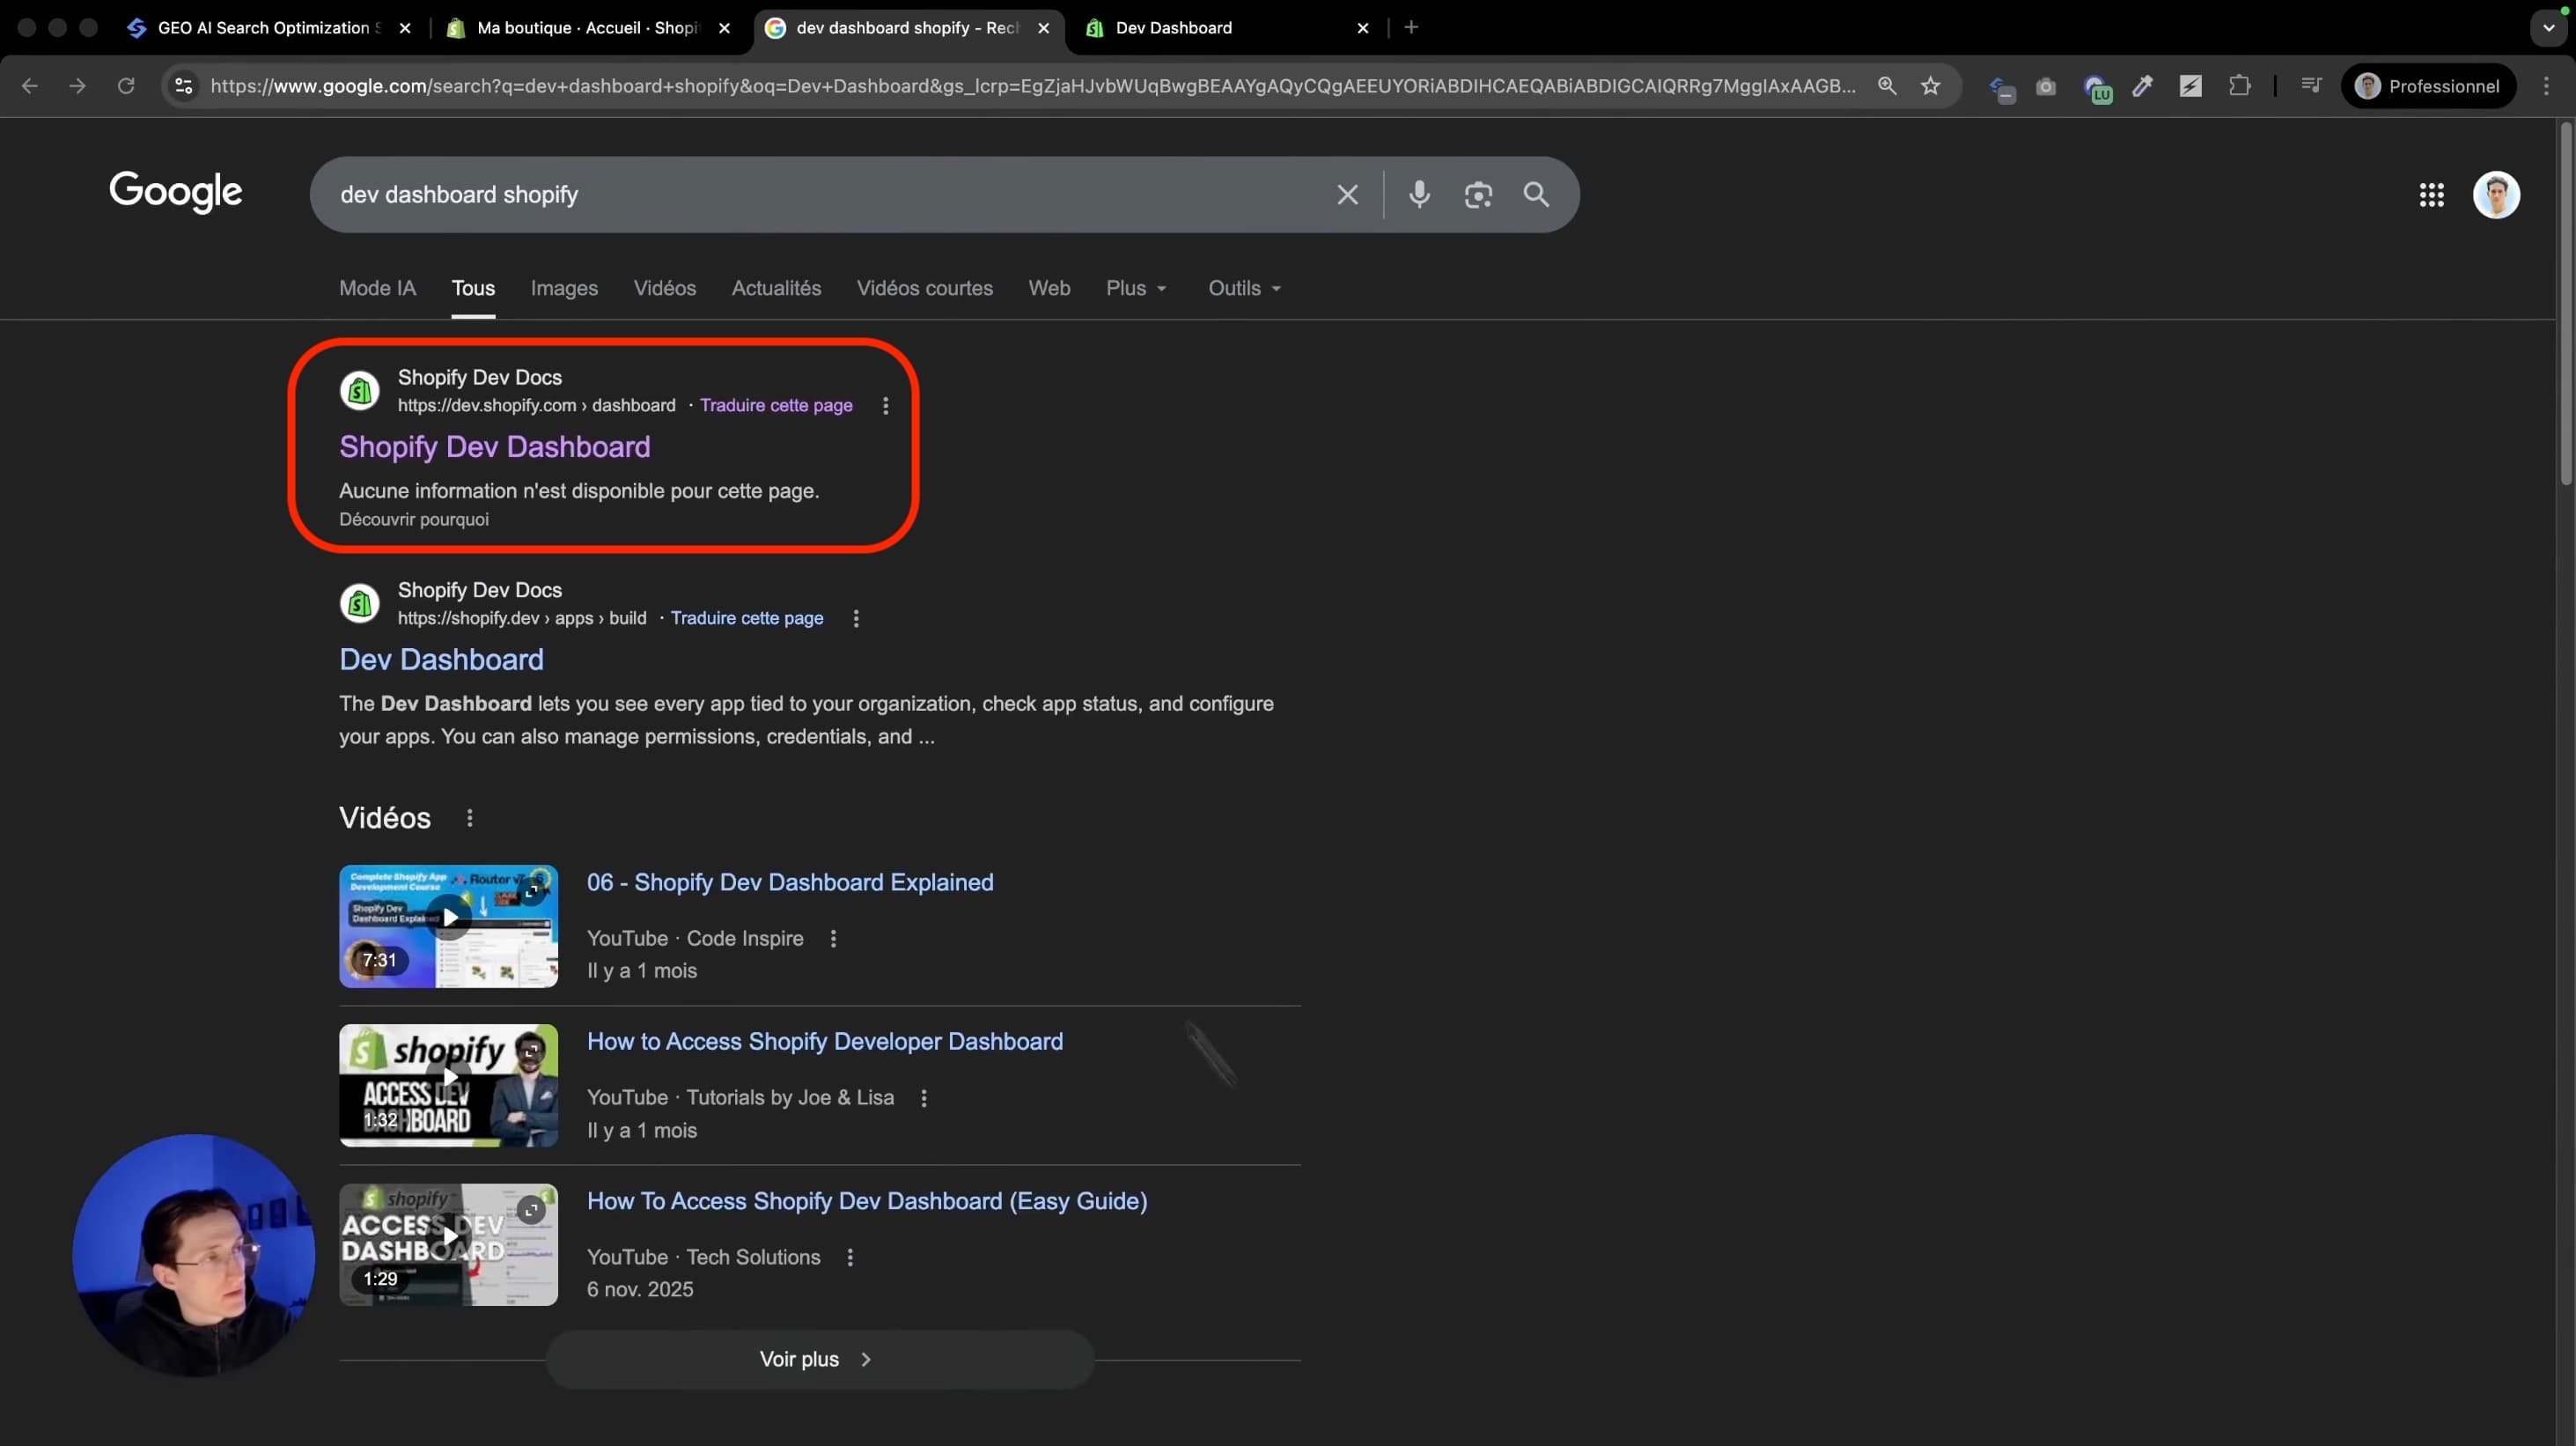
גשו ל-Shopify Dev Dashboard. חפשו "dev dashboard Shopify" ב-Google ולחצו על הקישור הראשון. לחצו "Create an application" ובחרו "Start from dev dashboard". קראו לה "sorank" וצרו אותה.
### שלב 2: יצירת אפליקציה ב-Shopify
גשו ל-Shopify Dev Dashboard. חפשו "dev dashboard Shopify" ב-Google ולחצו על הקישור הראשון. לחצו "Create an application" ובחרו "Start from dev dashboard". קראו לה "sorank" וצרו אותה.
 עמוד הבית של Shopify Dev Dashboard עם כפתור "Create an app".
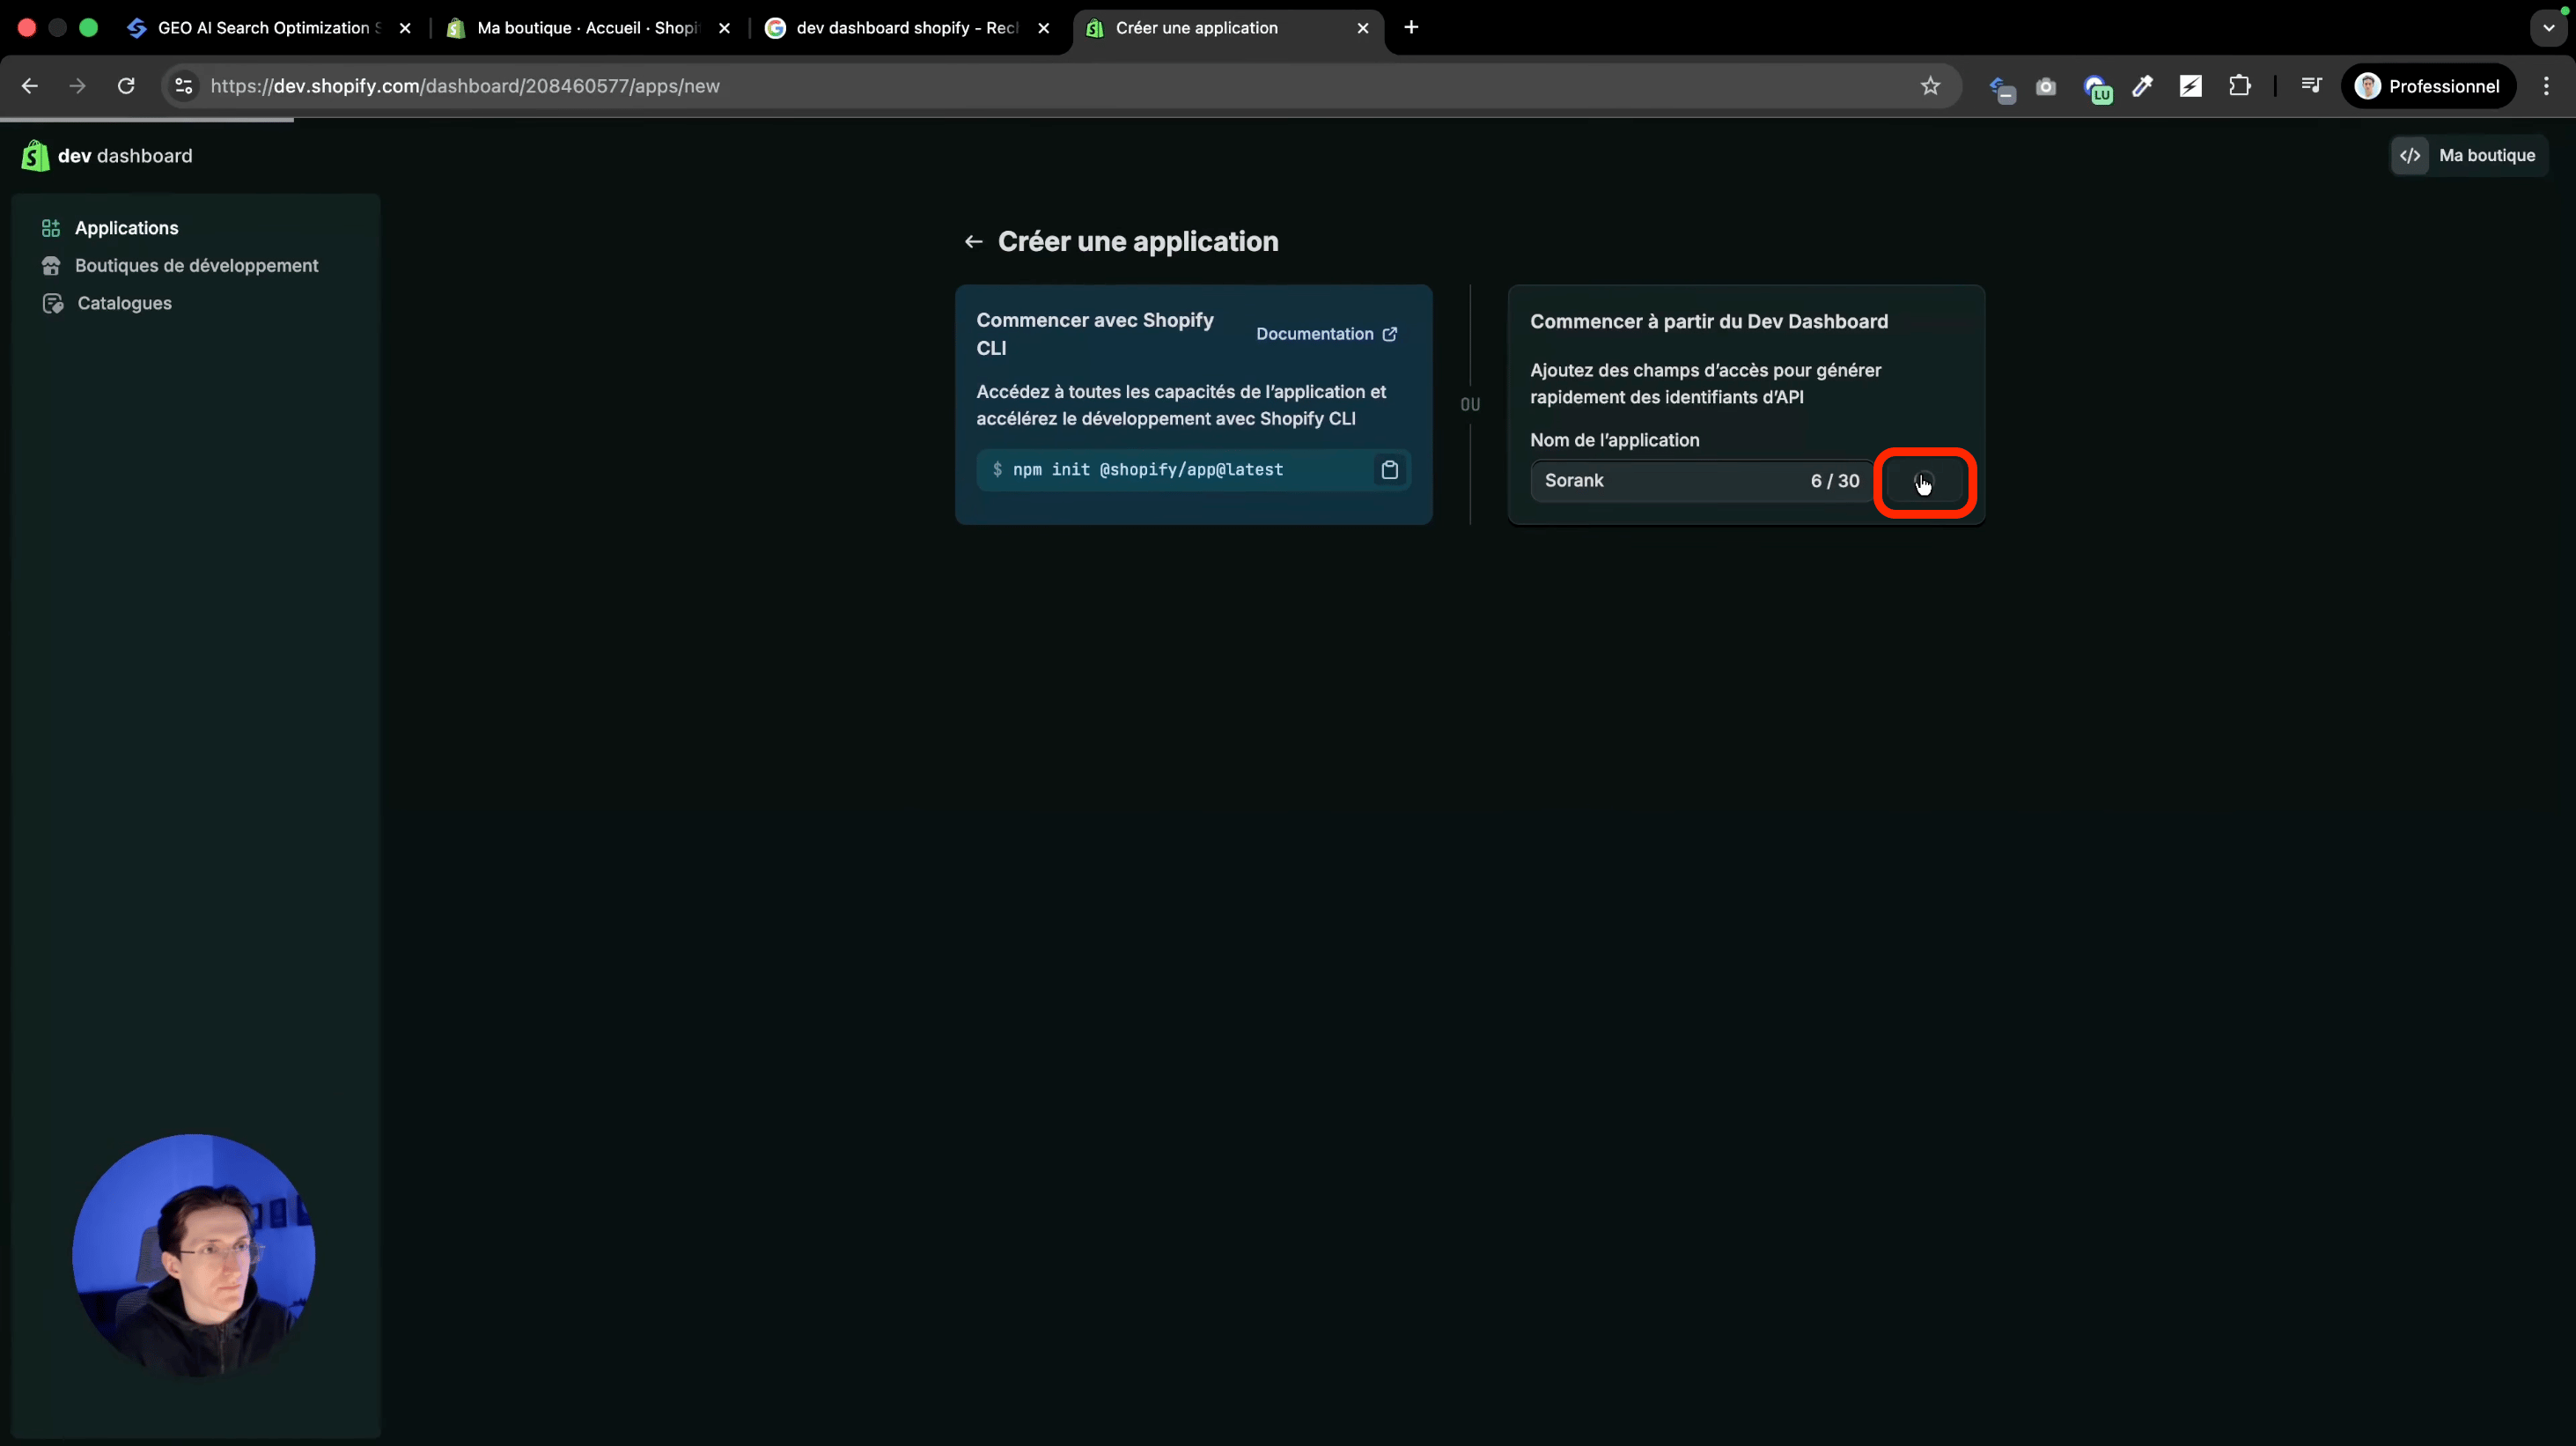 טופס יצירת האפליקציה בו תקראו לאפליקציה "sorank".
### שלב 3: הגדרת ה-App URL וה-Redirect URL
טופס יצירת האפליקציה בו תקראו לאפליקציה "sorank".
### שלב 3: הגדרת ה-App URL וה-Redirect URL
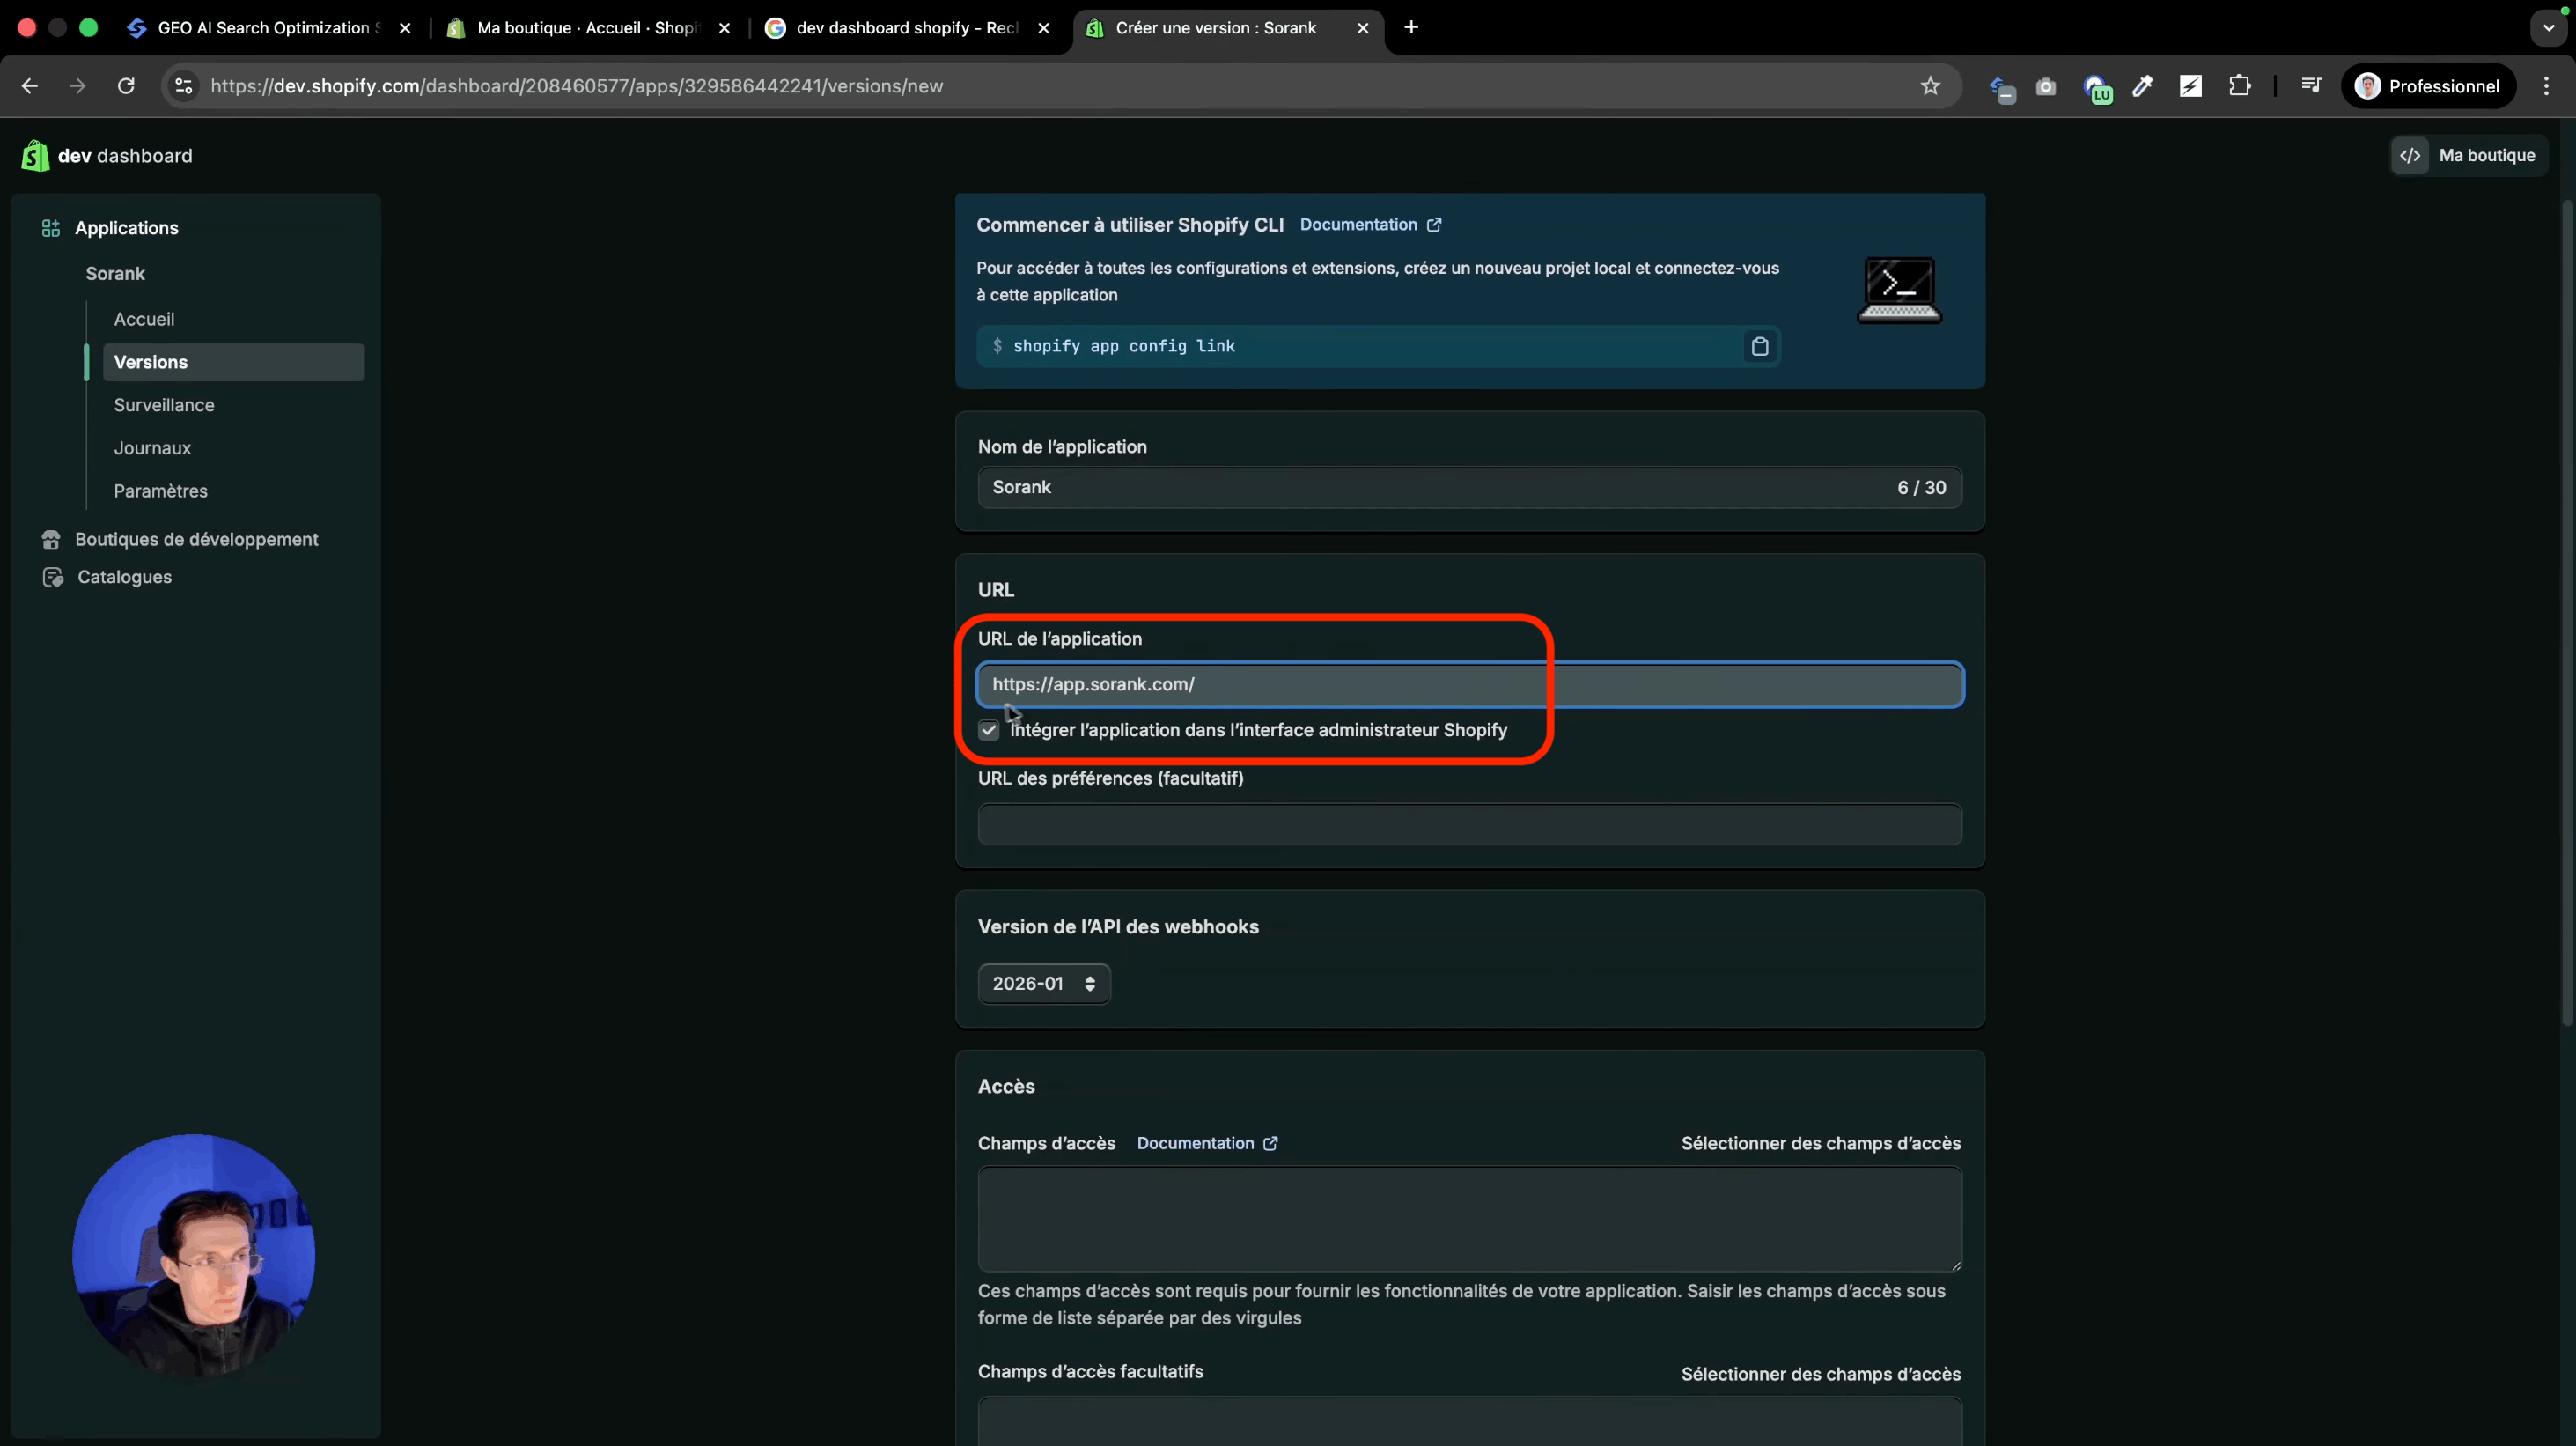 הוסיפו את כתובת האתר של Sorank.
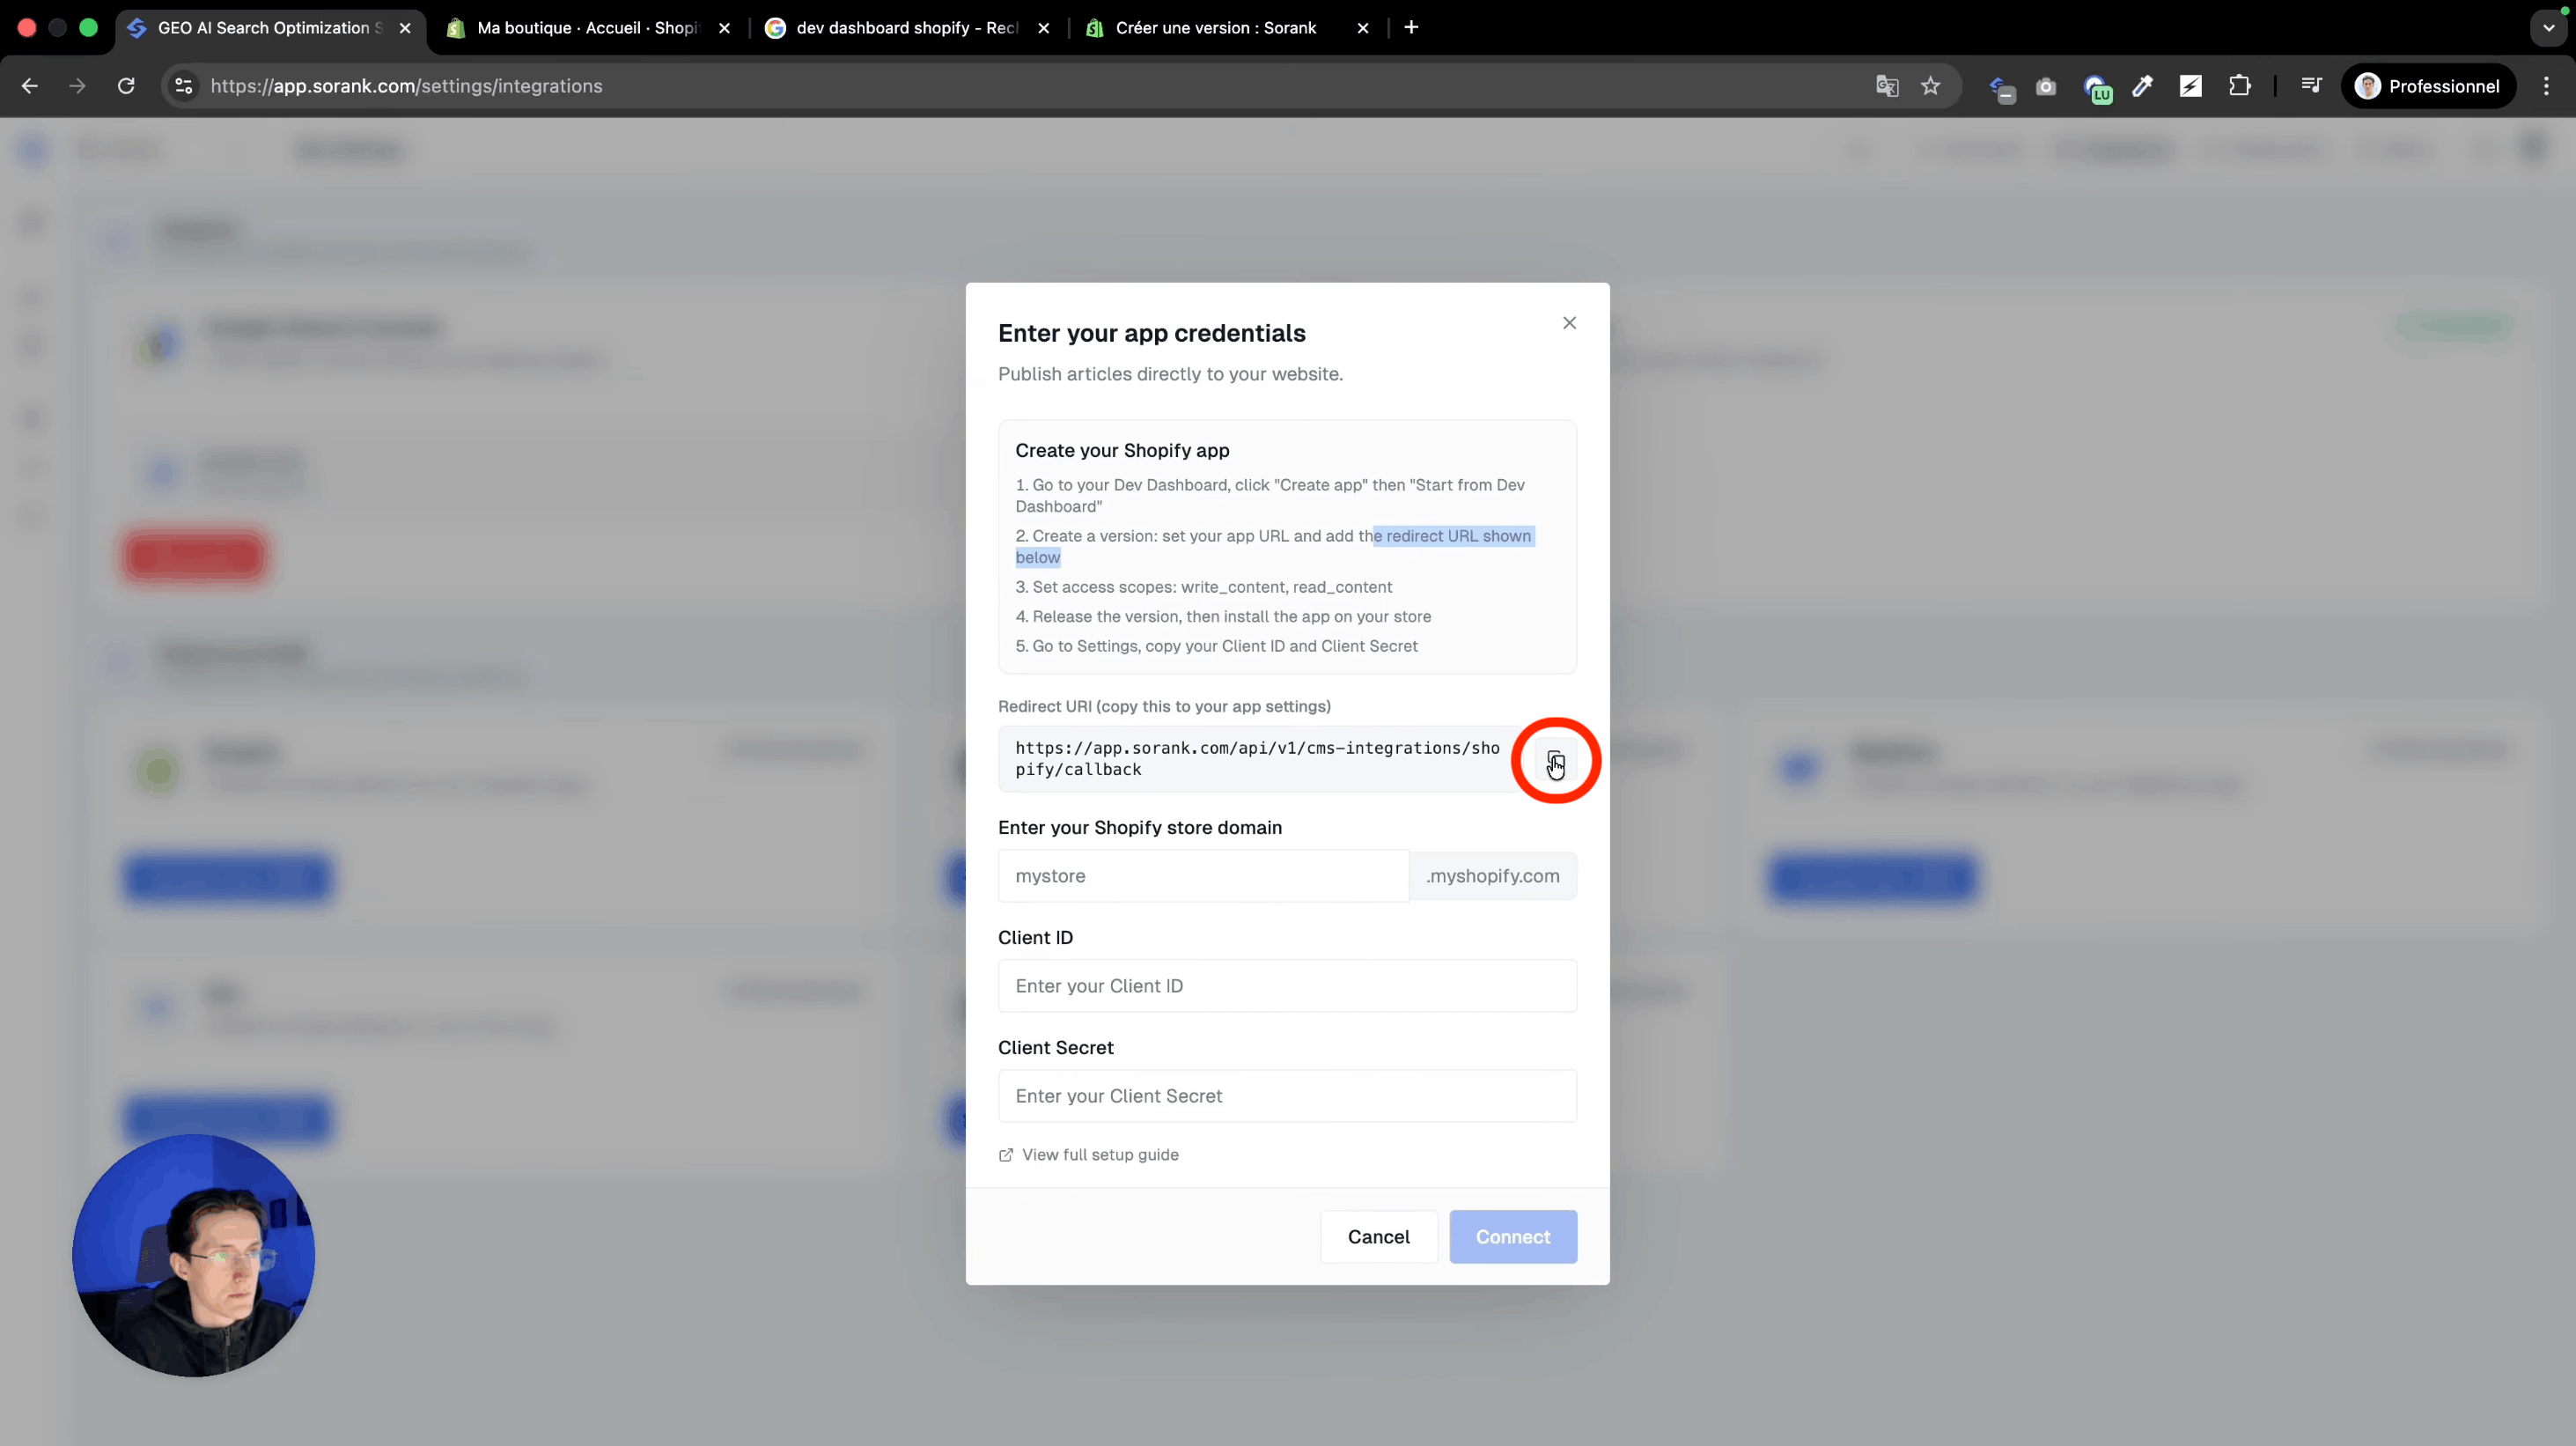 העתיקו את ה-redirect url.
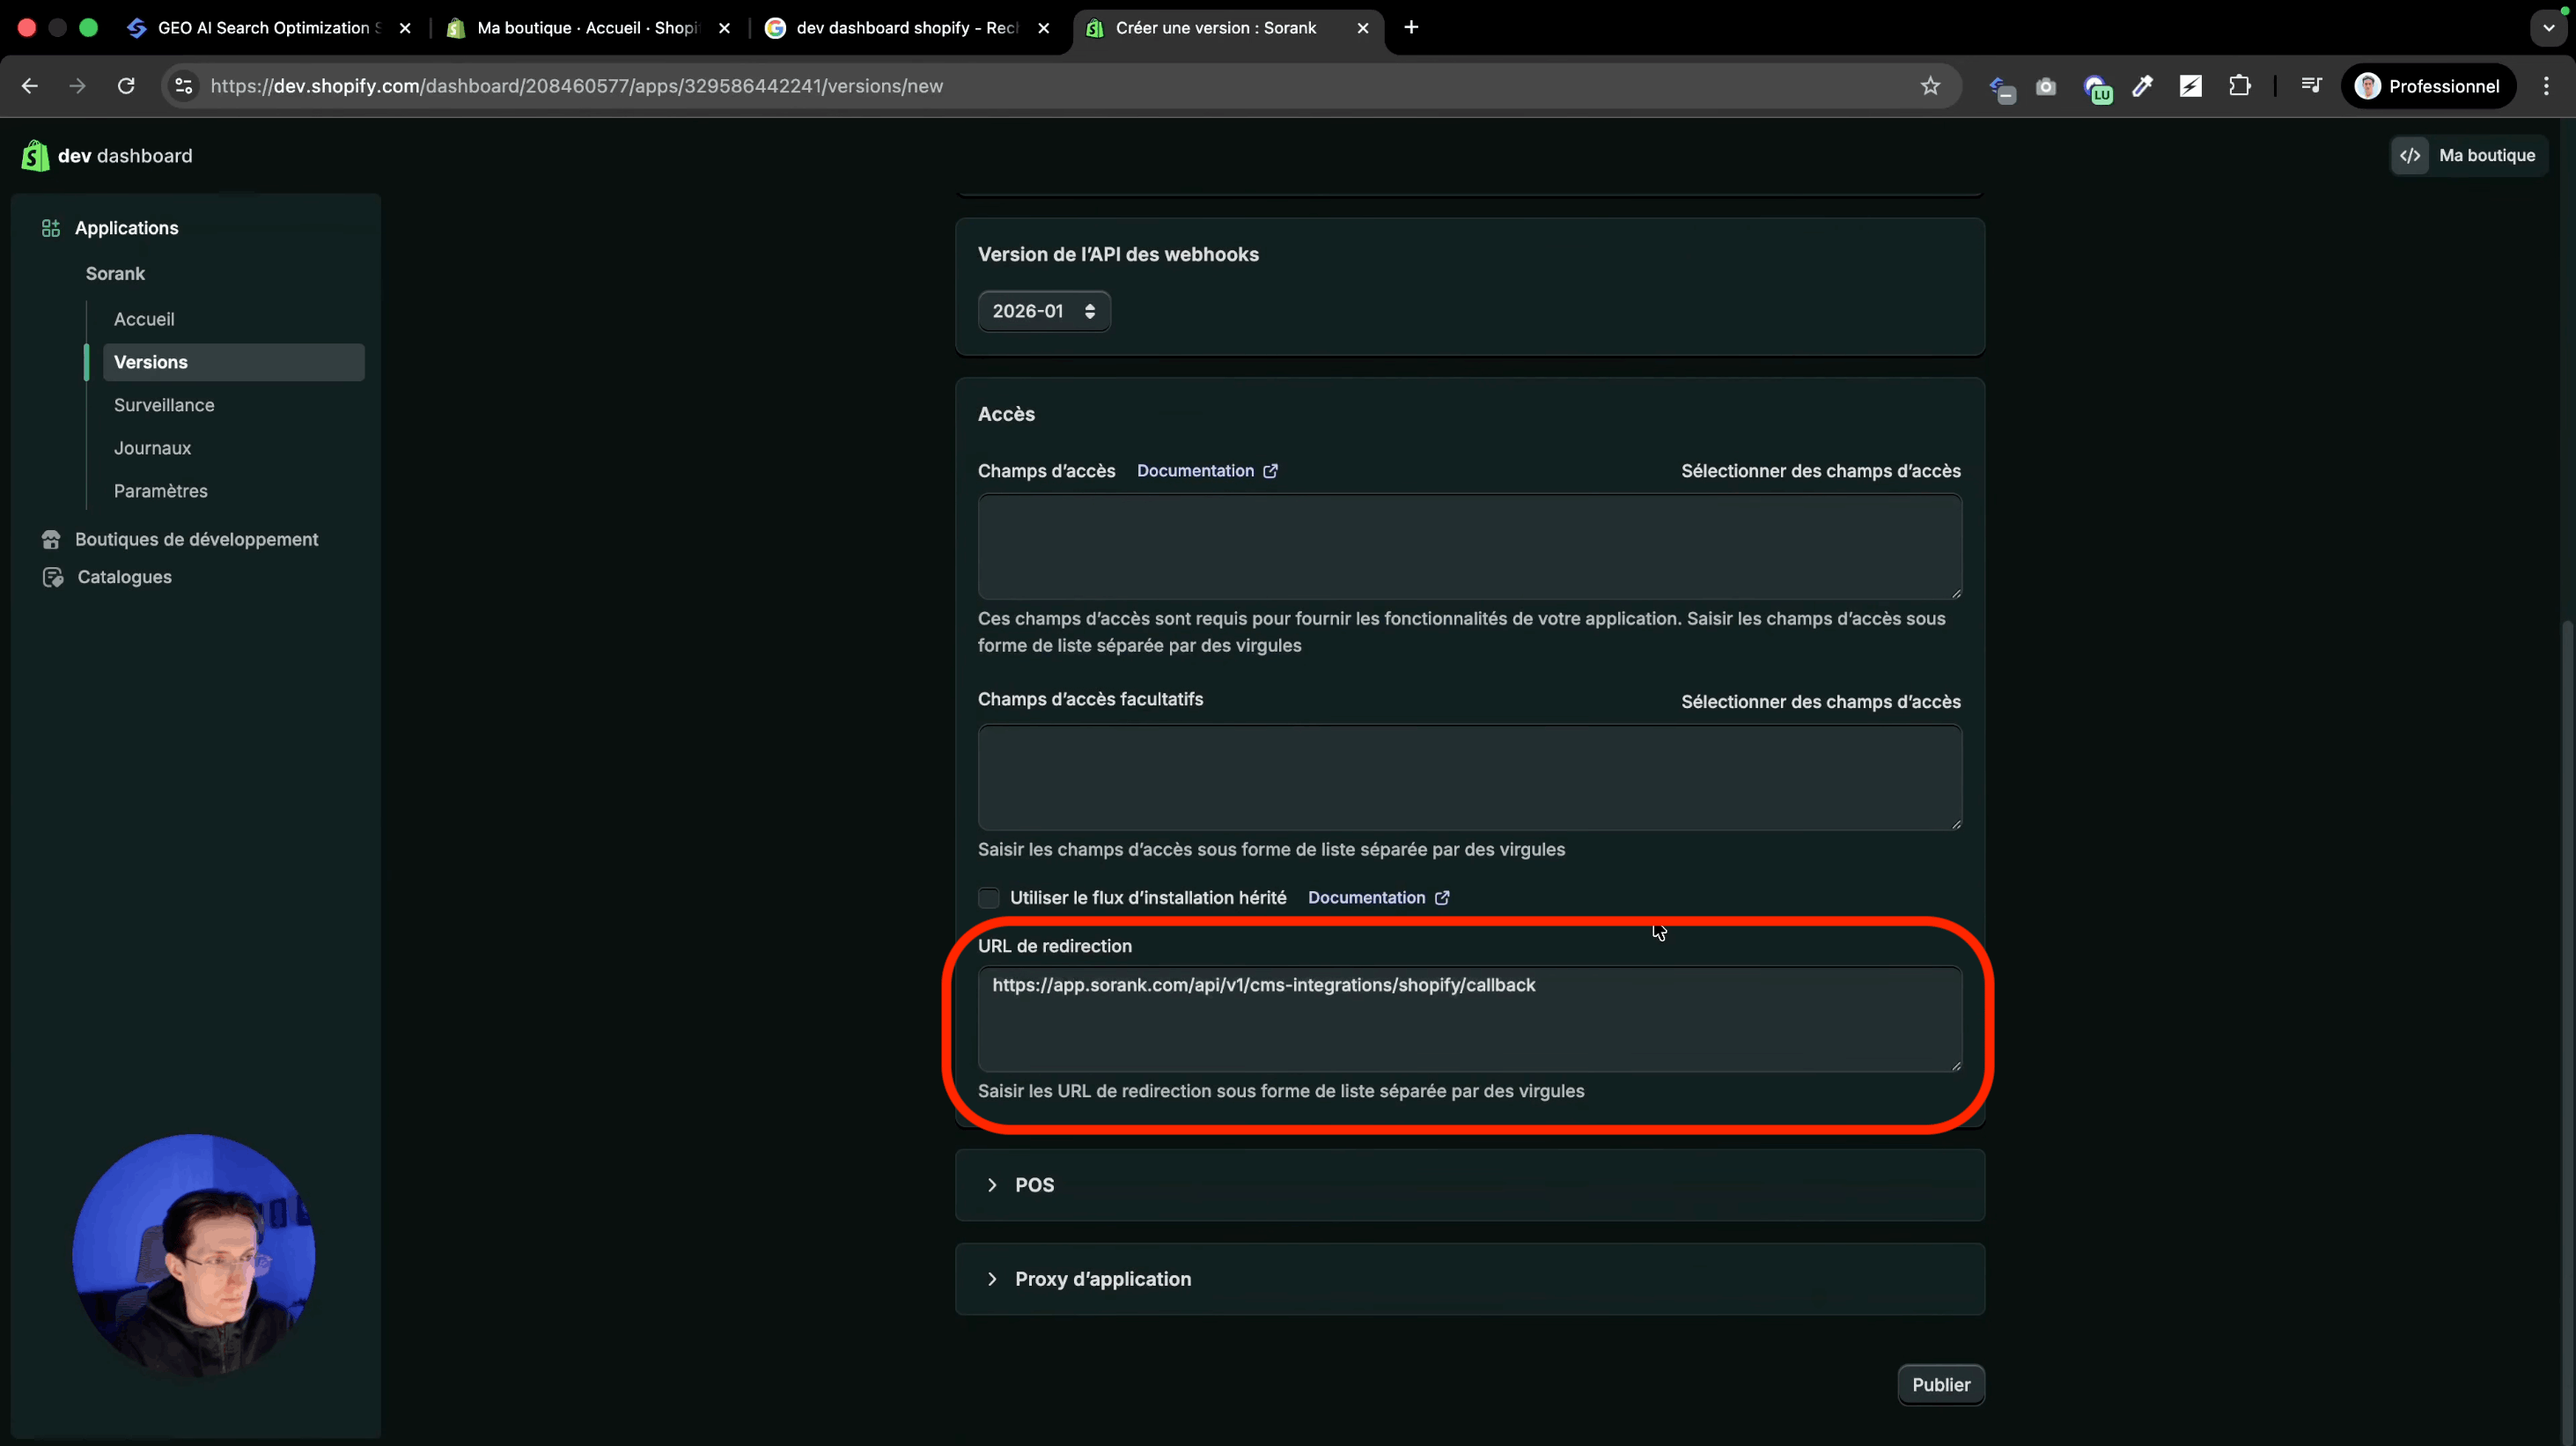 הדביקו את ה-redirect url.
### שלב 4: בחירת ה-Scopes
באפליקציית Shopify שלכם, גשו לשדות ההרשאה והוסיפו את ה-scopes הבאים:
**Content**: "write\_content" ו-"read\_content"
**Files**: "write\_files" ו-"read\_files"
לחצו finish לאחר שכל ארבעת ה-scopes נוספו
הדביקו את ה-redirect url.
### שלב 4: בחירת ה-Scopes
באפליקציית Shopify שלכם, גשו לשדות ההרשאה והוסיפו את ה-scopes הבאים:
**Content**: "write\_content" ו-"read\_content"
**Files**: "write\_files" ו-"read\_files"
לחצו finish לאחר שכל ארבעת ה-scopes נוספו
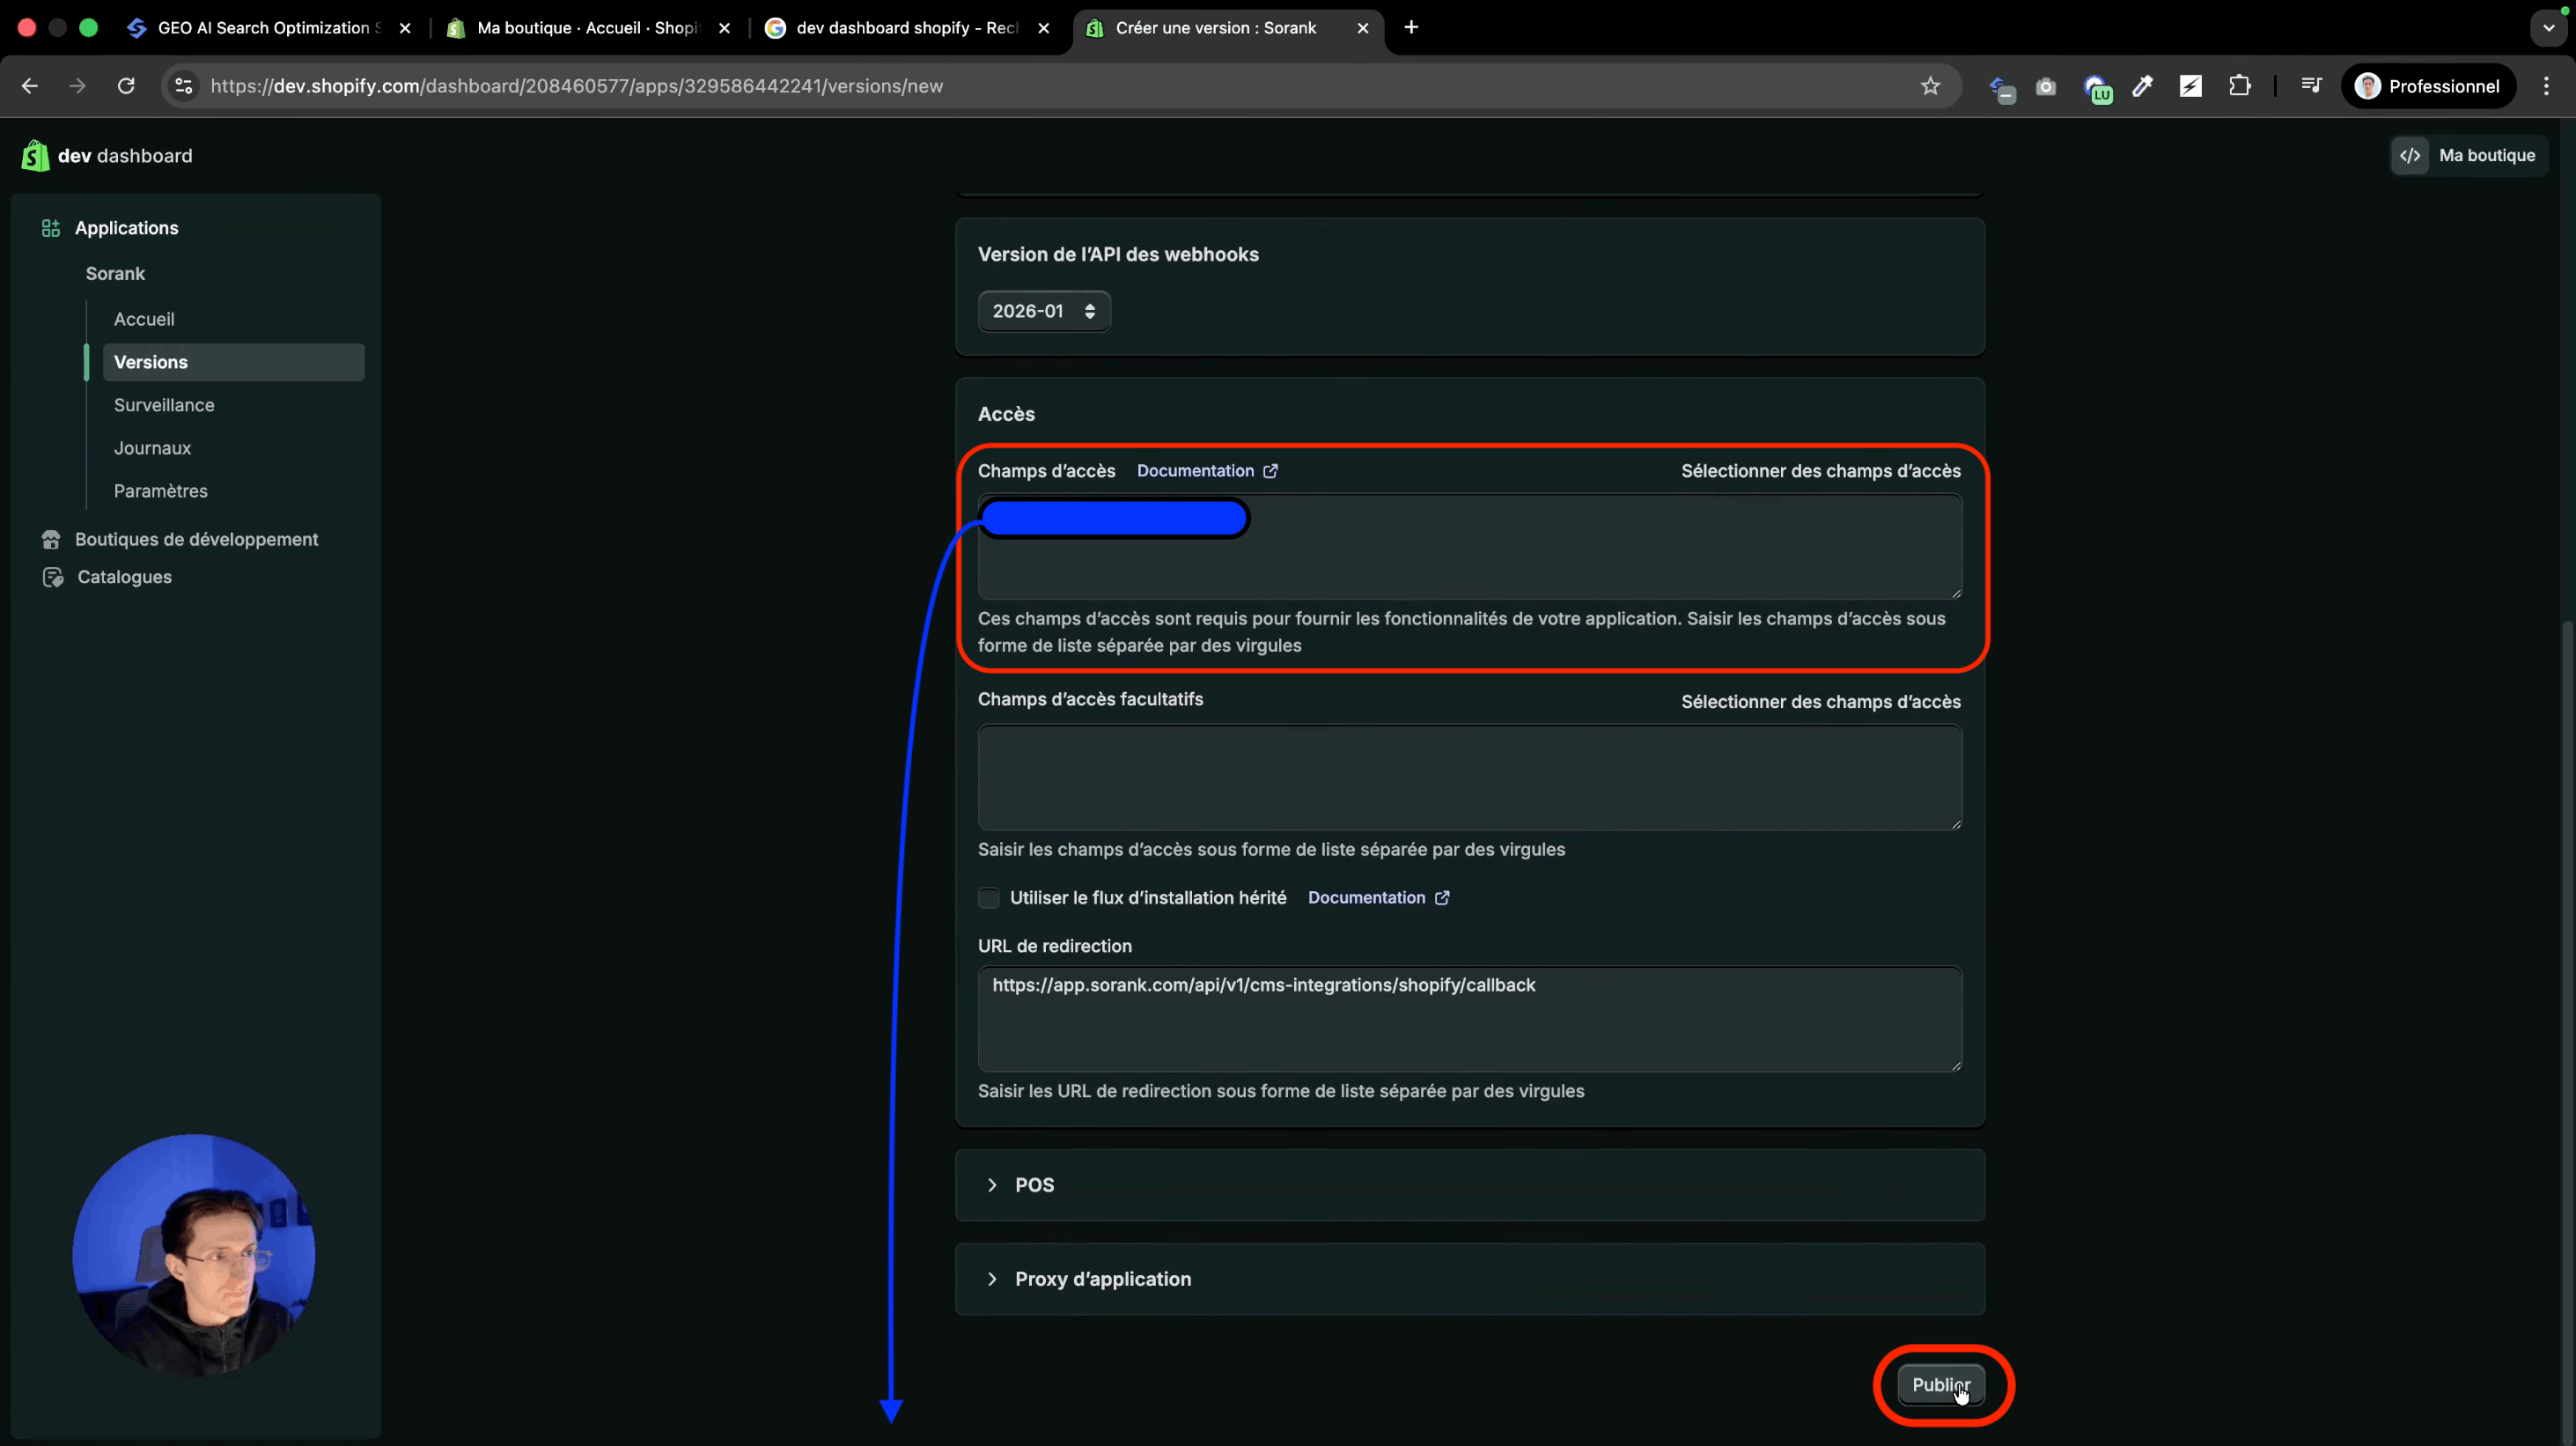 באפליקציית Shopify שלכם, תראו את ה-scopes שהוספתם בשלב הקודם:
**Content**: "write\_content" ו-"read\_content"
**Files**: "write\_files" ו-"read\_files"
### שלב 5: פרסום והתקנת האפליקציה
לחצו publish באפליקציית Shopify שלכם. שם הגרסה אופציונלי. לאחר הפרסום, גשו לחנות Shopify שלכם, ואז אל Apps > Add. בחרו את האפליקציה שלכם והתקינו אותה.
באפליקציית Shopify שלכם, תראו את ה-scopes שהוספתם בשלב הקודם:
**Content**: "write\_content" ו-"read\_content"
**Files**: "write\_files" ו-"read\_files"
### שלב 5: פרסום והתקנת האפליקציה
לחצו publish באפליקציית Shopify שלכם. שם הגרסה אופציונלי. לאחר הפרסום, גשו לחנות Shopify שלכם, ואז אל Apps > Add. בחרו את האפליקציה שלכם והתקינו אותה.
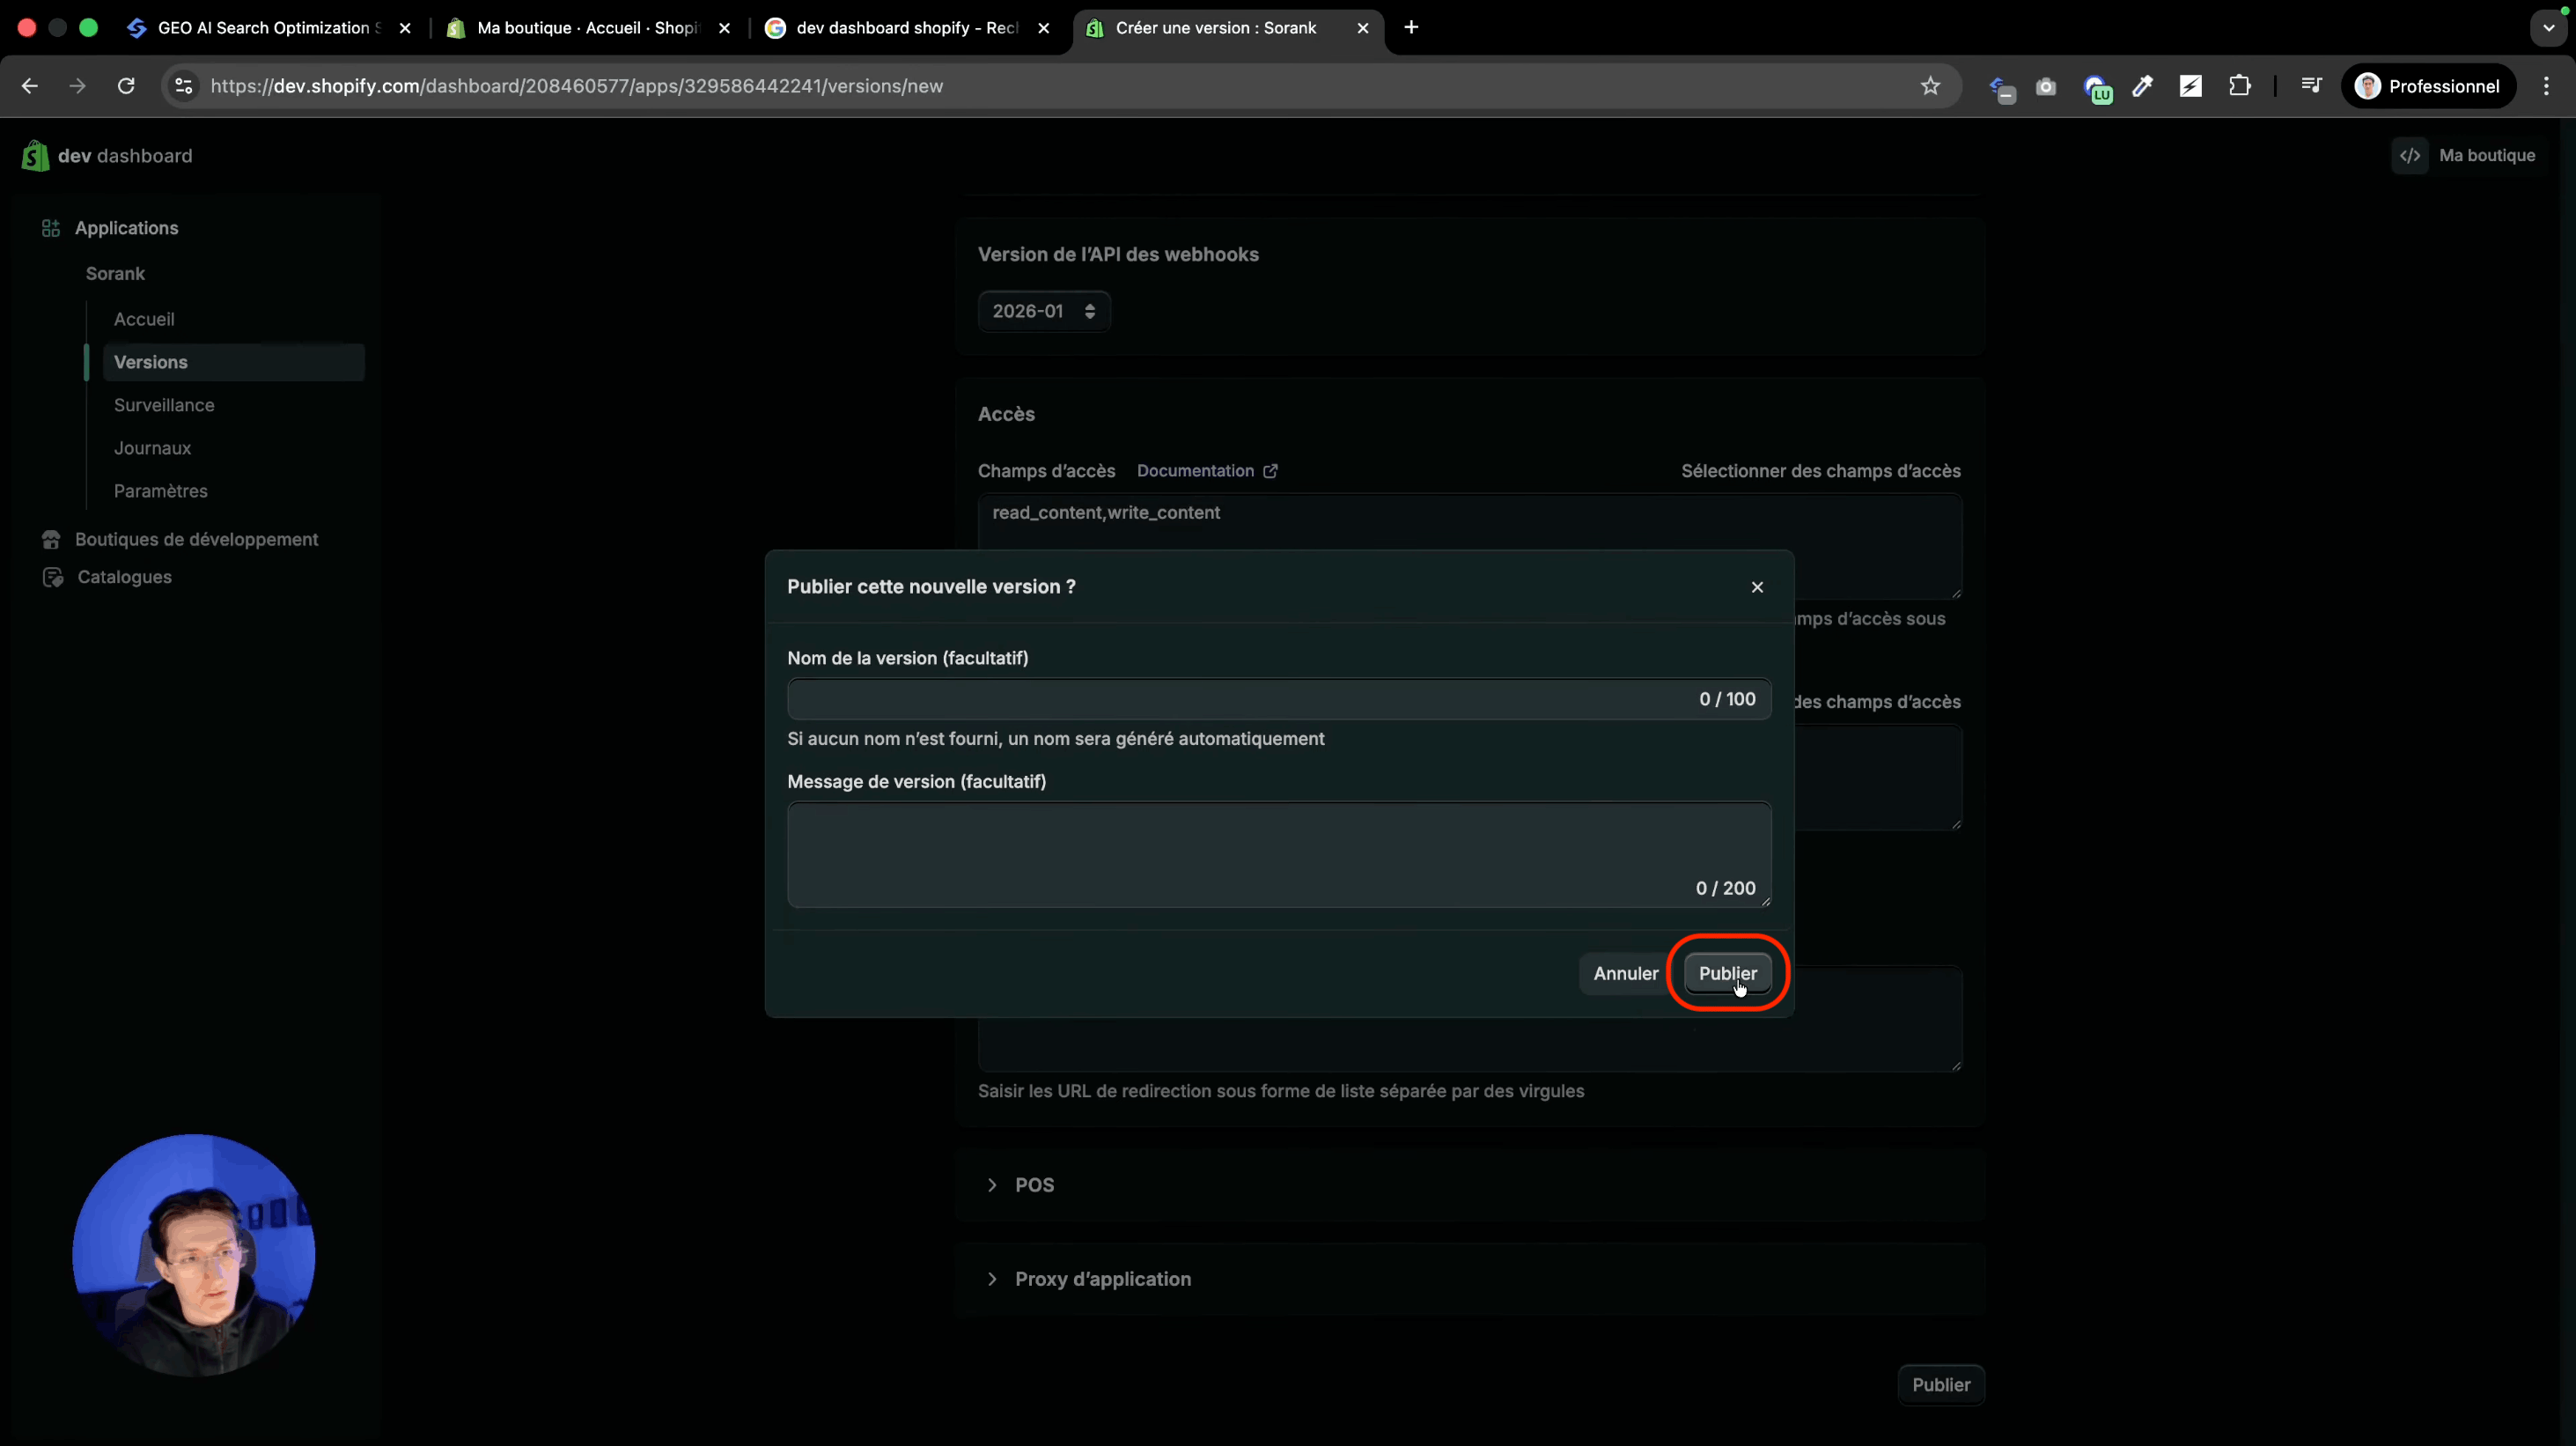 לחצו publish.
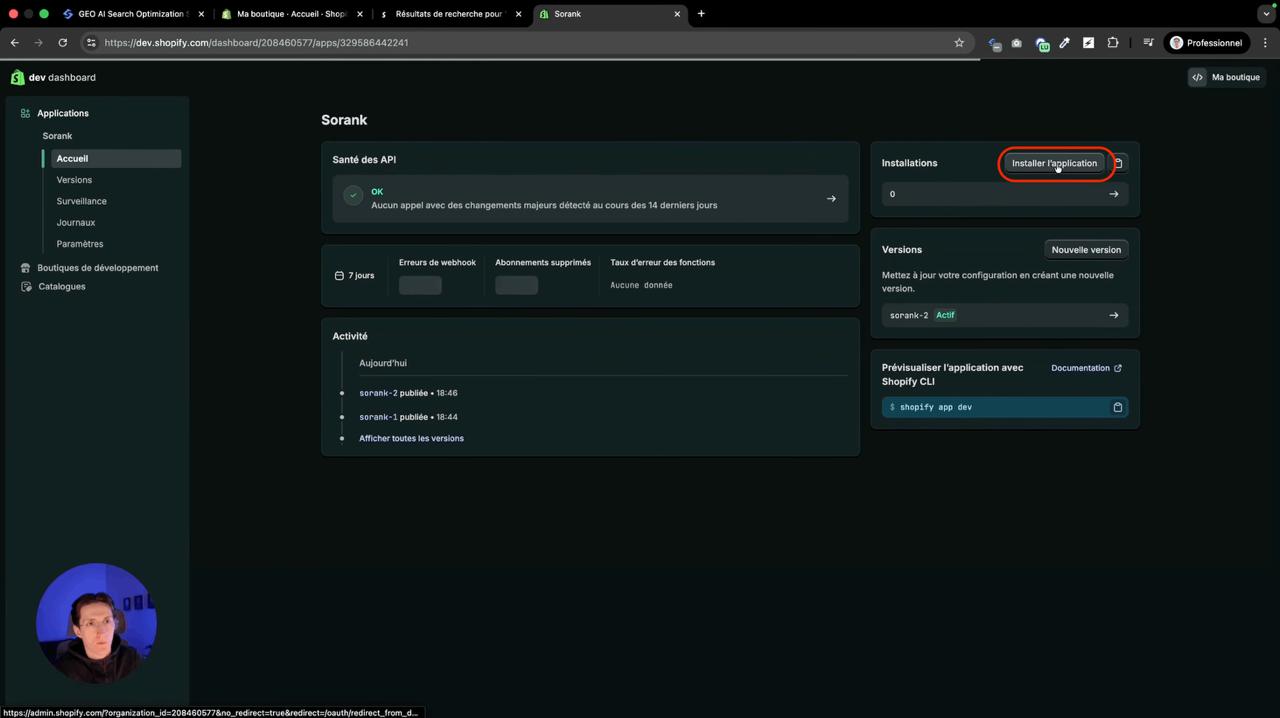 לחצו install.
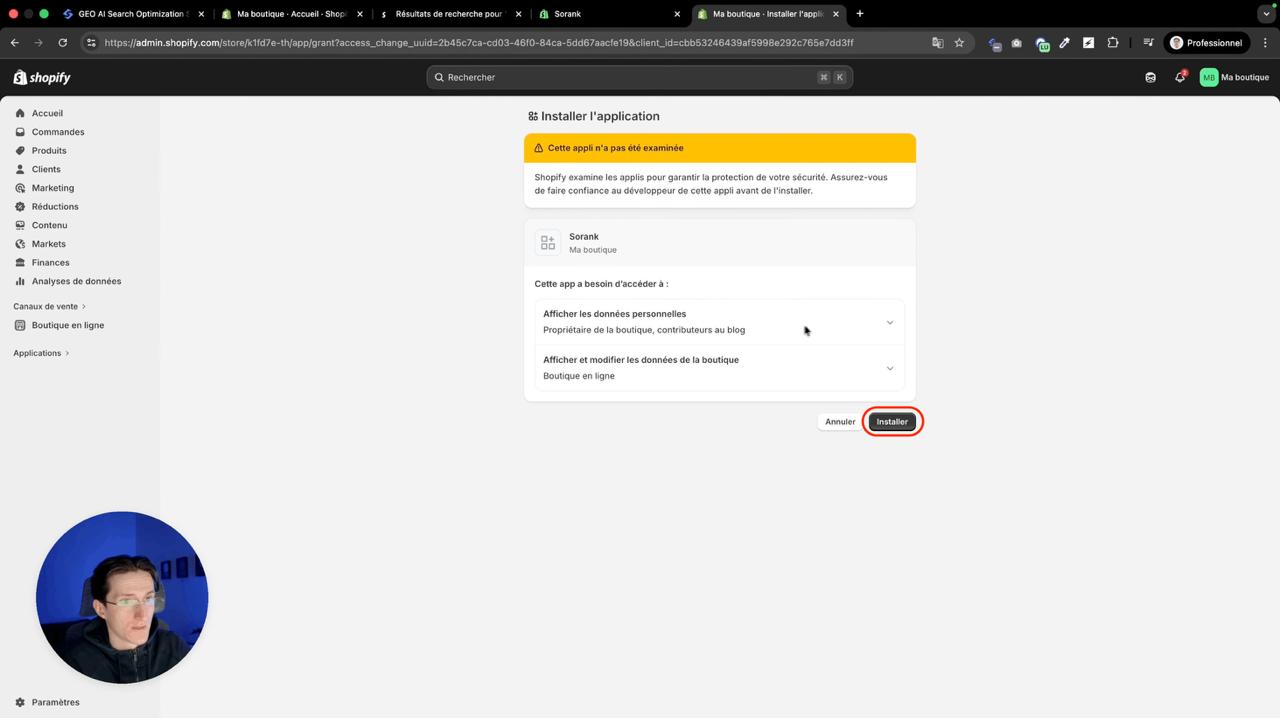 סקירת אפליקציית Shopify המאשרת שהאפליקציה מוכנה להתקנה.
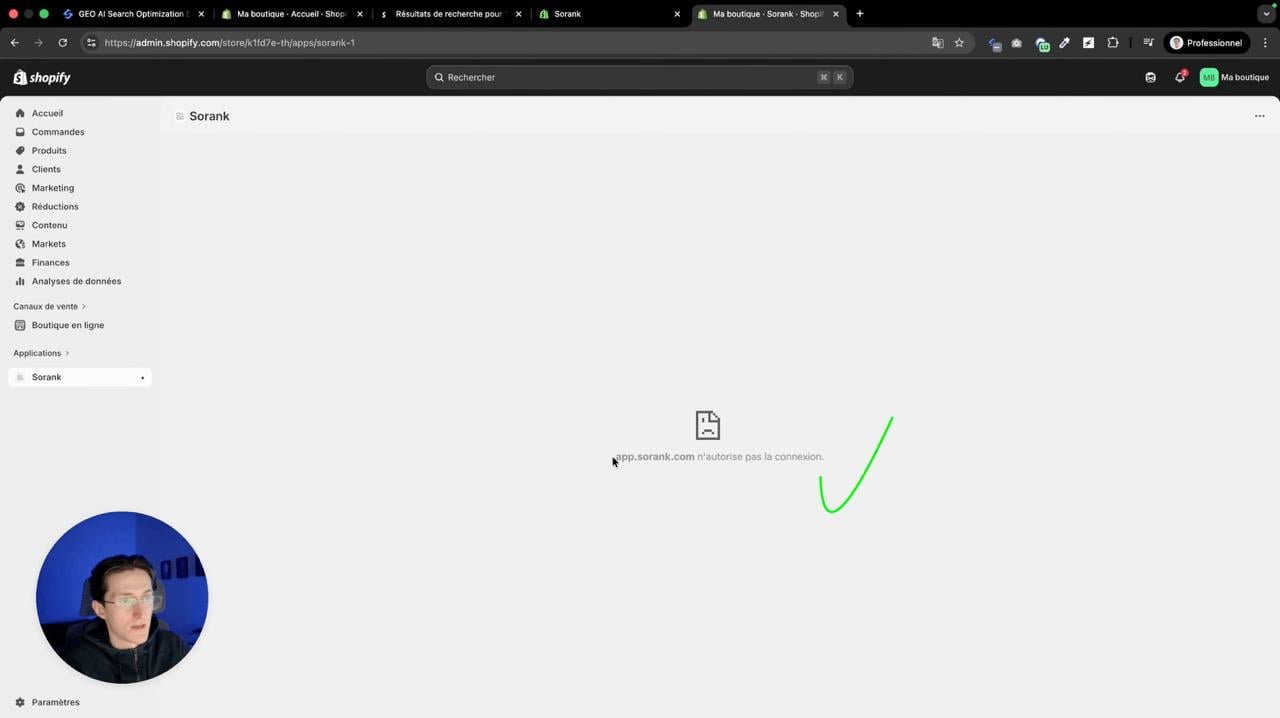 הודעת האישור המראה שהאפליקציה הותקנה בהצלחה.
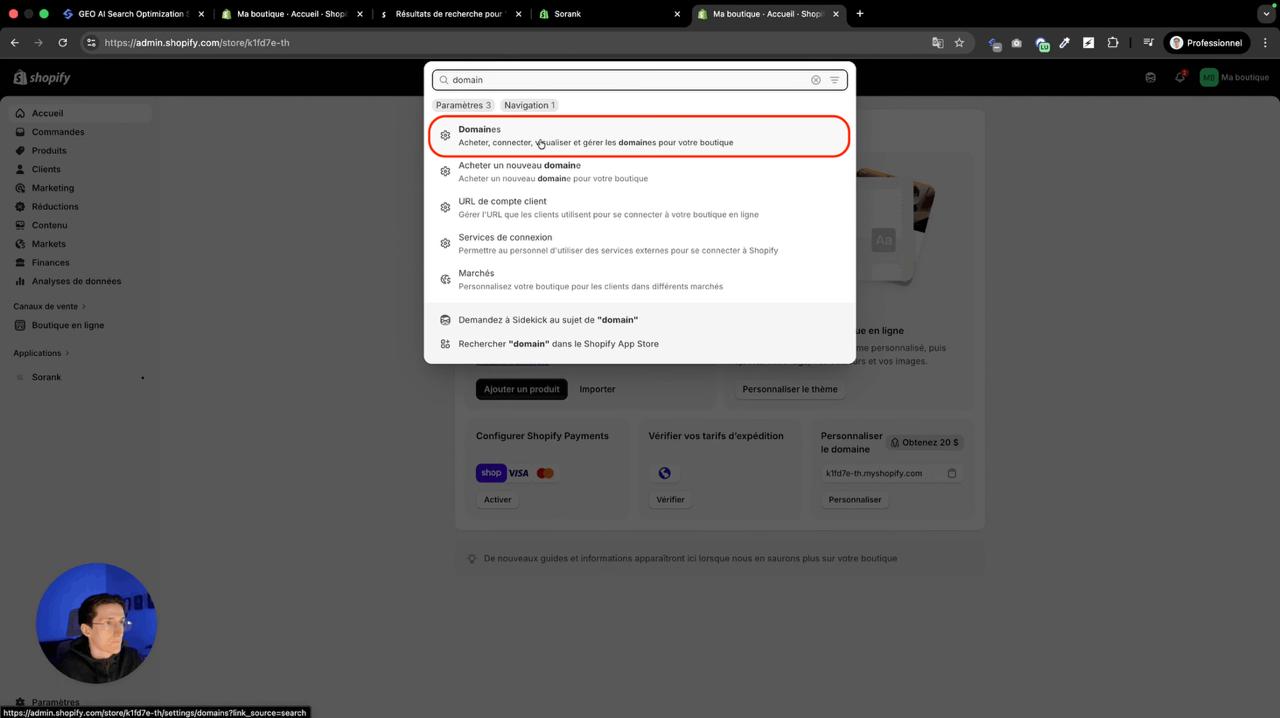 מצאו את דומיין ה-myshopify מחנות Shopify שלכם.
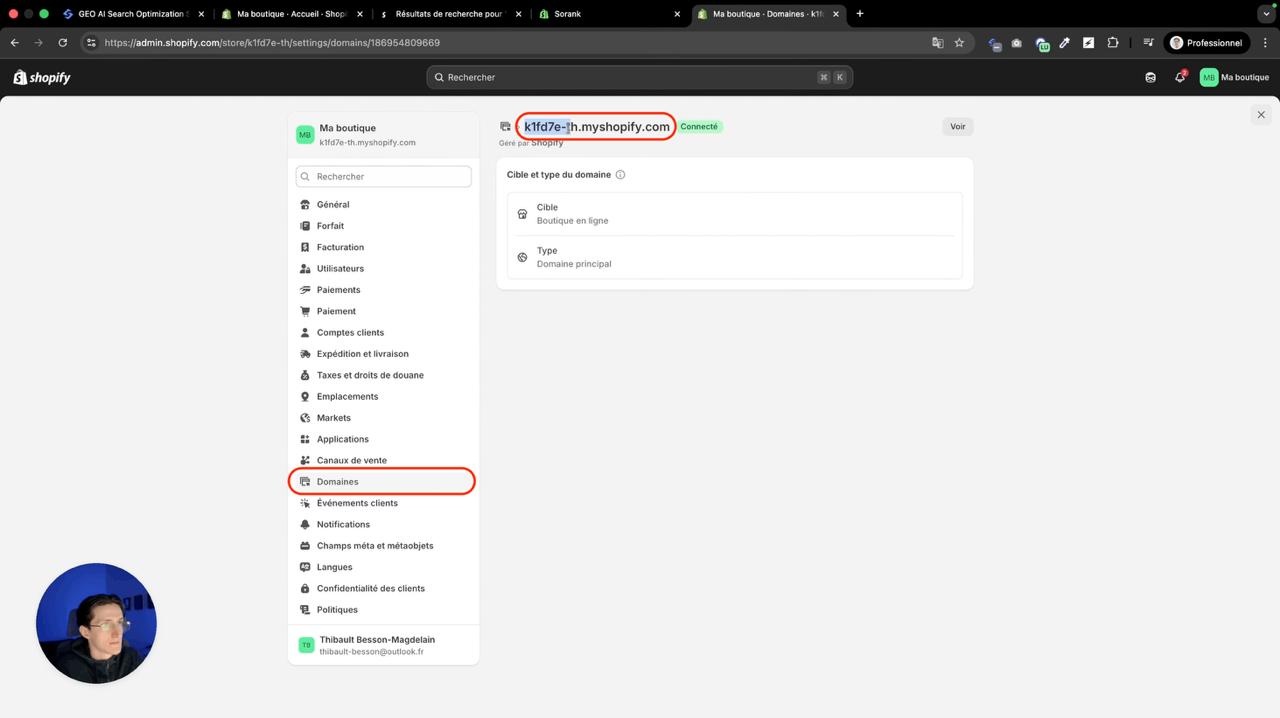 קבלו את דומיין ה-myshopify מהגדרות חנות Shopify שלכם תחת Domain.
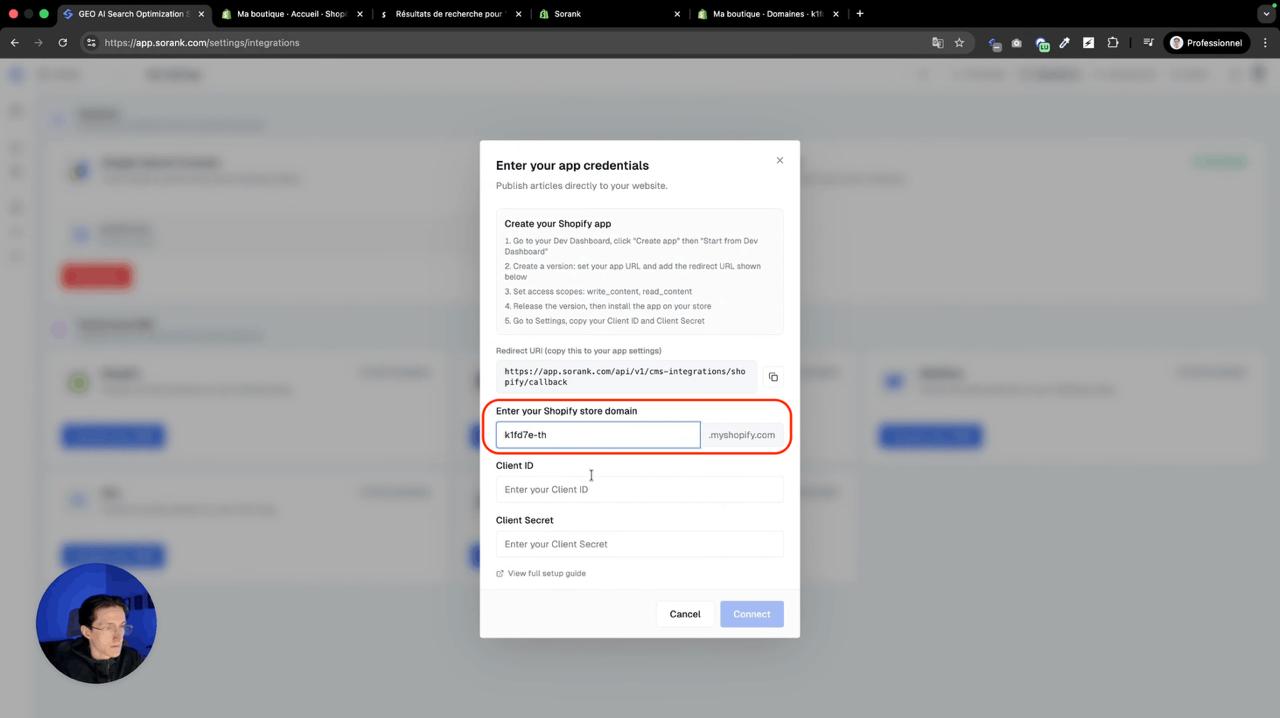 הדביקו אותו ב-Sorank.
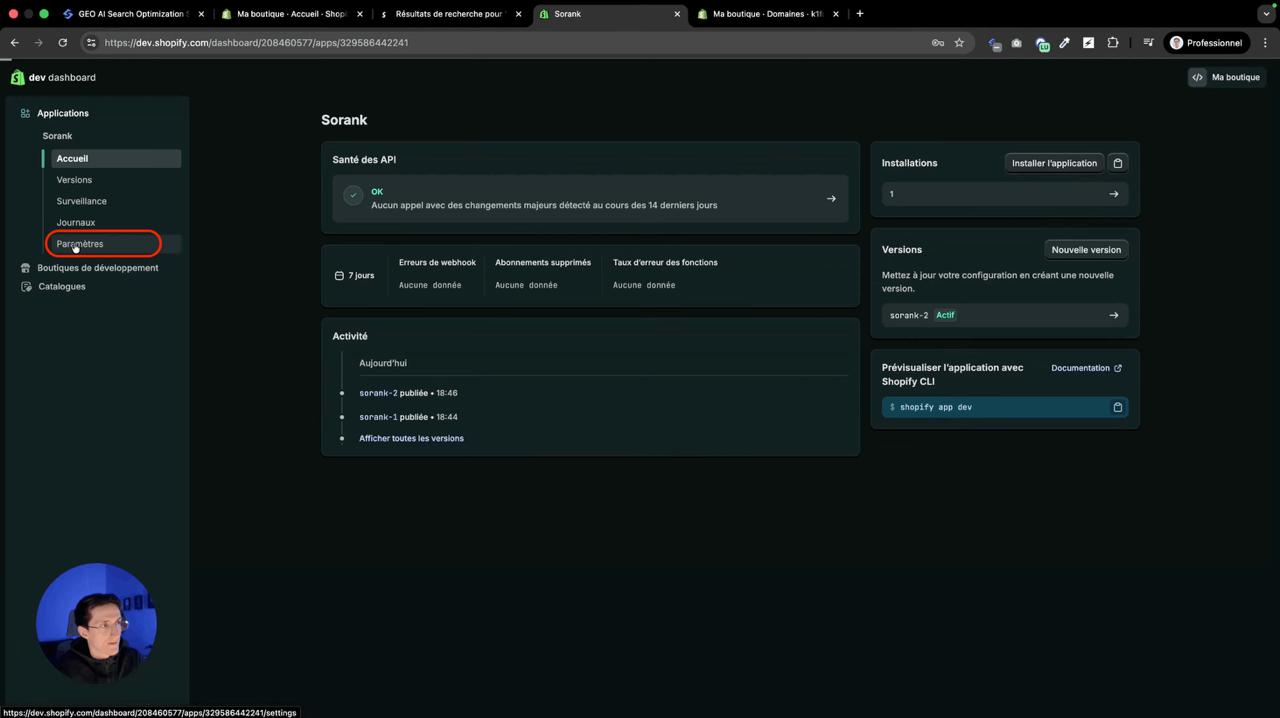 גשו להגדרות ב-Dev Dashboard שלכם
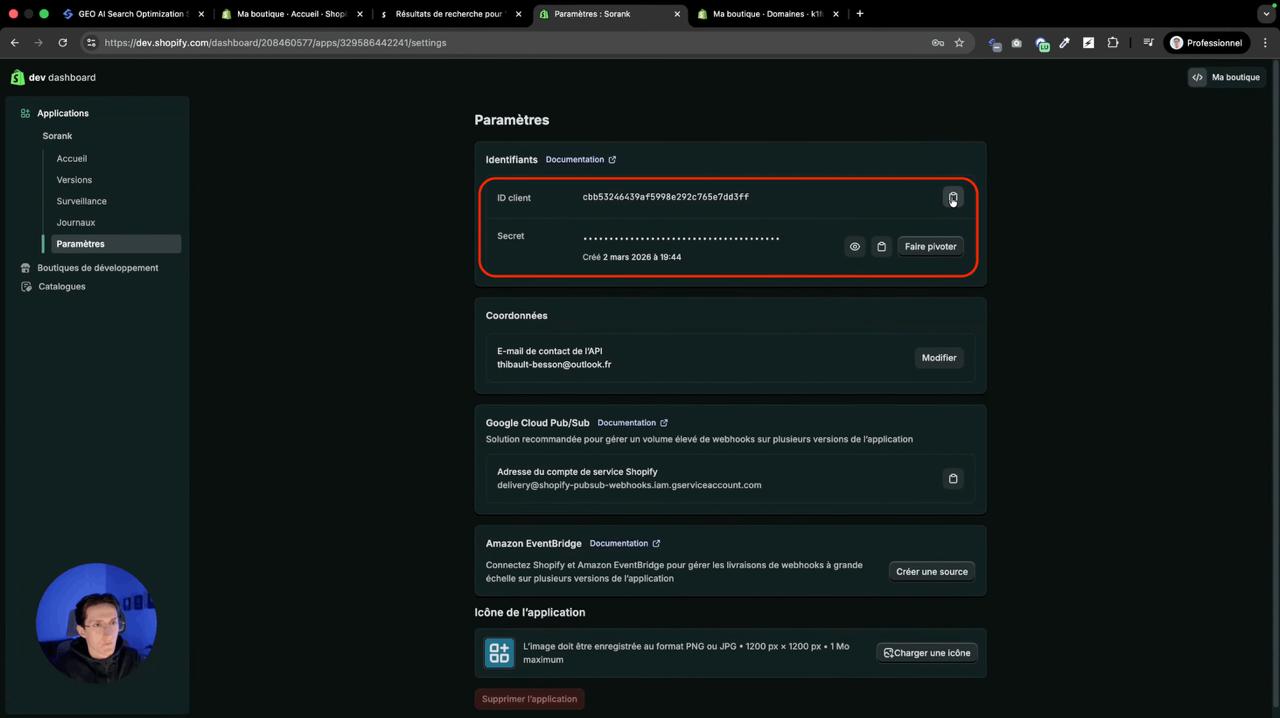 קבלו את Client ID ו-Client Secret מ-Shopify Dev Dashboard בהגדרות האפליקציה שלכם.
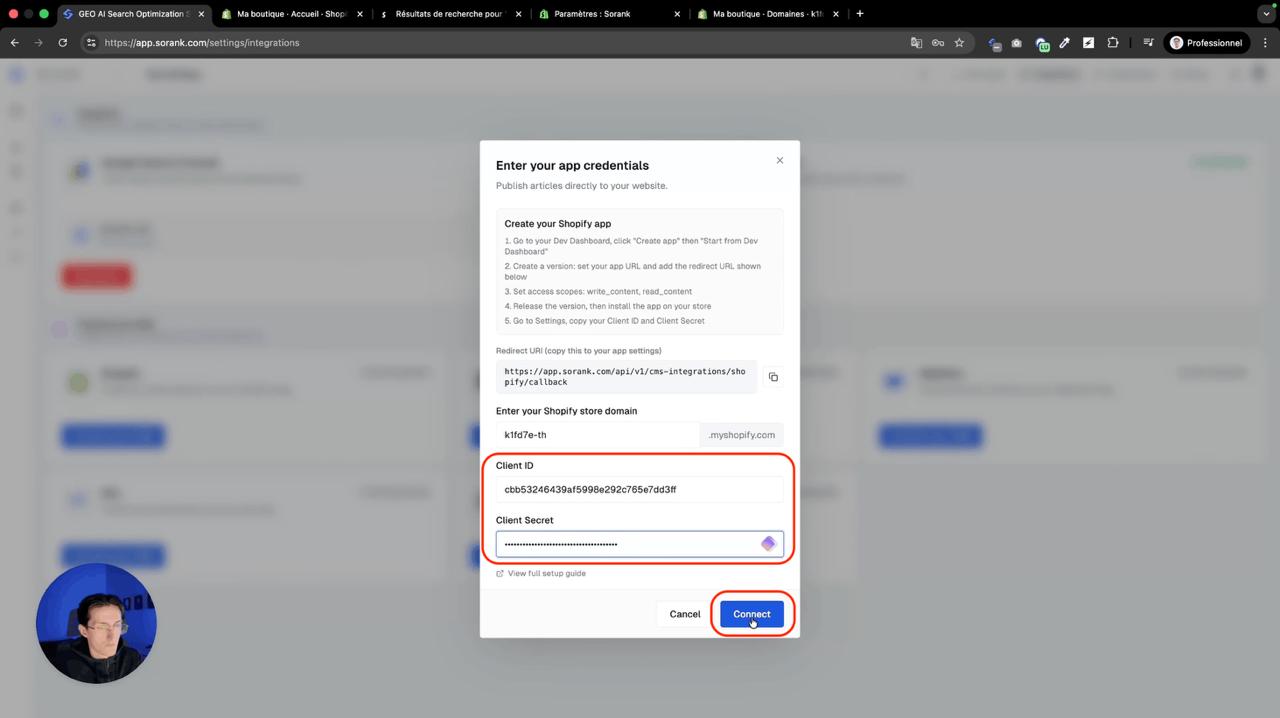 הדביקו בשדות של Sorank.
### שלב 6: חיבור Shopify אל Sorank
קבלו את דומיין ה-myshopify מהגדרות חנות Shopify שלכם תחת Domain. קבלו את Client ID ו-Client Secret מ-Shopify Dev Dashboard בהגדרות האפליקציה שלכם. הדביקו הכל ב-Sorank תחת Settings > Integration > Shopify ולחצו Connect.
הדביקו בשדות של Sorank.
### שלב 6: חיבור Shopify אל Sorank
קבלו את דומיין ה-myshopify מהגדרות חנות Shopify שלכם תחת Domain. קבלו את Client ID ו-Client Secret מ-Shopify Dev Dashboard בהגדרות האפליקציה שלכם. הדביקו הכל ב-Sorank תחת Settings > Integration > Shopify ולחצו Connect.
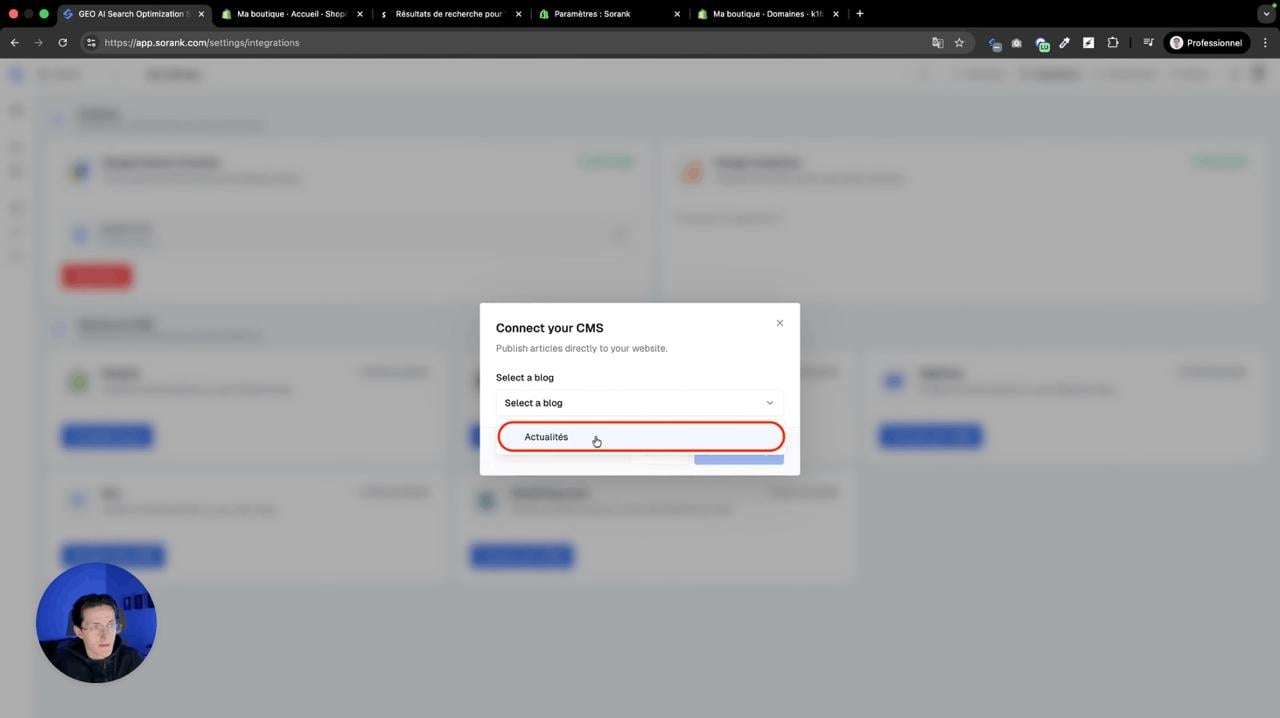 בחרו את הבלוג בחנות שלכם בו אתם רוצים לפרסם את המאמרים.
### שלב 7: בחרו את הבלוג ופרסמו
בחרו את הבלוג בחנות שלכם בו אתם רוצים לפרסם את המאמרים. לחצו "Confirm setup". גשו אל SEO Articles ב-Sorank ולחצו Publish. המאמר שלכם יופיע ב-Content > Blog Posts ב-Shopify עם כל התמונות, הכותרות, הקישורים הפנימיים והקריאות לפעולה.
בחרו את הבלוג בחנות שלכם בו אתם רוצים לפרסם את המאמרים.
### שלב 7: בחרו את הבלוג ופרסמו
בחרו את הבלוג בחנות שלכם בו אתם רוצים לפרסם את המאמרים. לחצו "Confirm setup". גשו אל SEO Articles ב-Sorank ולחצו Publish. המאמר שלכם יופיע ב-Content > Blog Posts ב-Shopify עם כל התמונות, הכותרות, הקישורים הפנימיים והקריאות לפעולה.