> ## Documentation Index
> Fetch the complete documentation index at: https://sorank.com/llms.txt
> Use this file to discover all available pages before exploring further.
# Connect Webflow to SORANK
> Create a Webflow app, configure its permissions, and connect your site to SORANK.
Connect Webflow to Sorank to publish articles directly to your CMS. You will create a Webflow app, grant the required permissions, and connect it with your Client ID and Client Secret.
## Before you start
Your Webflow site must meet these requirements:
* Publish the site live at least once.
* Create a **Blog Posts** CMS collection.
* Bind **SEO Title** and **Meta Description** to the corresponding CMS fields in the Webflow Designer.
Without these bindings, Webflow publishes articles without title and description tags in the HTML. Follow the [Webflow blog setup guide](/documentation/setup-your-webflow-blog) if your site is not ready.
In Sorank, open [Publishing platforms](https://app.sorank.com/settings/integrations/publishing), select **Webflow**, and keep the setup guide visible while you complete the following steps.
## Step 1: Open Webflow app development
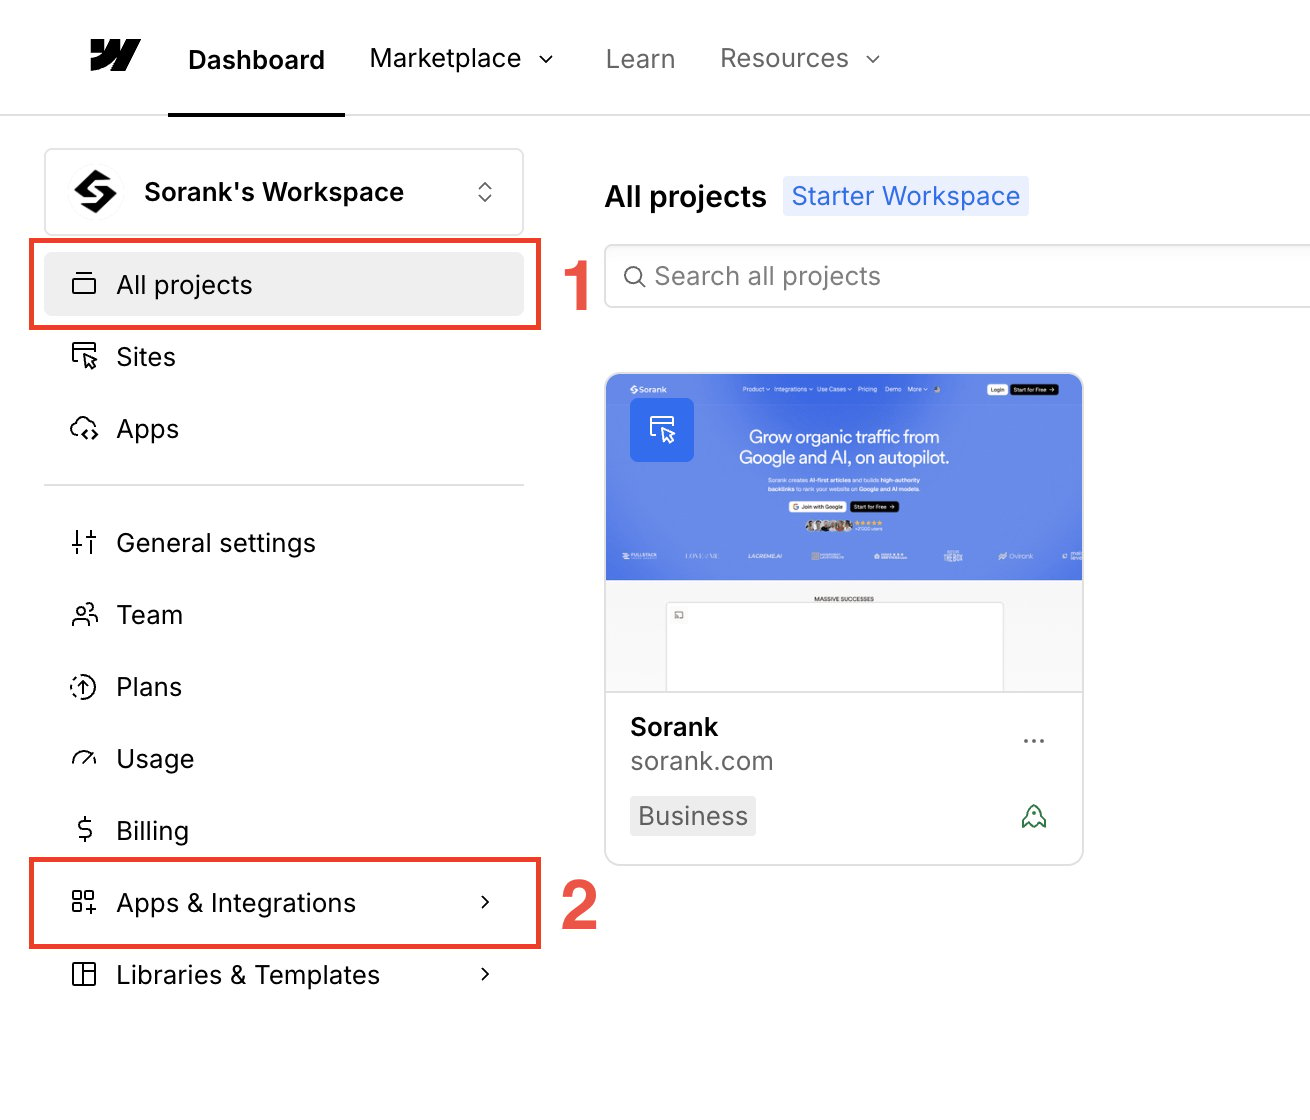
Go to the [Webflow Dashboard](https://webflow.com/dashboard/). Open **Apps & Integrations**, select **Develop**, then click **Create an App**.
 ## Step 2: Create your app
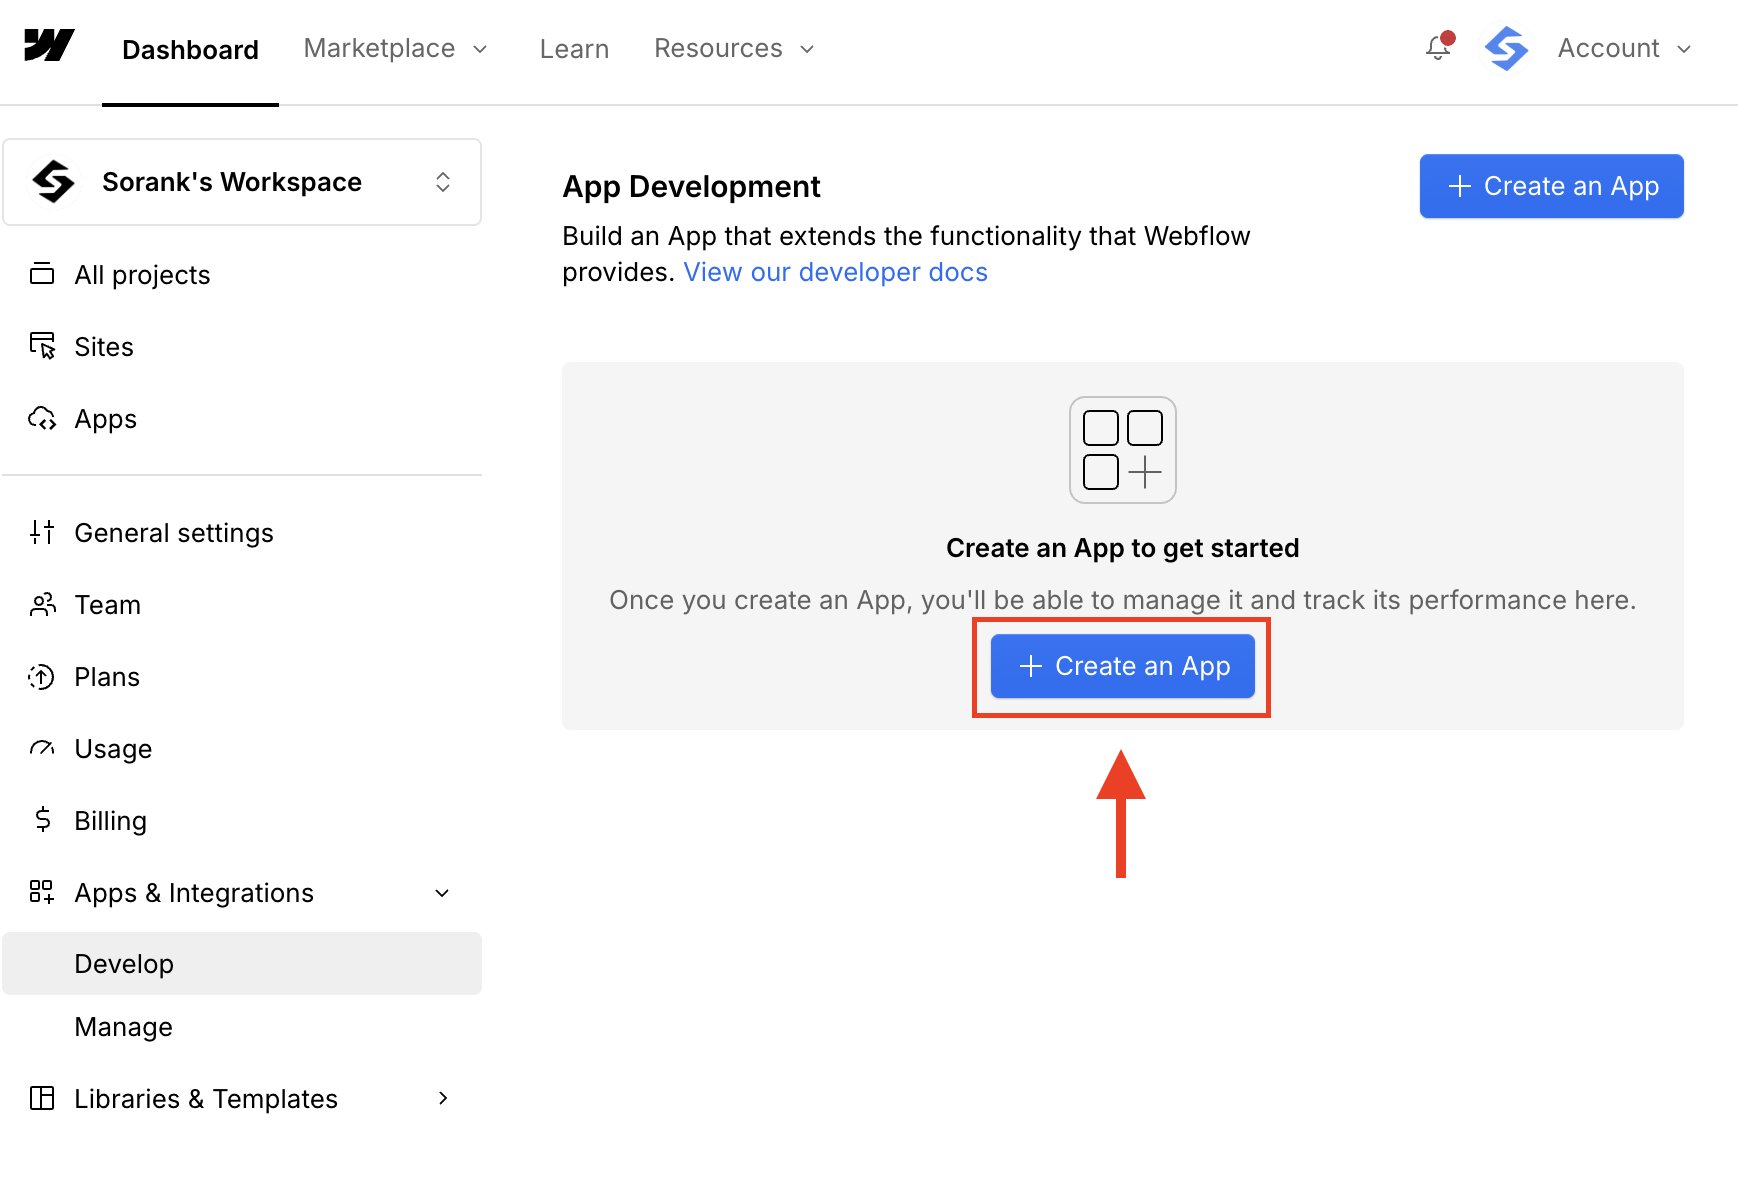
In **App Development**, click **Create an App**.
## Step 2: Create your app
In **App Development**, click **Create an App**.
 ## Step 3: Enter the app information
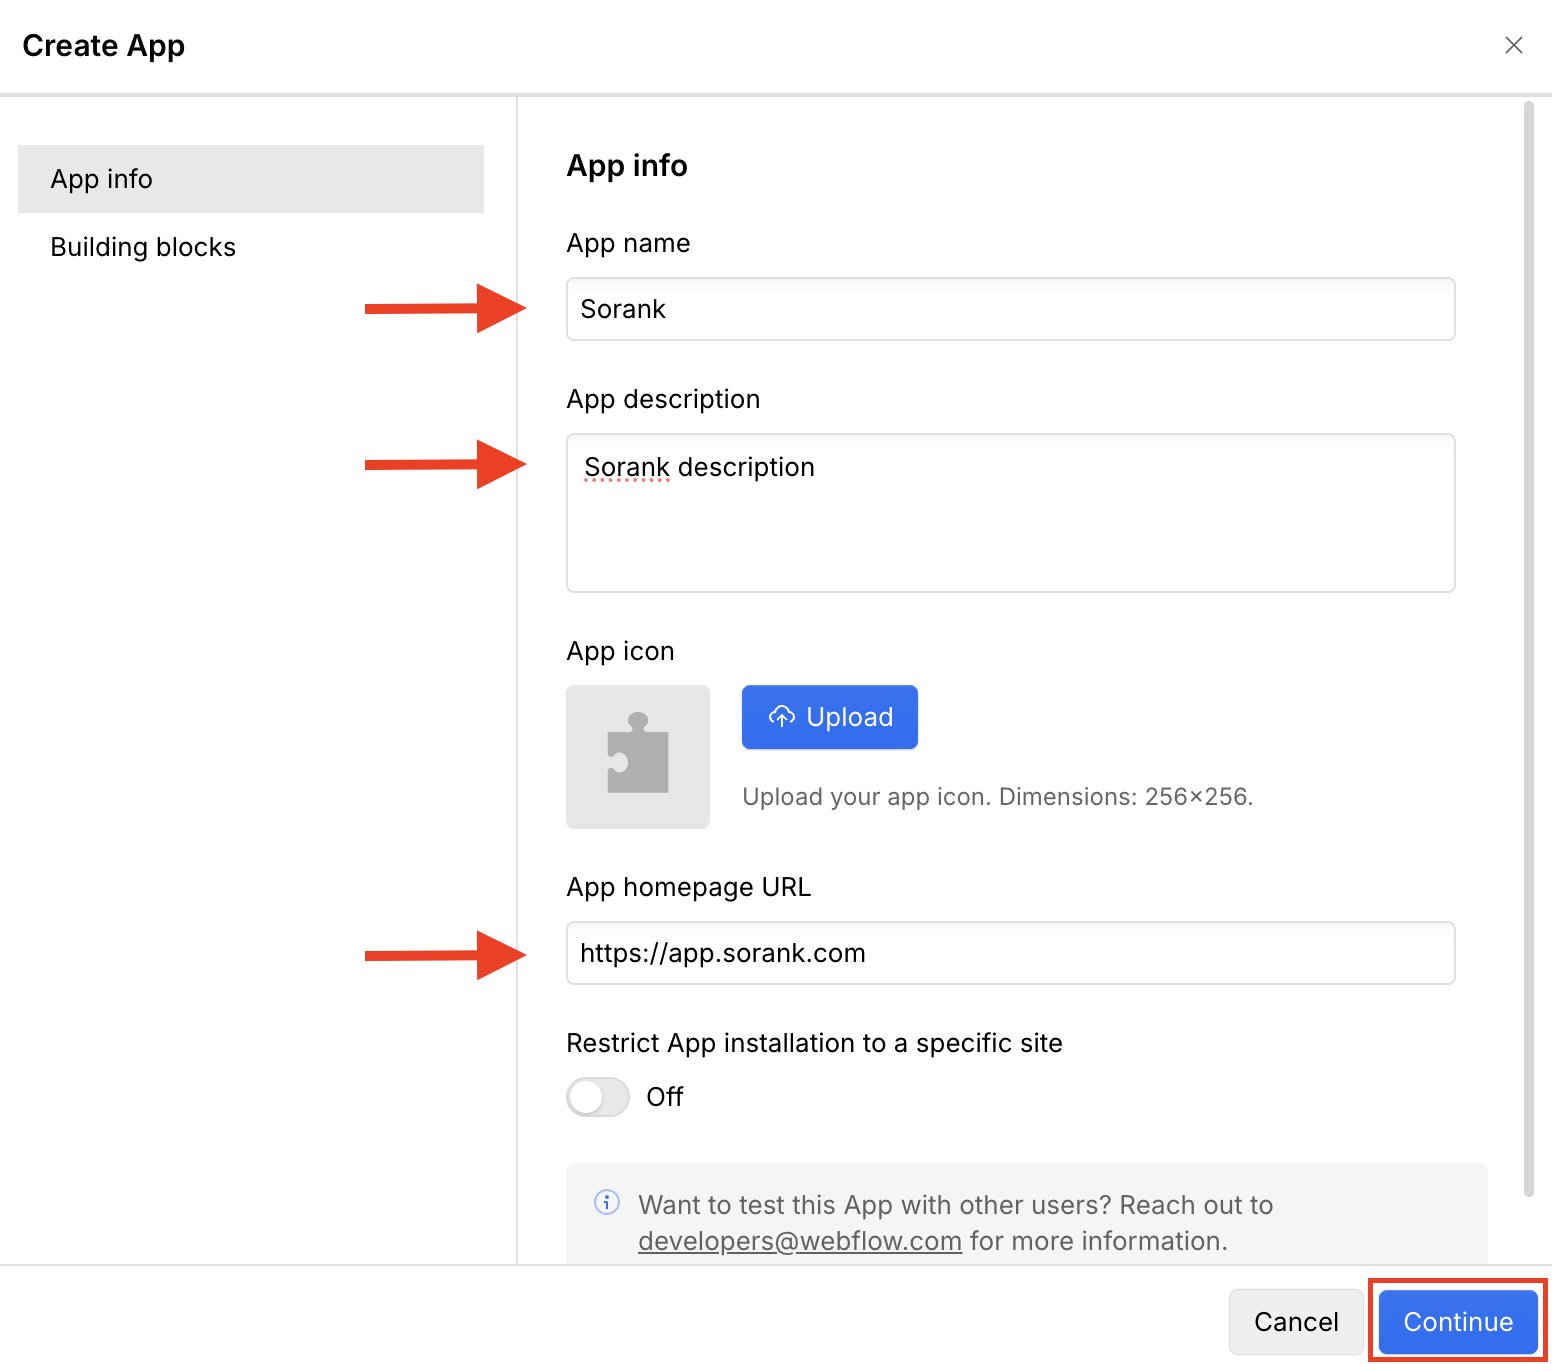
Enter an **App name**, **Description**, and **App homepage URL**. You can use your website URL as the homepage. Click **Continue**.
## Step 3: Enter the app information
Enter an **App name**, **Description**, and **App homepage URL**. You can use your website URL as the homepage. Click **Continue**.
 ## Step 4: Enable Data Client and add the redirect URI
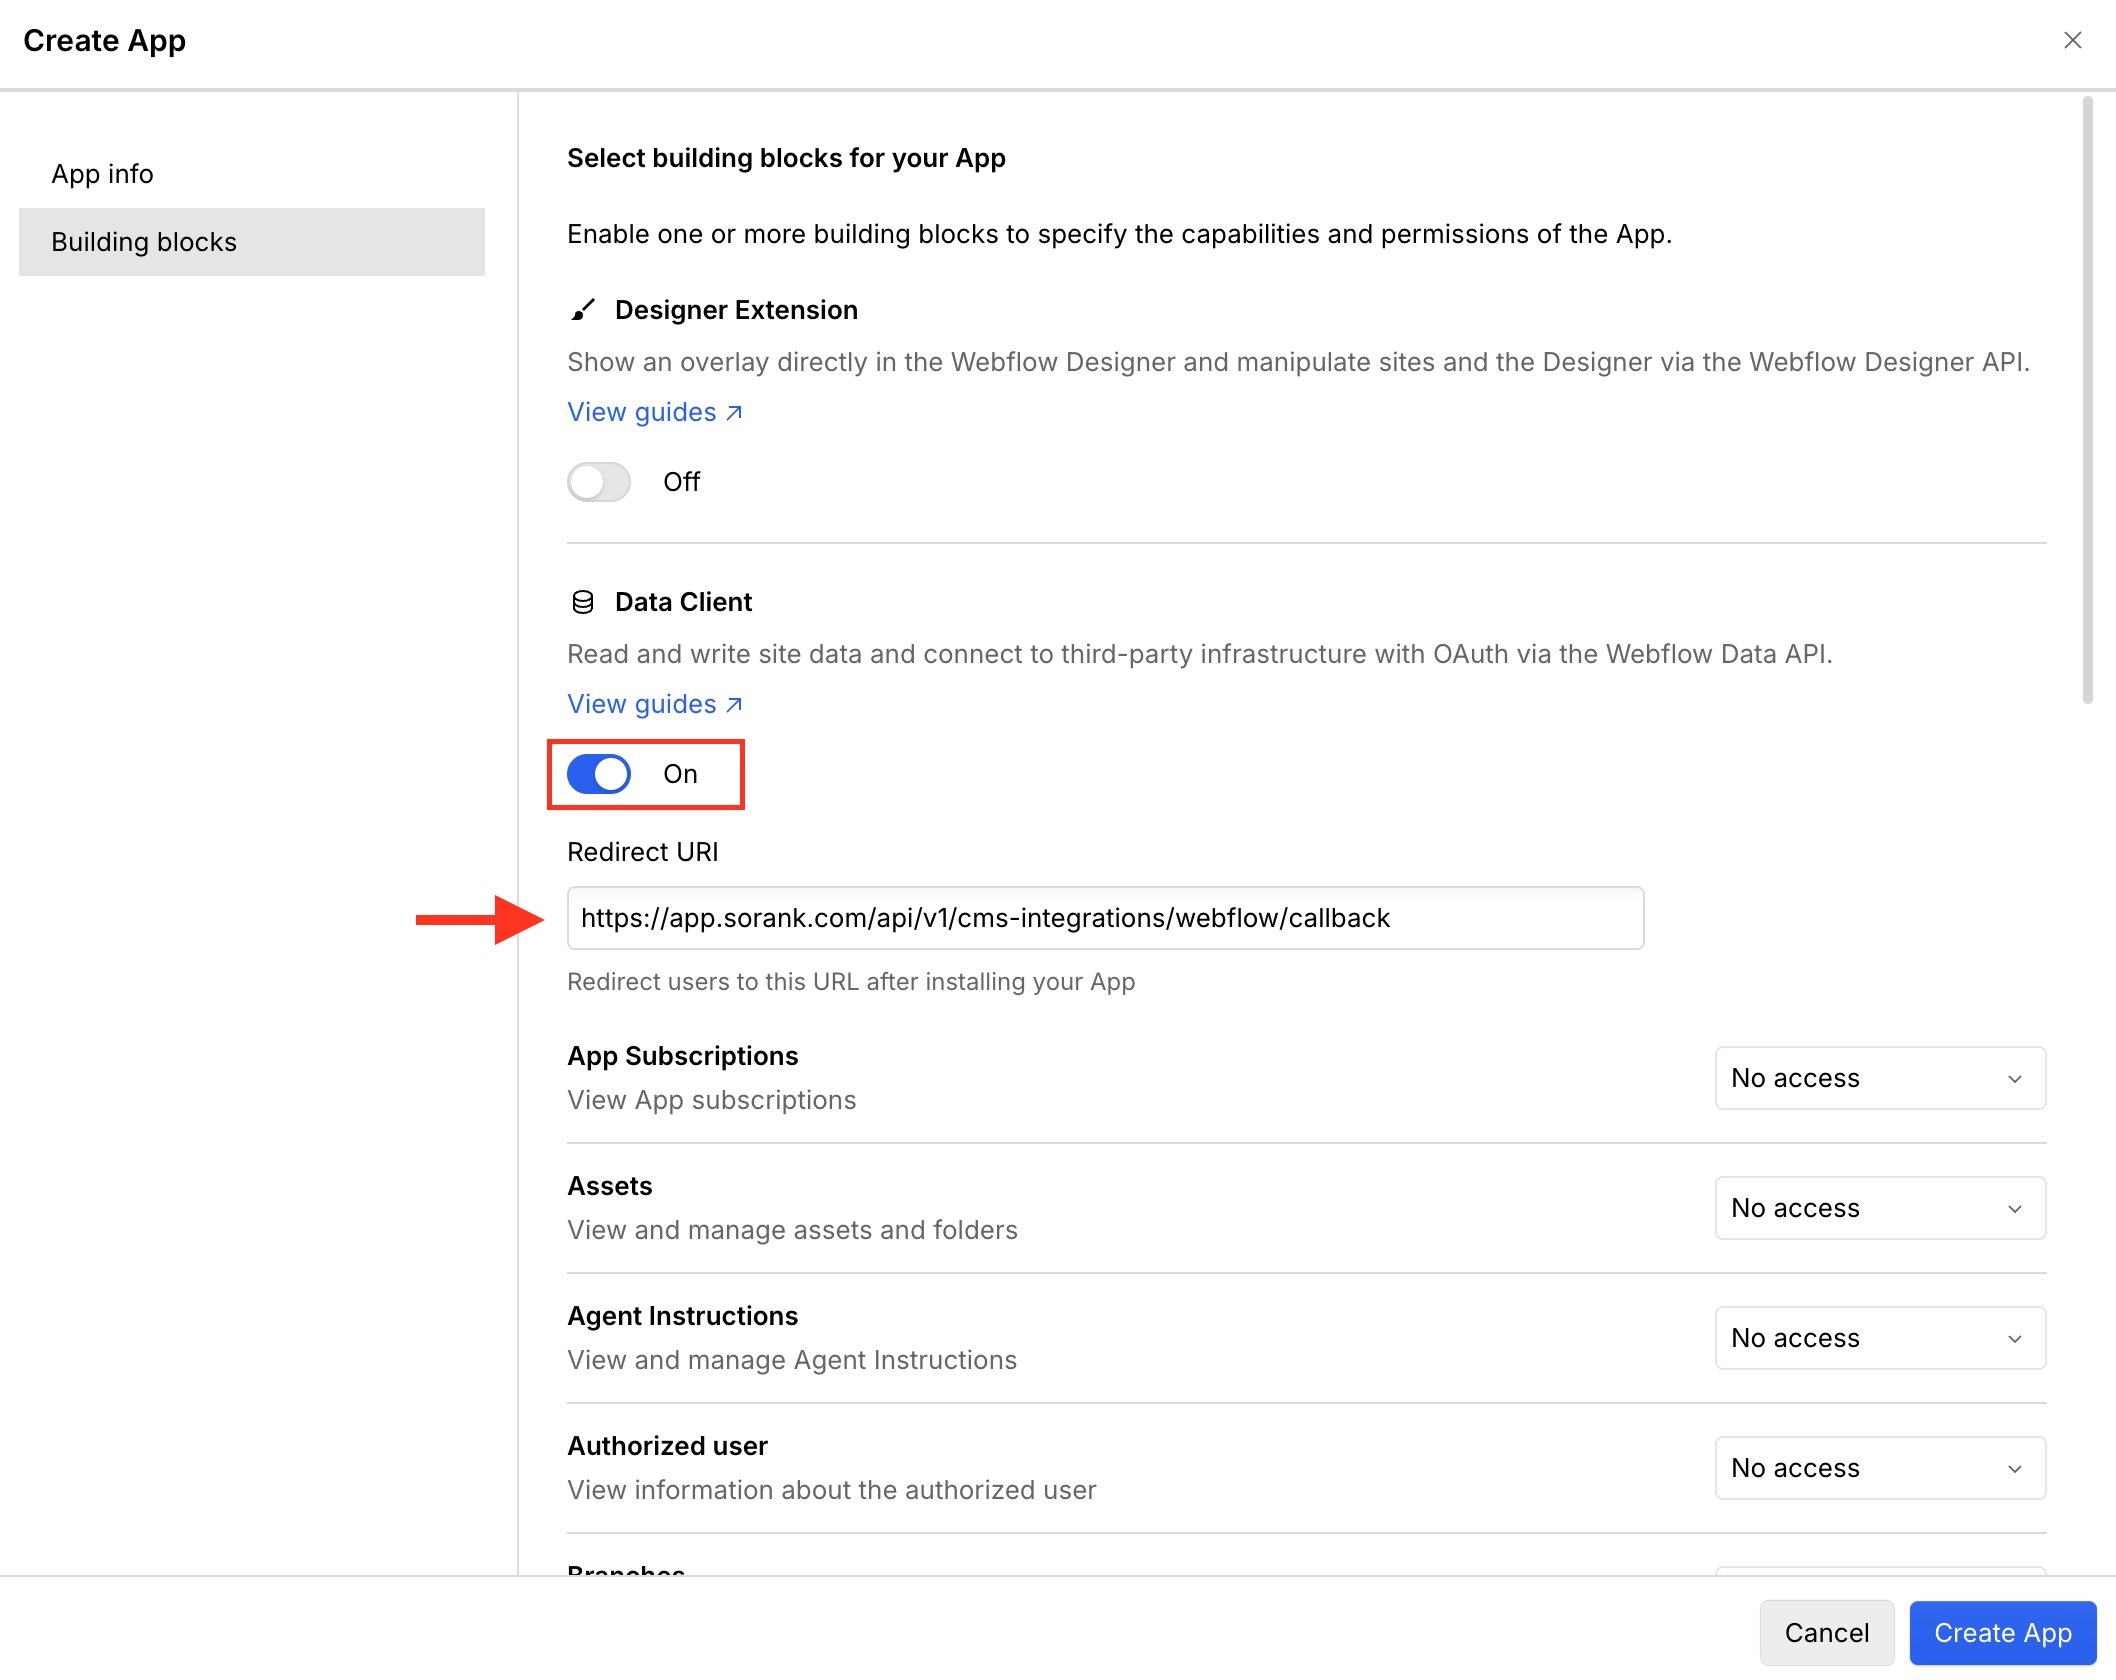
Open **Building blocks** and enable **Data Client**. Copy the redirect URI displayed in the Sorank setup guide and paste it into **Redirect URI**.
For the production Sorank application, the URI is:
`https://app.sorank.com/api/v1/cms-integrations/webflow/callback`
## Step 4: Enable Data Client and add the redirect URI
Open **Building blocks** and enable **Data Client**. Copy the redirect URI displayed in the Sorank setup guide and paste it into **Redirect URI**.
For the production Sorank application, the URI is:
`https://app.sorank.com/api/v1/cms-integrations/webflow/callback`
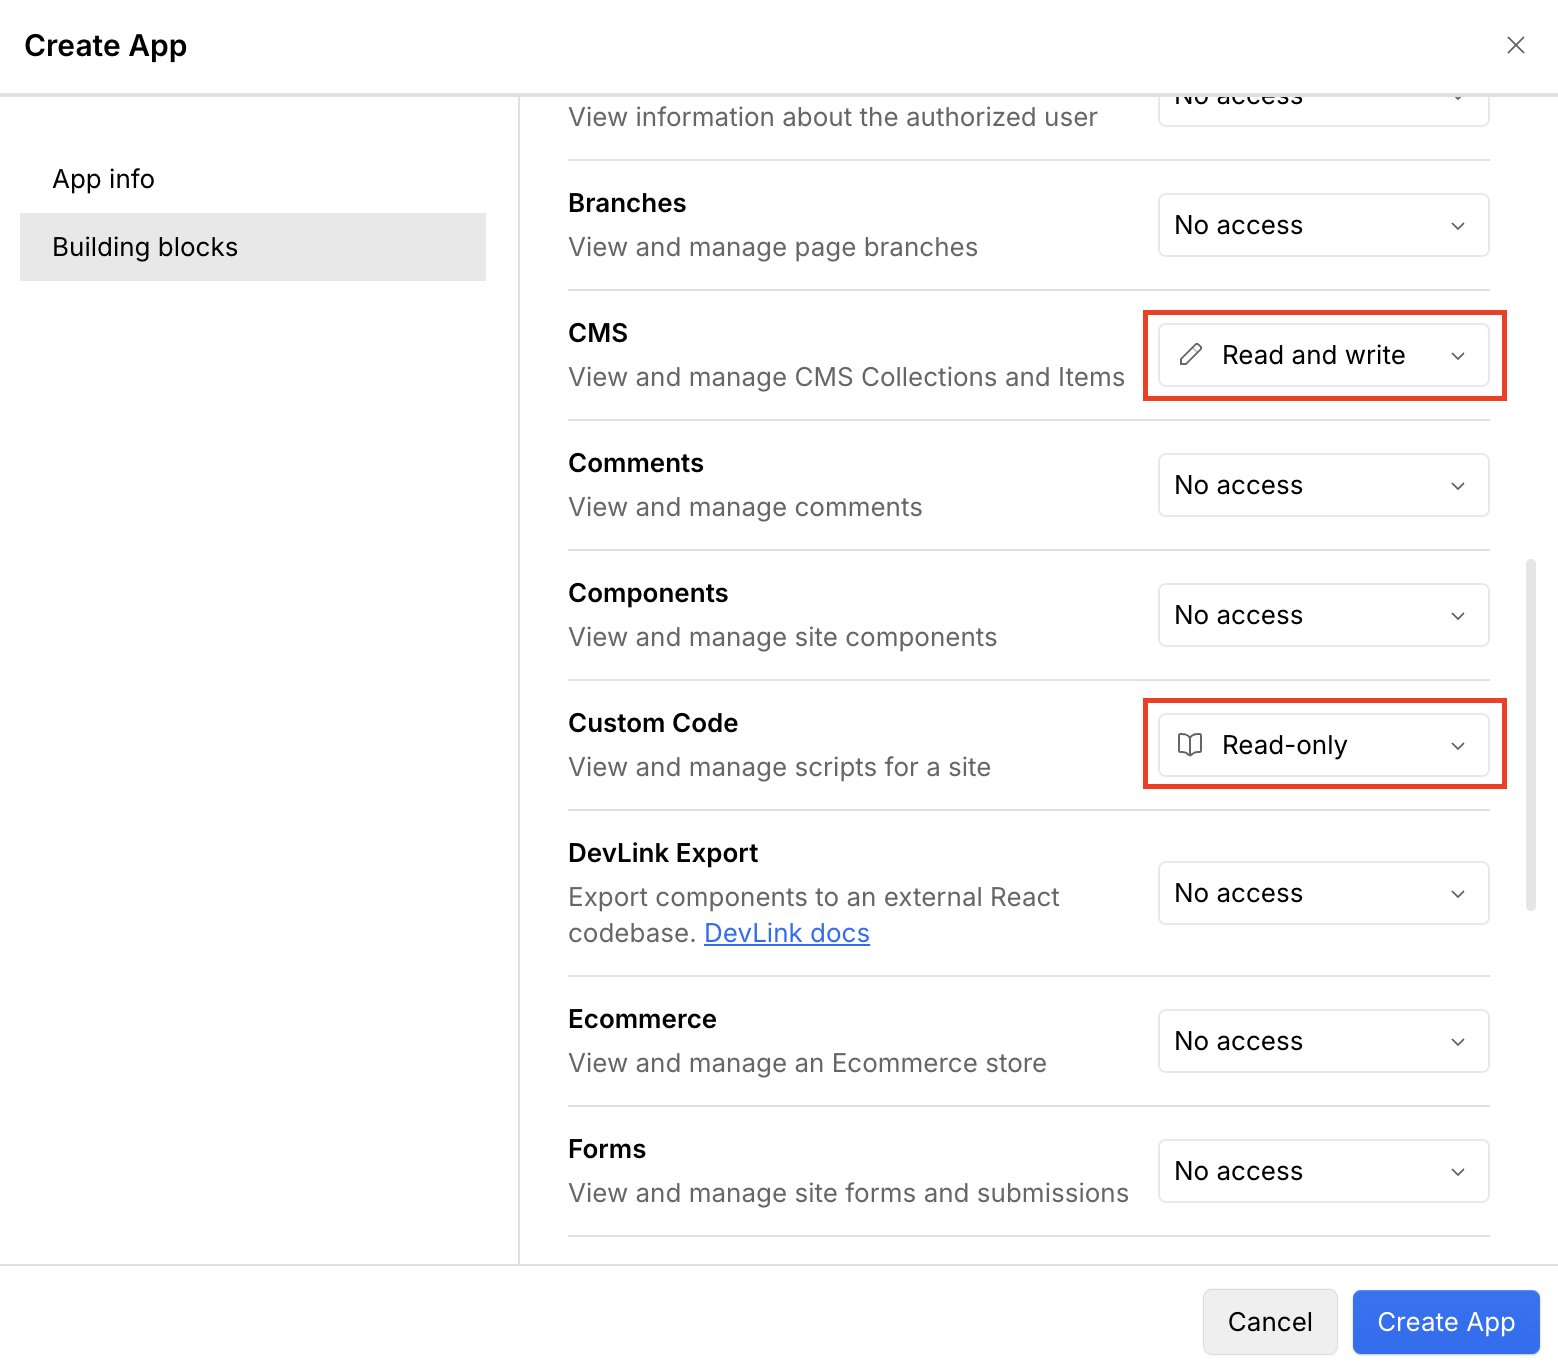
 ## Step 5: Configure CMS and Custom Code permissions
Set these permissions:
* **CMS:** Read and write
* **Custom Code:** Read-only
## Step 5: Configure CMS and Custom Code permissions
Set these permissions:
* **CMS:** Read and write
* **Custom Code:** Read-only
 ## Step 6: Configure Pages and Sites permissions
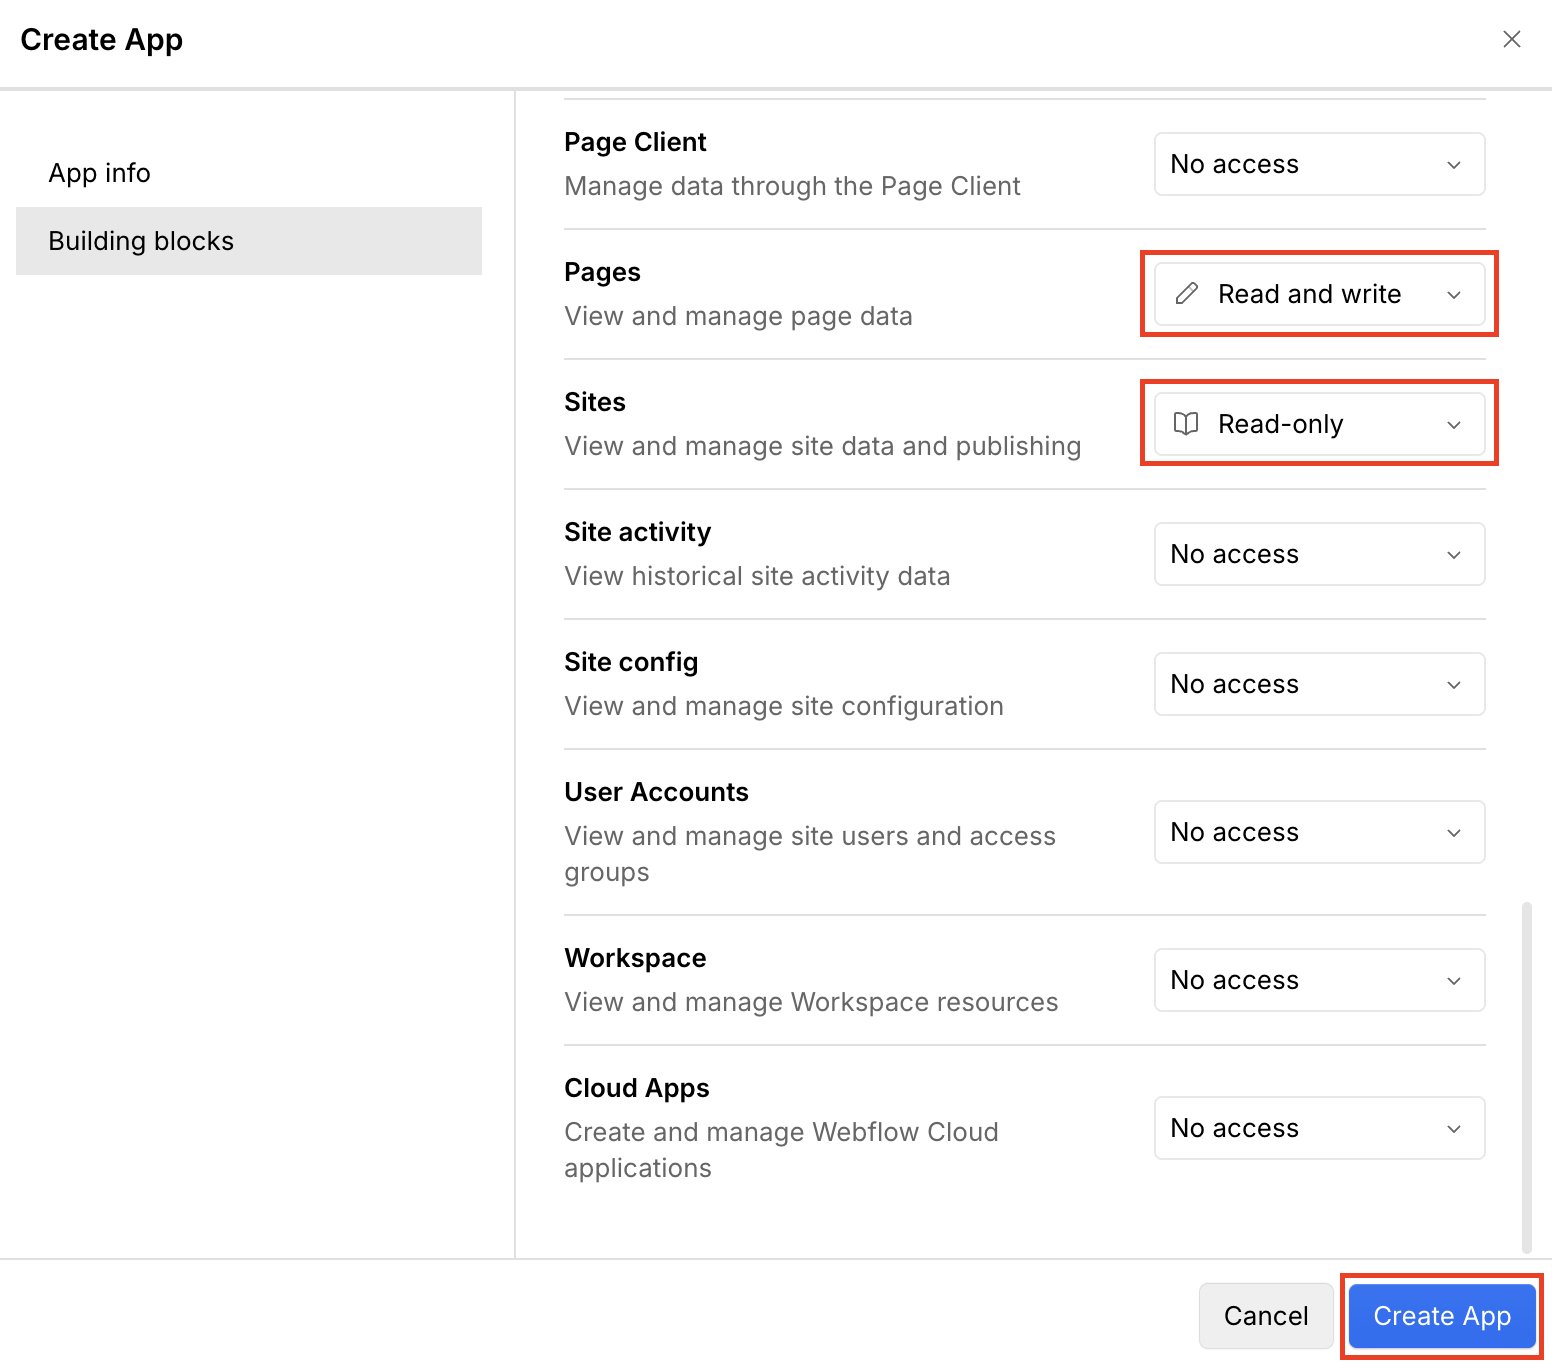
Set these permissions:
* **Pages:** Read and write
* **Sites:** Read-only
Leave the other permissions set to **No access**, then click **Create App**.
## Step 6: Configure Pages and Sites permissions
Set these permissions:
* **Pages:** Read and write
* **Sites:** Read-only
Leave the other permissions set to **No access**, then click **Create App**.
 ## Step 7: Edit the app
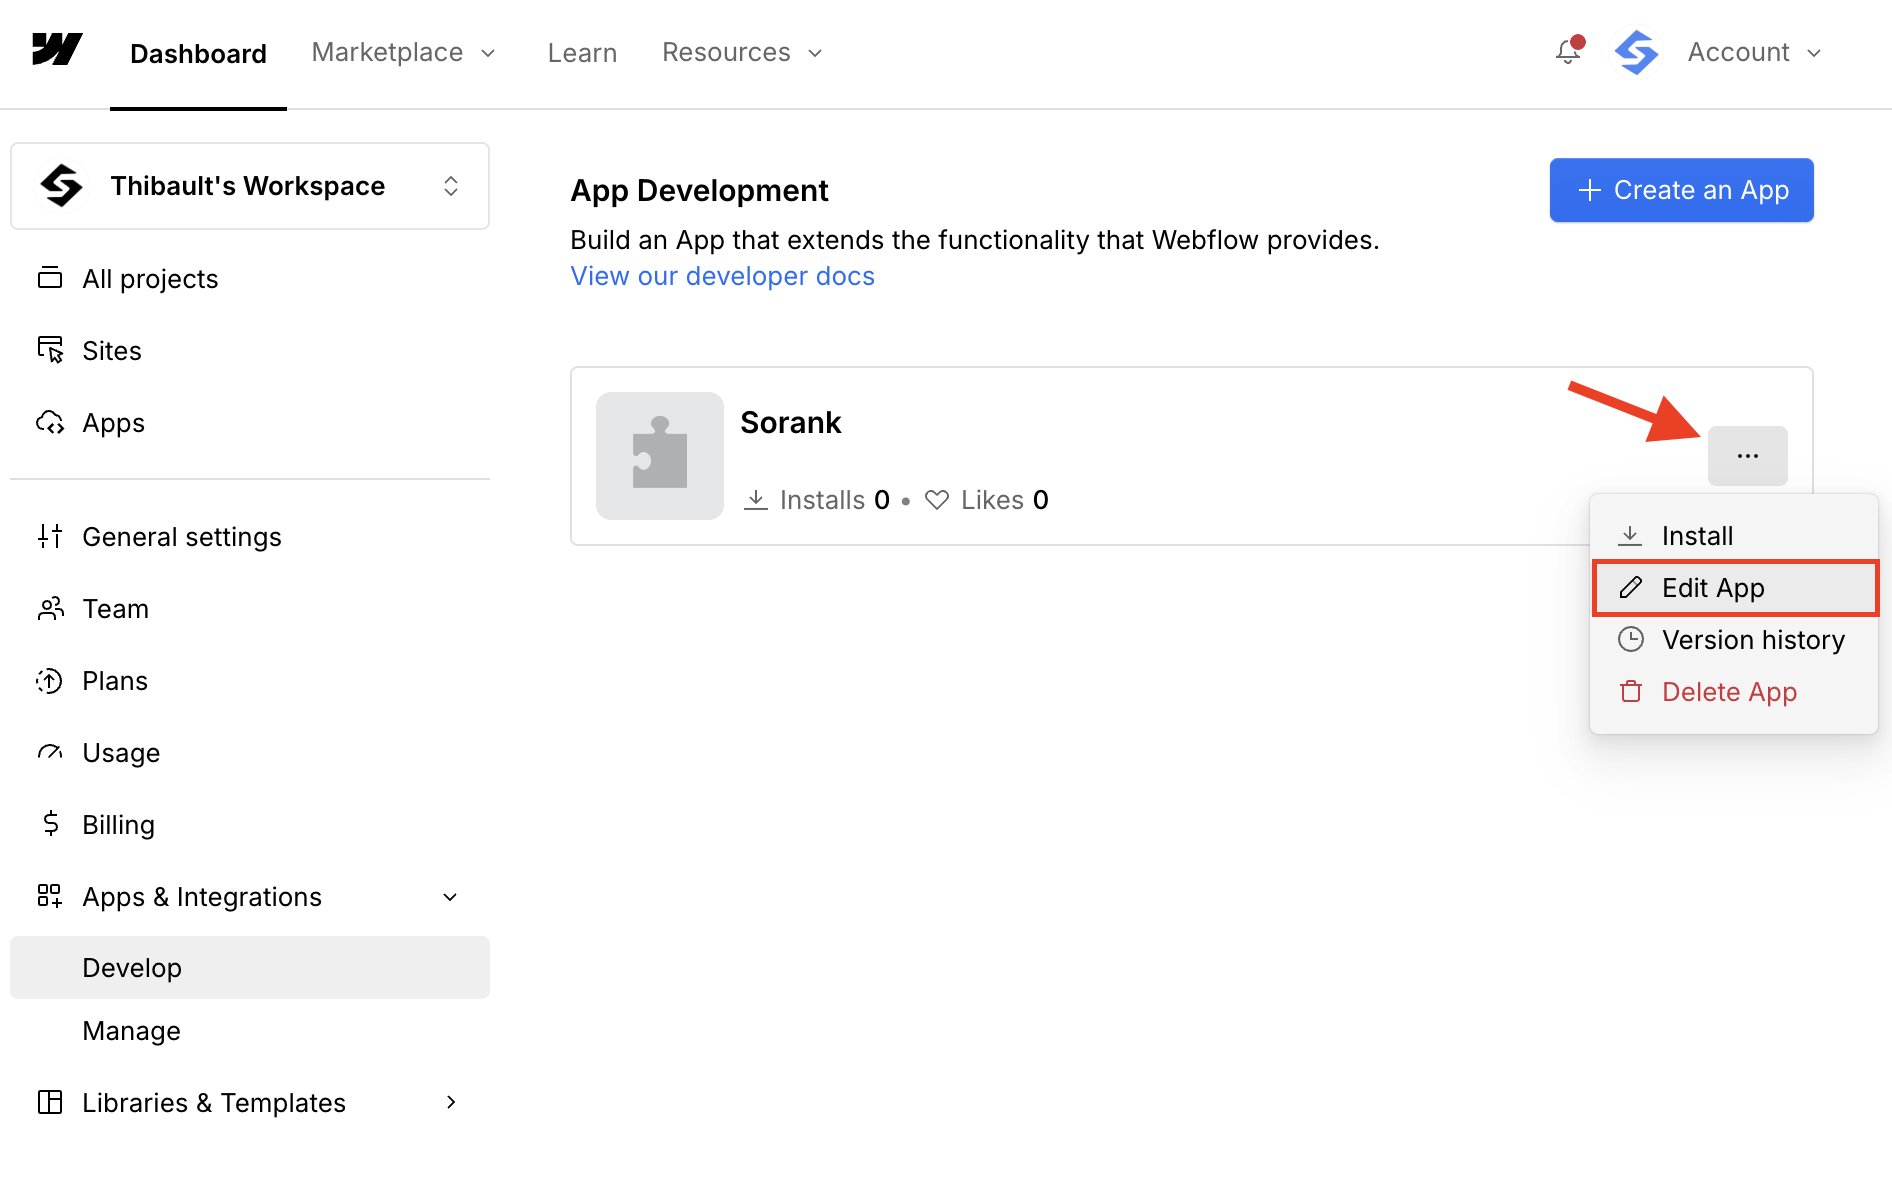
In **App Development**, open the menu for your app and click **Edit App**.
## Step 7: Edit the app
In **App Development**, open the menu for your app and click **Edit App**.
 ## Step 8: Copy your credentials
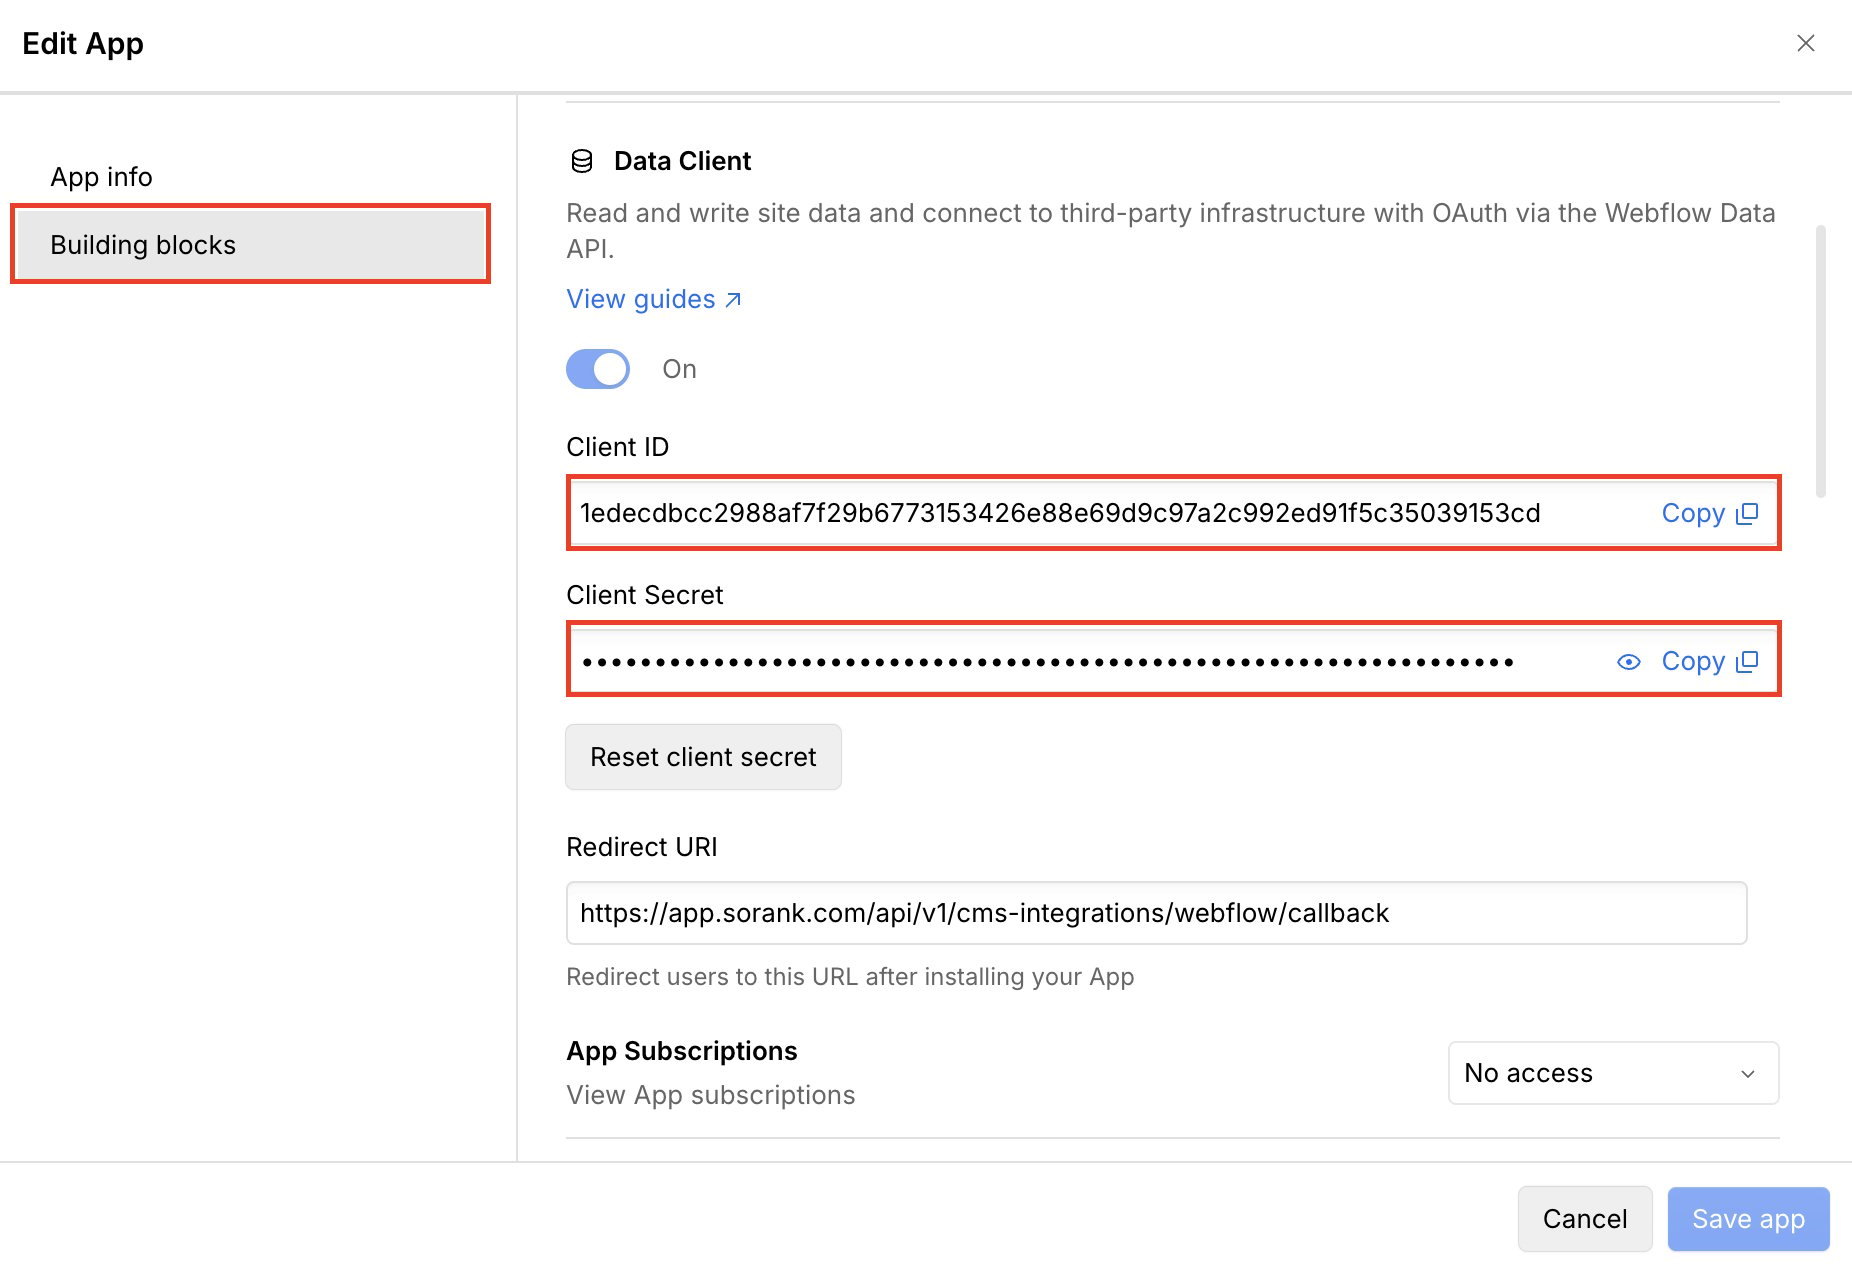
Open **Building blocks**. Copy the **Client ID**, then reveal and copy the **Client Secret**. Keep the Client Secret private.
## Step 8: Copy your credentials
Open **Building blocks**. Copy the **Client ID**, then reveal and copy the **Client Secret**. Keep the Client Secret private.
 ## Step 9: Connect Webflow to Sorank
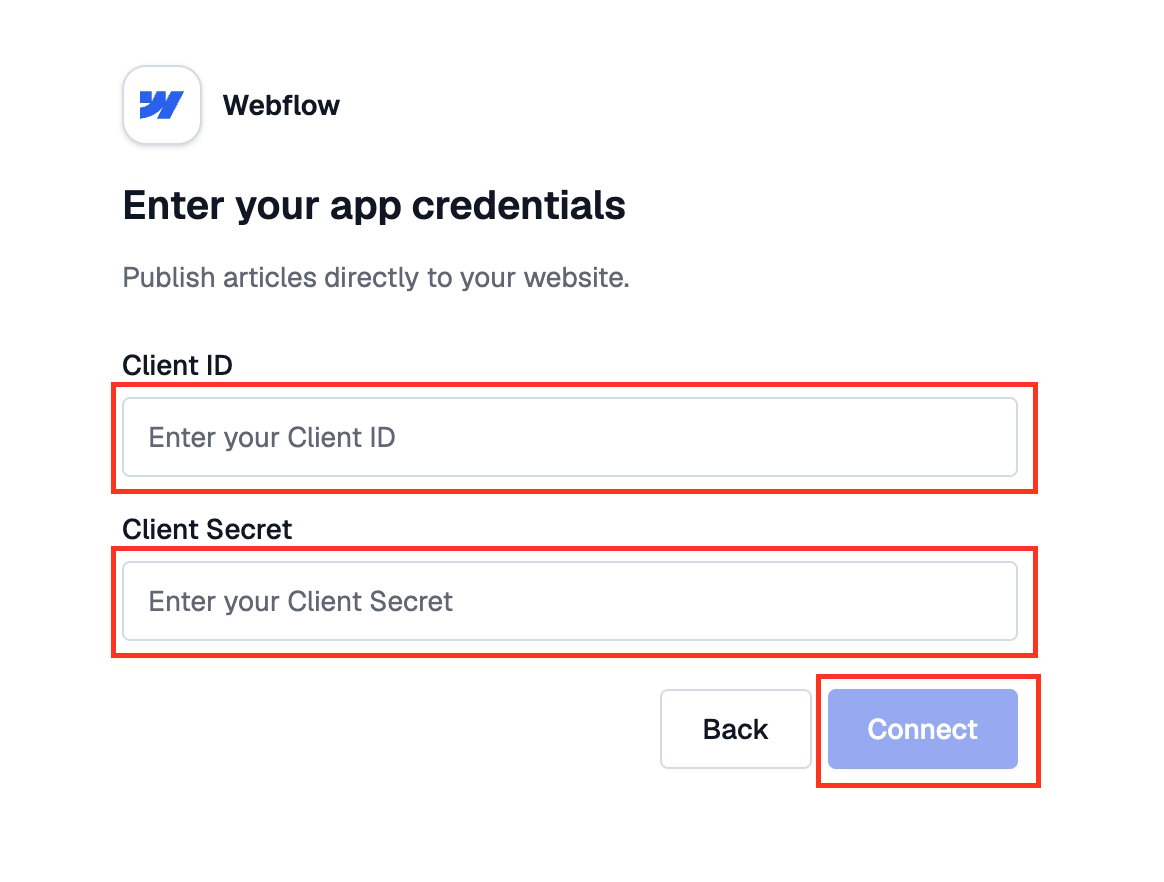
Return to Sorank. Paste the **Client ID** and **Client Secret**, then click **Connect**.
## Step 9: Connect Webflow to Sorank
Return to Sorank. Paste the **Client ID** and **Client Secret**, then click **Connect**.
 After authorization, select the Webflow site that matches your Sorank website. Then select the CMS collection where Sorank should publish your articles. You cannot continue with a site that has never been published live.
Your Webflow connection is now ready. You can publish or schedule articles from Sorank.
After authorization, select the Webflow site that matches your Sorank website. Then select the CMS collection where Sorank should publish your articles. You cannot continue with a site that has never been published live.
Your Webflow connection is now ready. You can publish or schedule articles from Sorank.