> ## Documentation Index
> Fetch the complete documentation index at: https://sorank.com/llms.txt
> Use this file to discover all available pages before exploring further.
# Connect Shopify to Sorank
> Doc Sorank - Shopify
## Open the Integrations page in Sorank
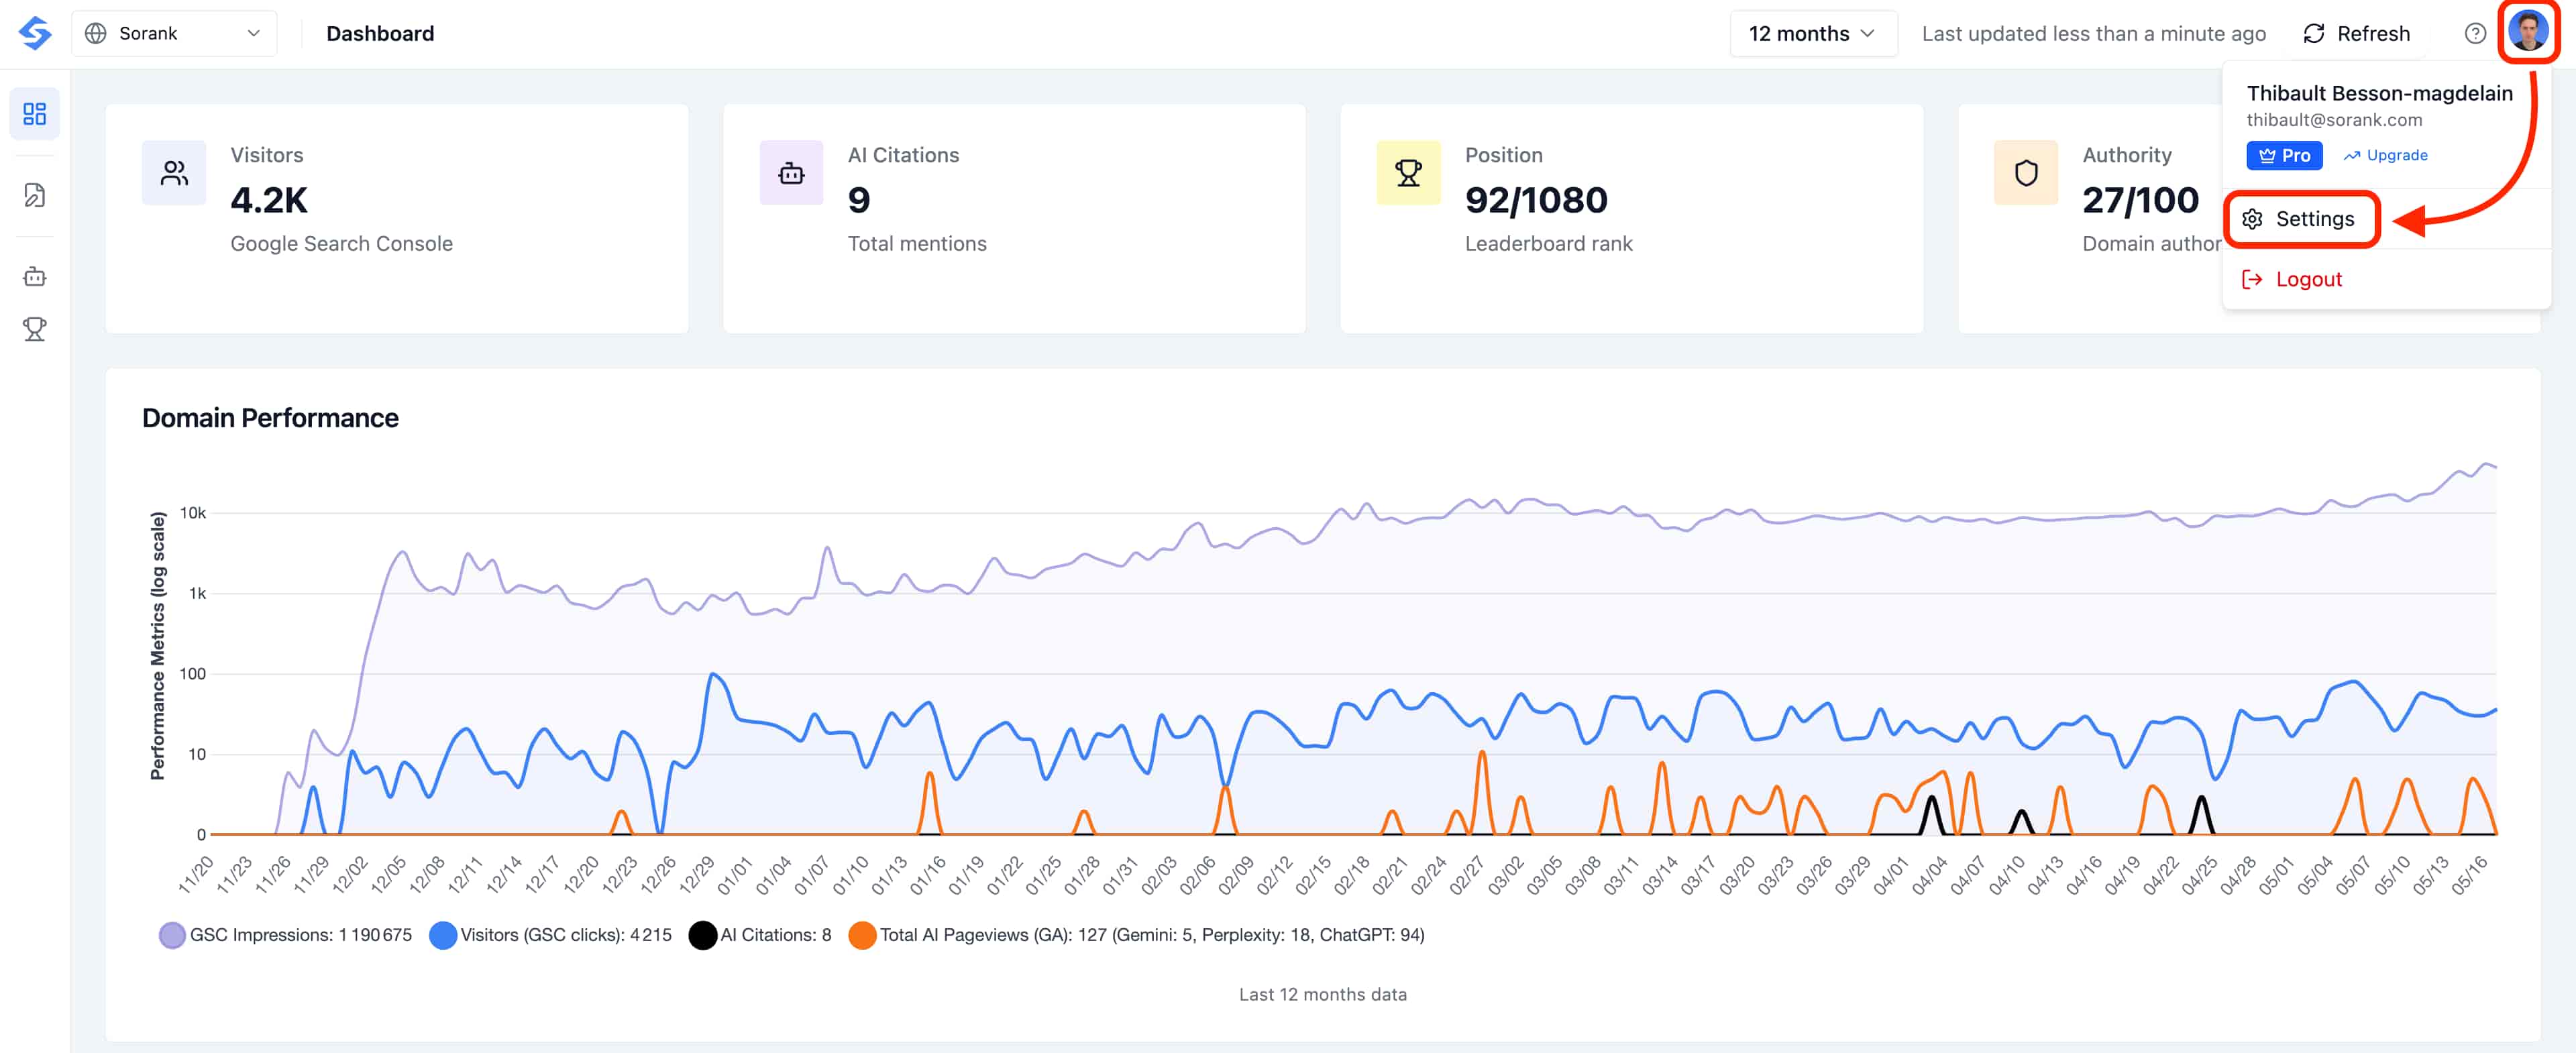
Before connecting your CMS, head to the **Integrations** page in Sorank. Click your **profile avatar** in the top-right corner of the dashboard, then select **Settings**.
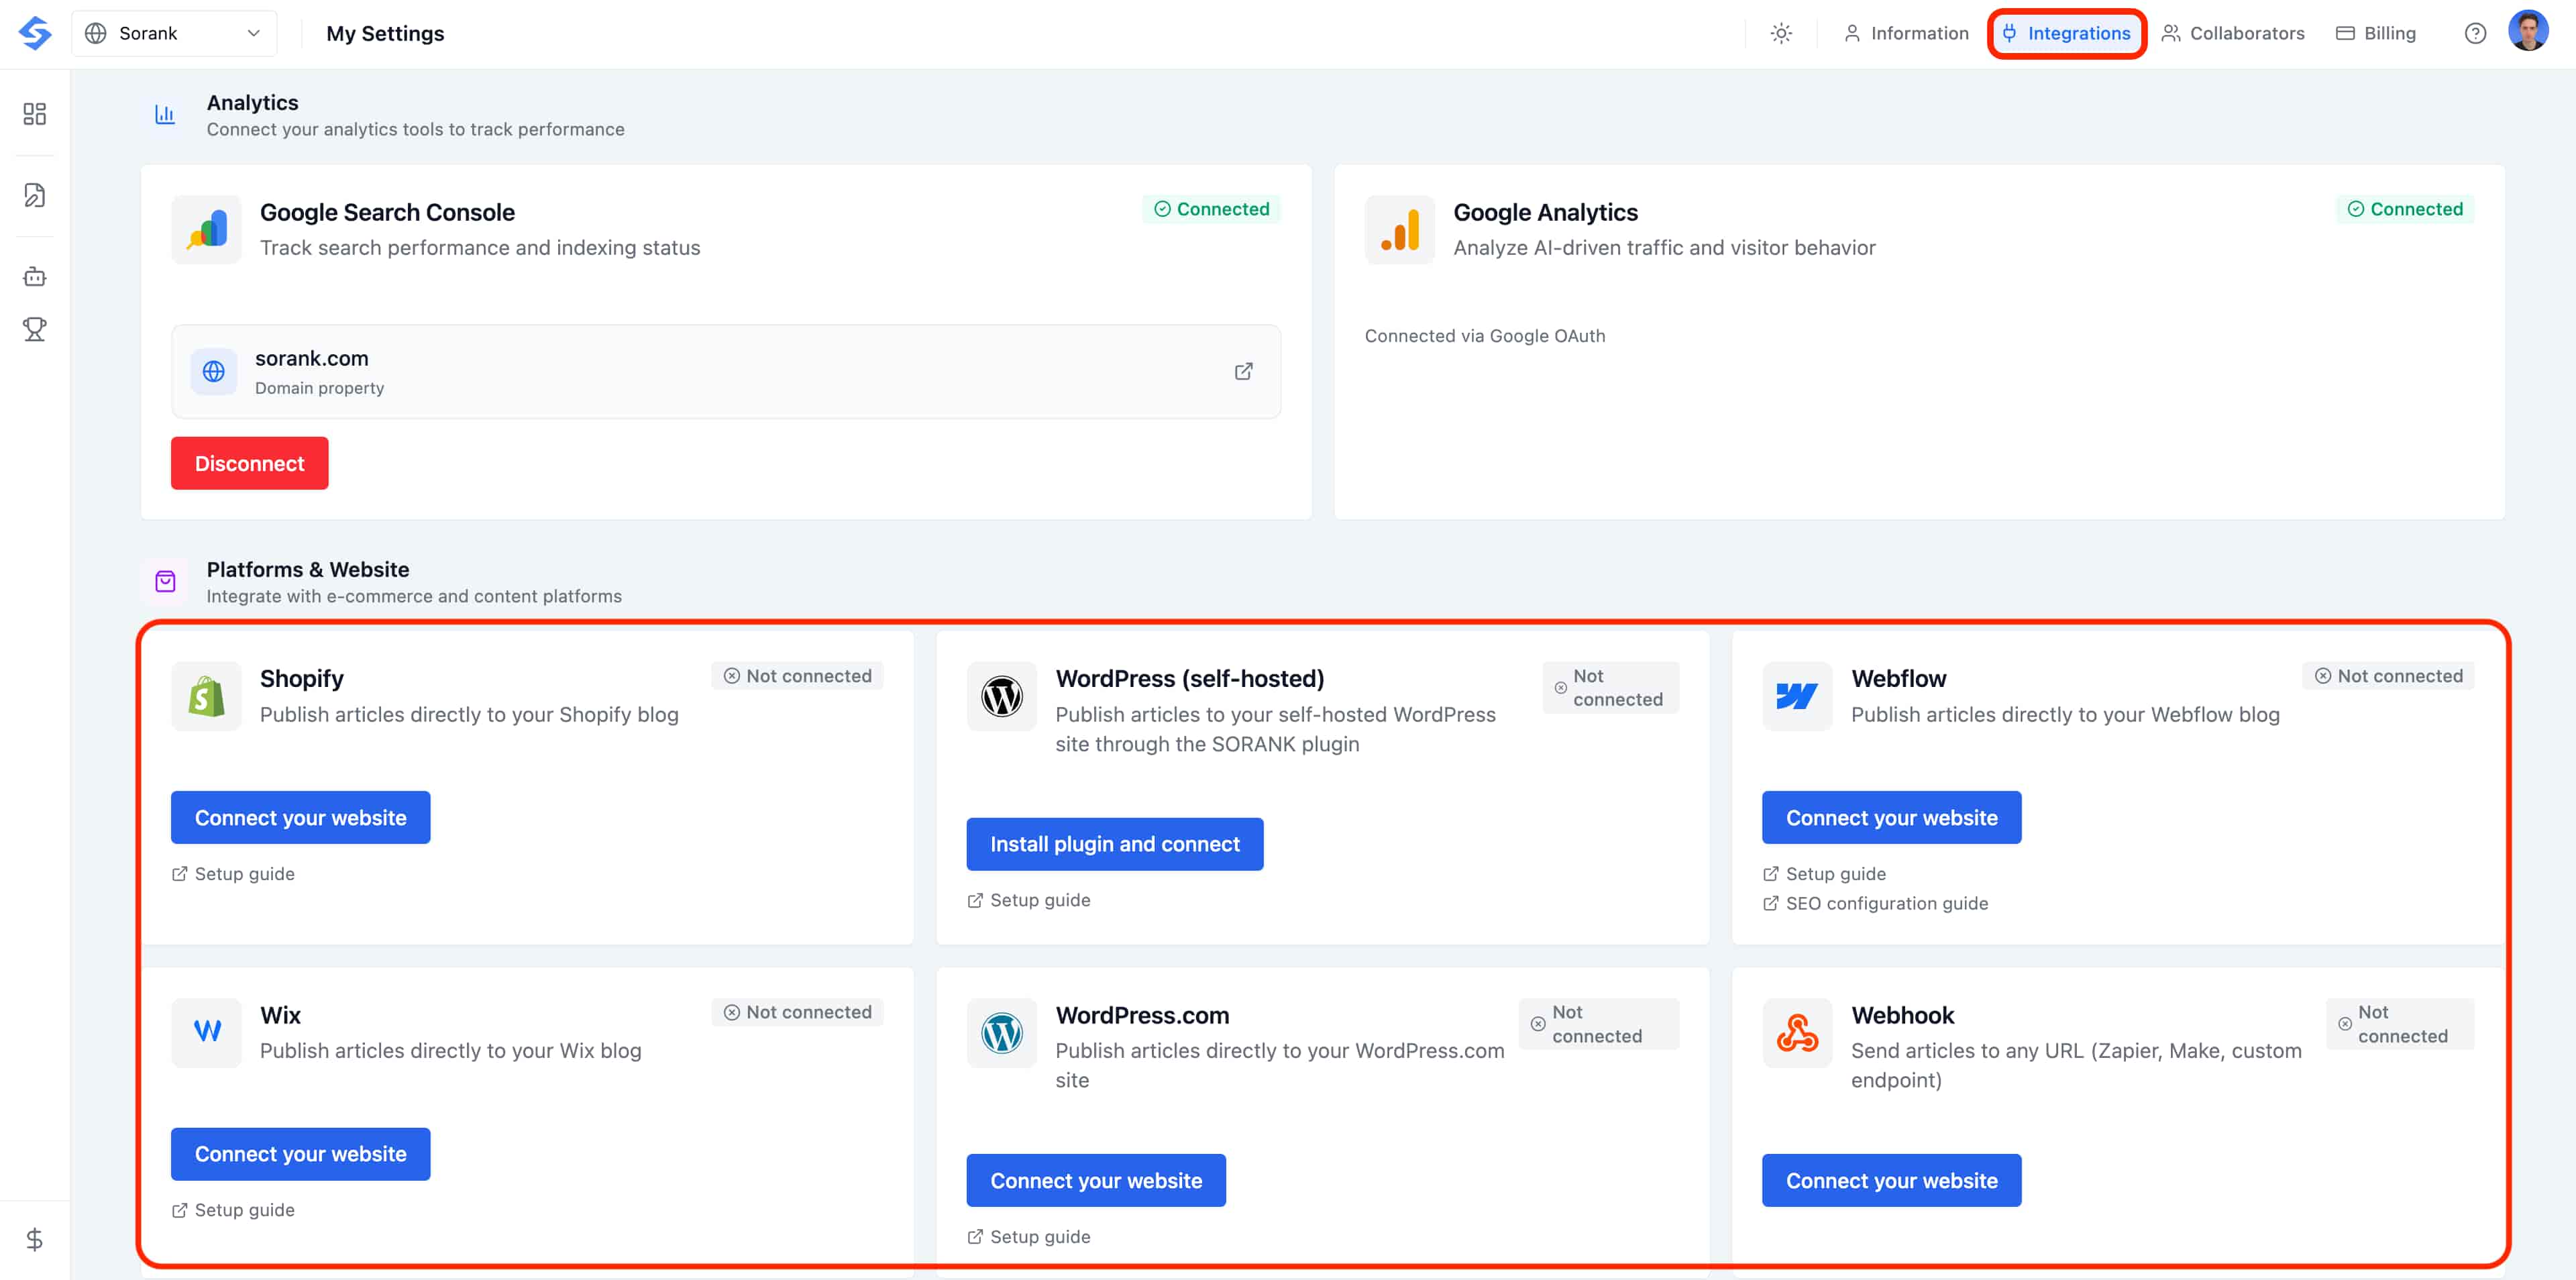 In the Settings page, click the **Integrations** tab at the top. This is where every CMS connector lives.
 In this article, we explain how you can **create** and **update** a Sorank app to allow us to manage your blog articles and other SEO/GEO optimisation.
First, let's create an app.
You will **find a tutorial for updating your existing app at the bottom of this page.**
## CREATE THE APP
### Step 1: Go to Your Integration Settings
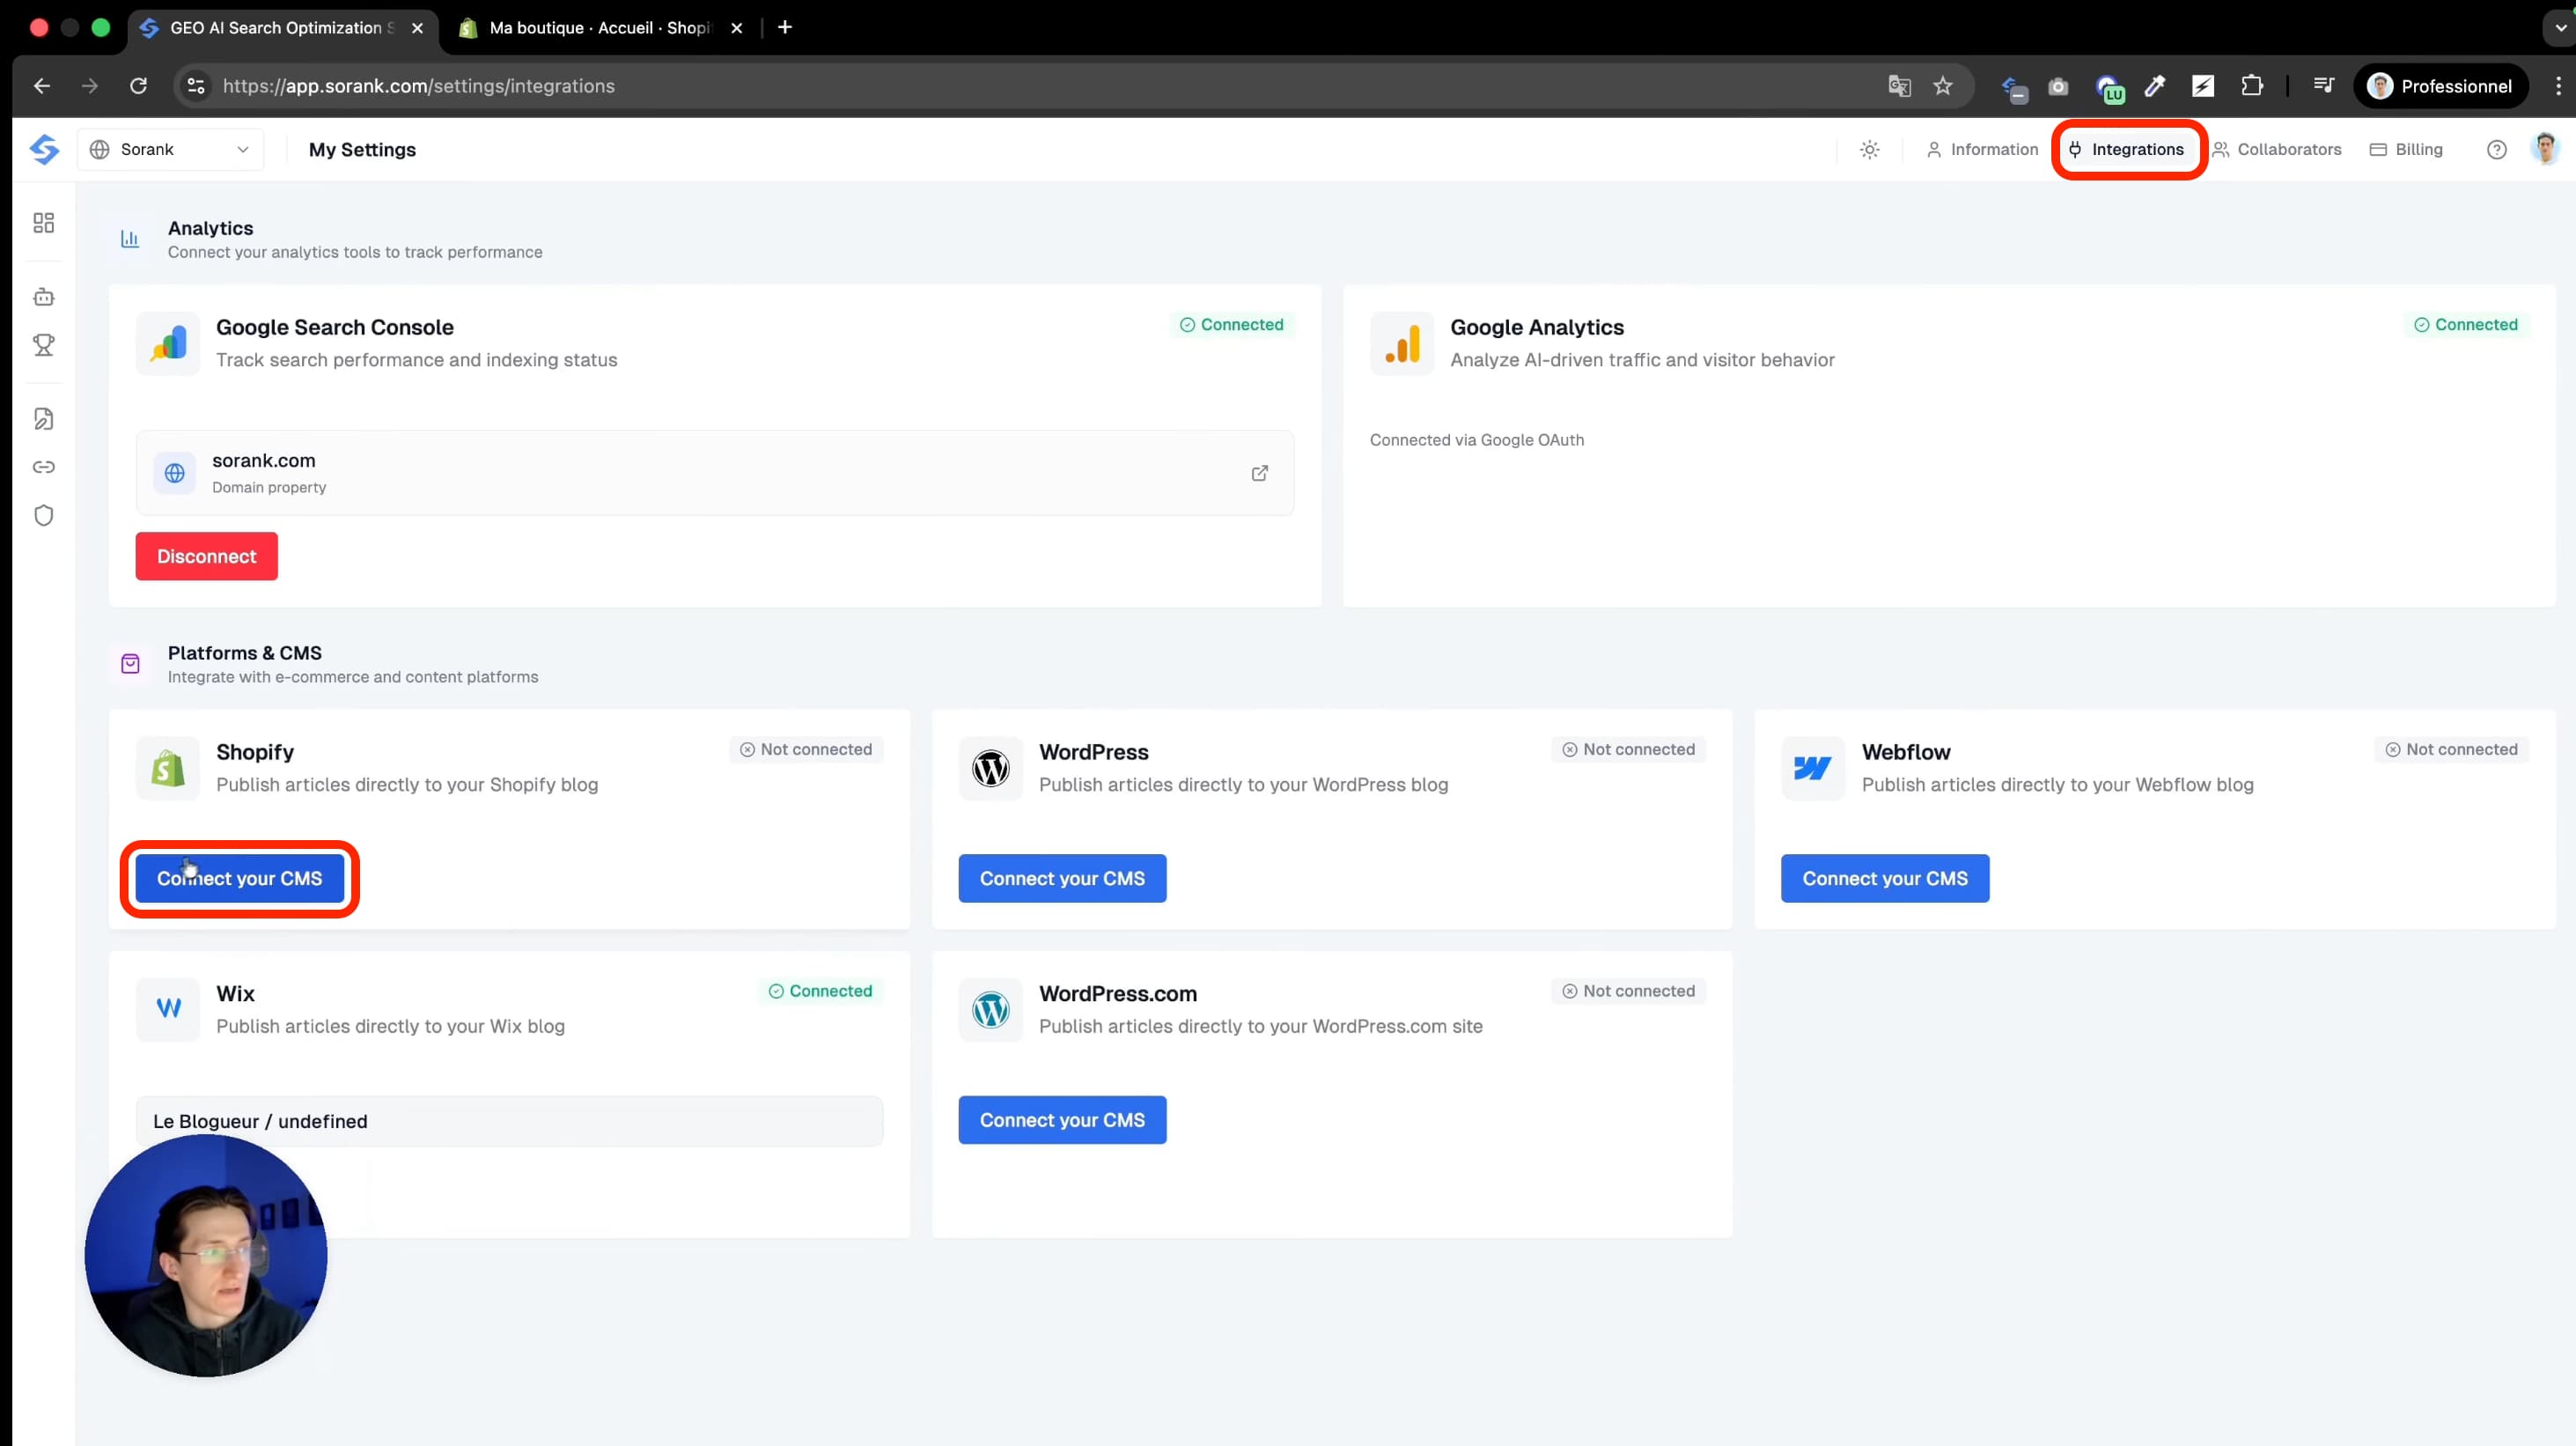
In Sorank, click the publish button on the SEO articles page or go to Settings > Integration. Click "Connect your CMS" and select Shopify.
In this article, we explain how you can **create** and **update** a Sorank app to allow us to manage your blog articles and other SEO/GEO optimisation.
First, let's create an app.
You will **find a tutorial for updating your existing app at the bottom of this page.**
## CREATE THE APP
### Step 1: Go to Your Integration Settings
In Sorank, click the publish button on the SEO articles page or go to Settings > Integration. Click "Connect your CMS" and select Shopify.
 ### Step 2: Create an App on Shopify
Go to the Shopify Dev Dashboard. Search "dev dashboard Shopify" on Google and click the first link. Click "Create an application" and select "Start from dev dashboard." Name it "sorank" and create it.
### Step 2: Create an App on Shopify
Go to the Shopify Dev Dashboard. Search "dev dashboard Shopify" on Google and click the first link. Click "Create an application" and select "Start from dev dashboard." Name it "sorank" and create it.
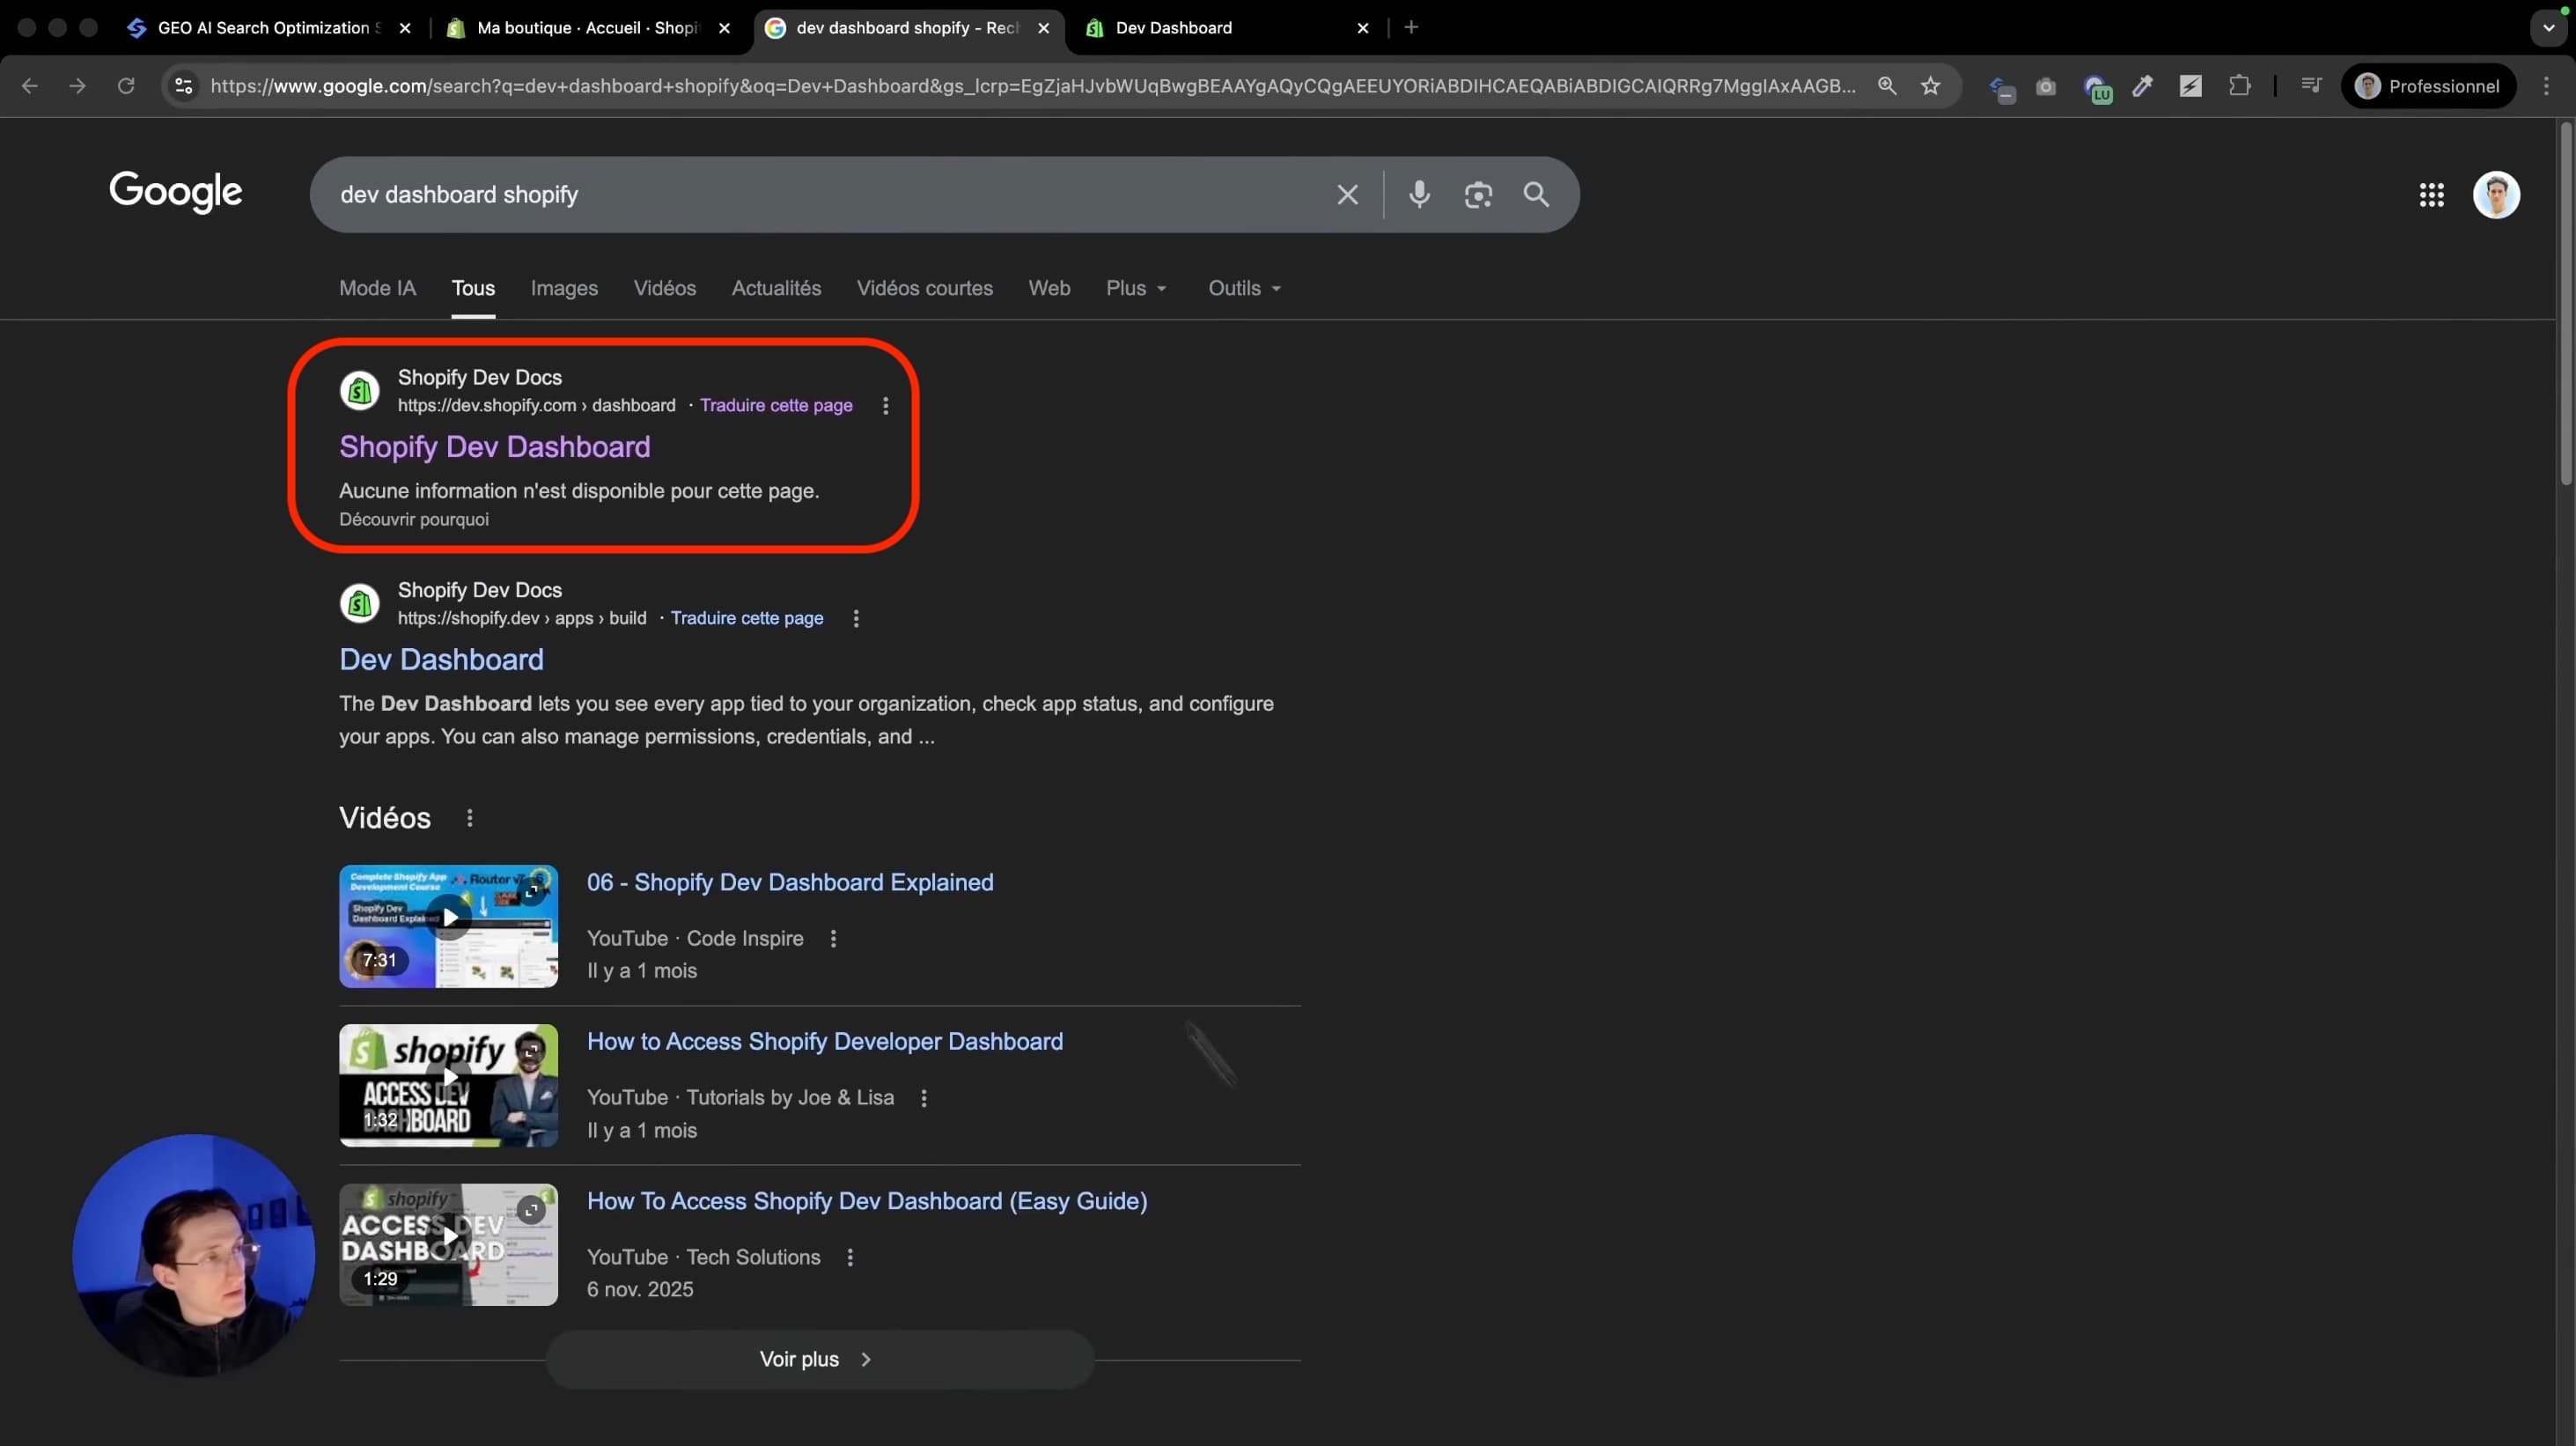 The Shopify Dev Dashboard homepage with the "Create an app" button.
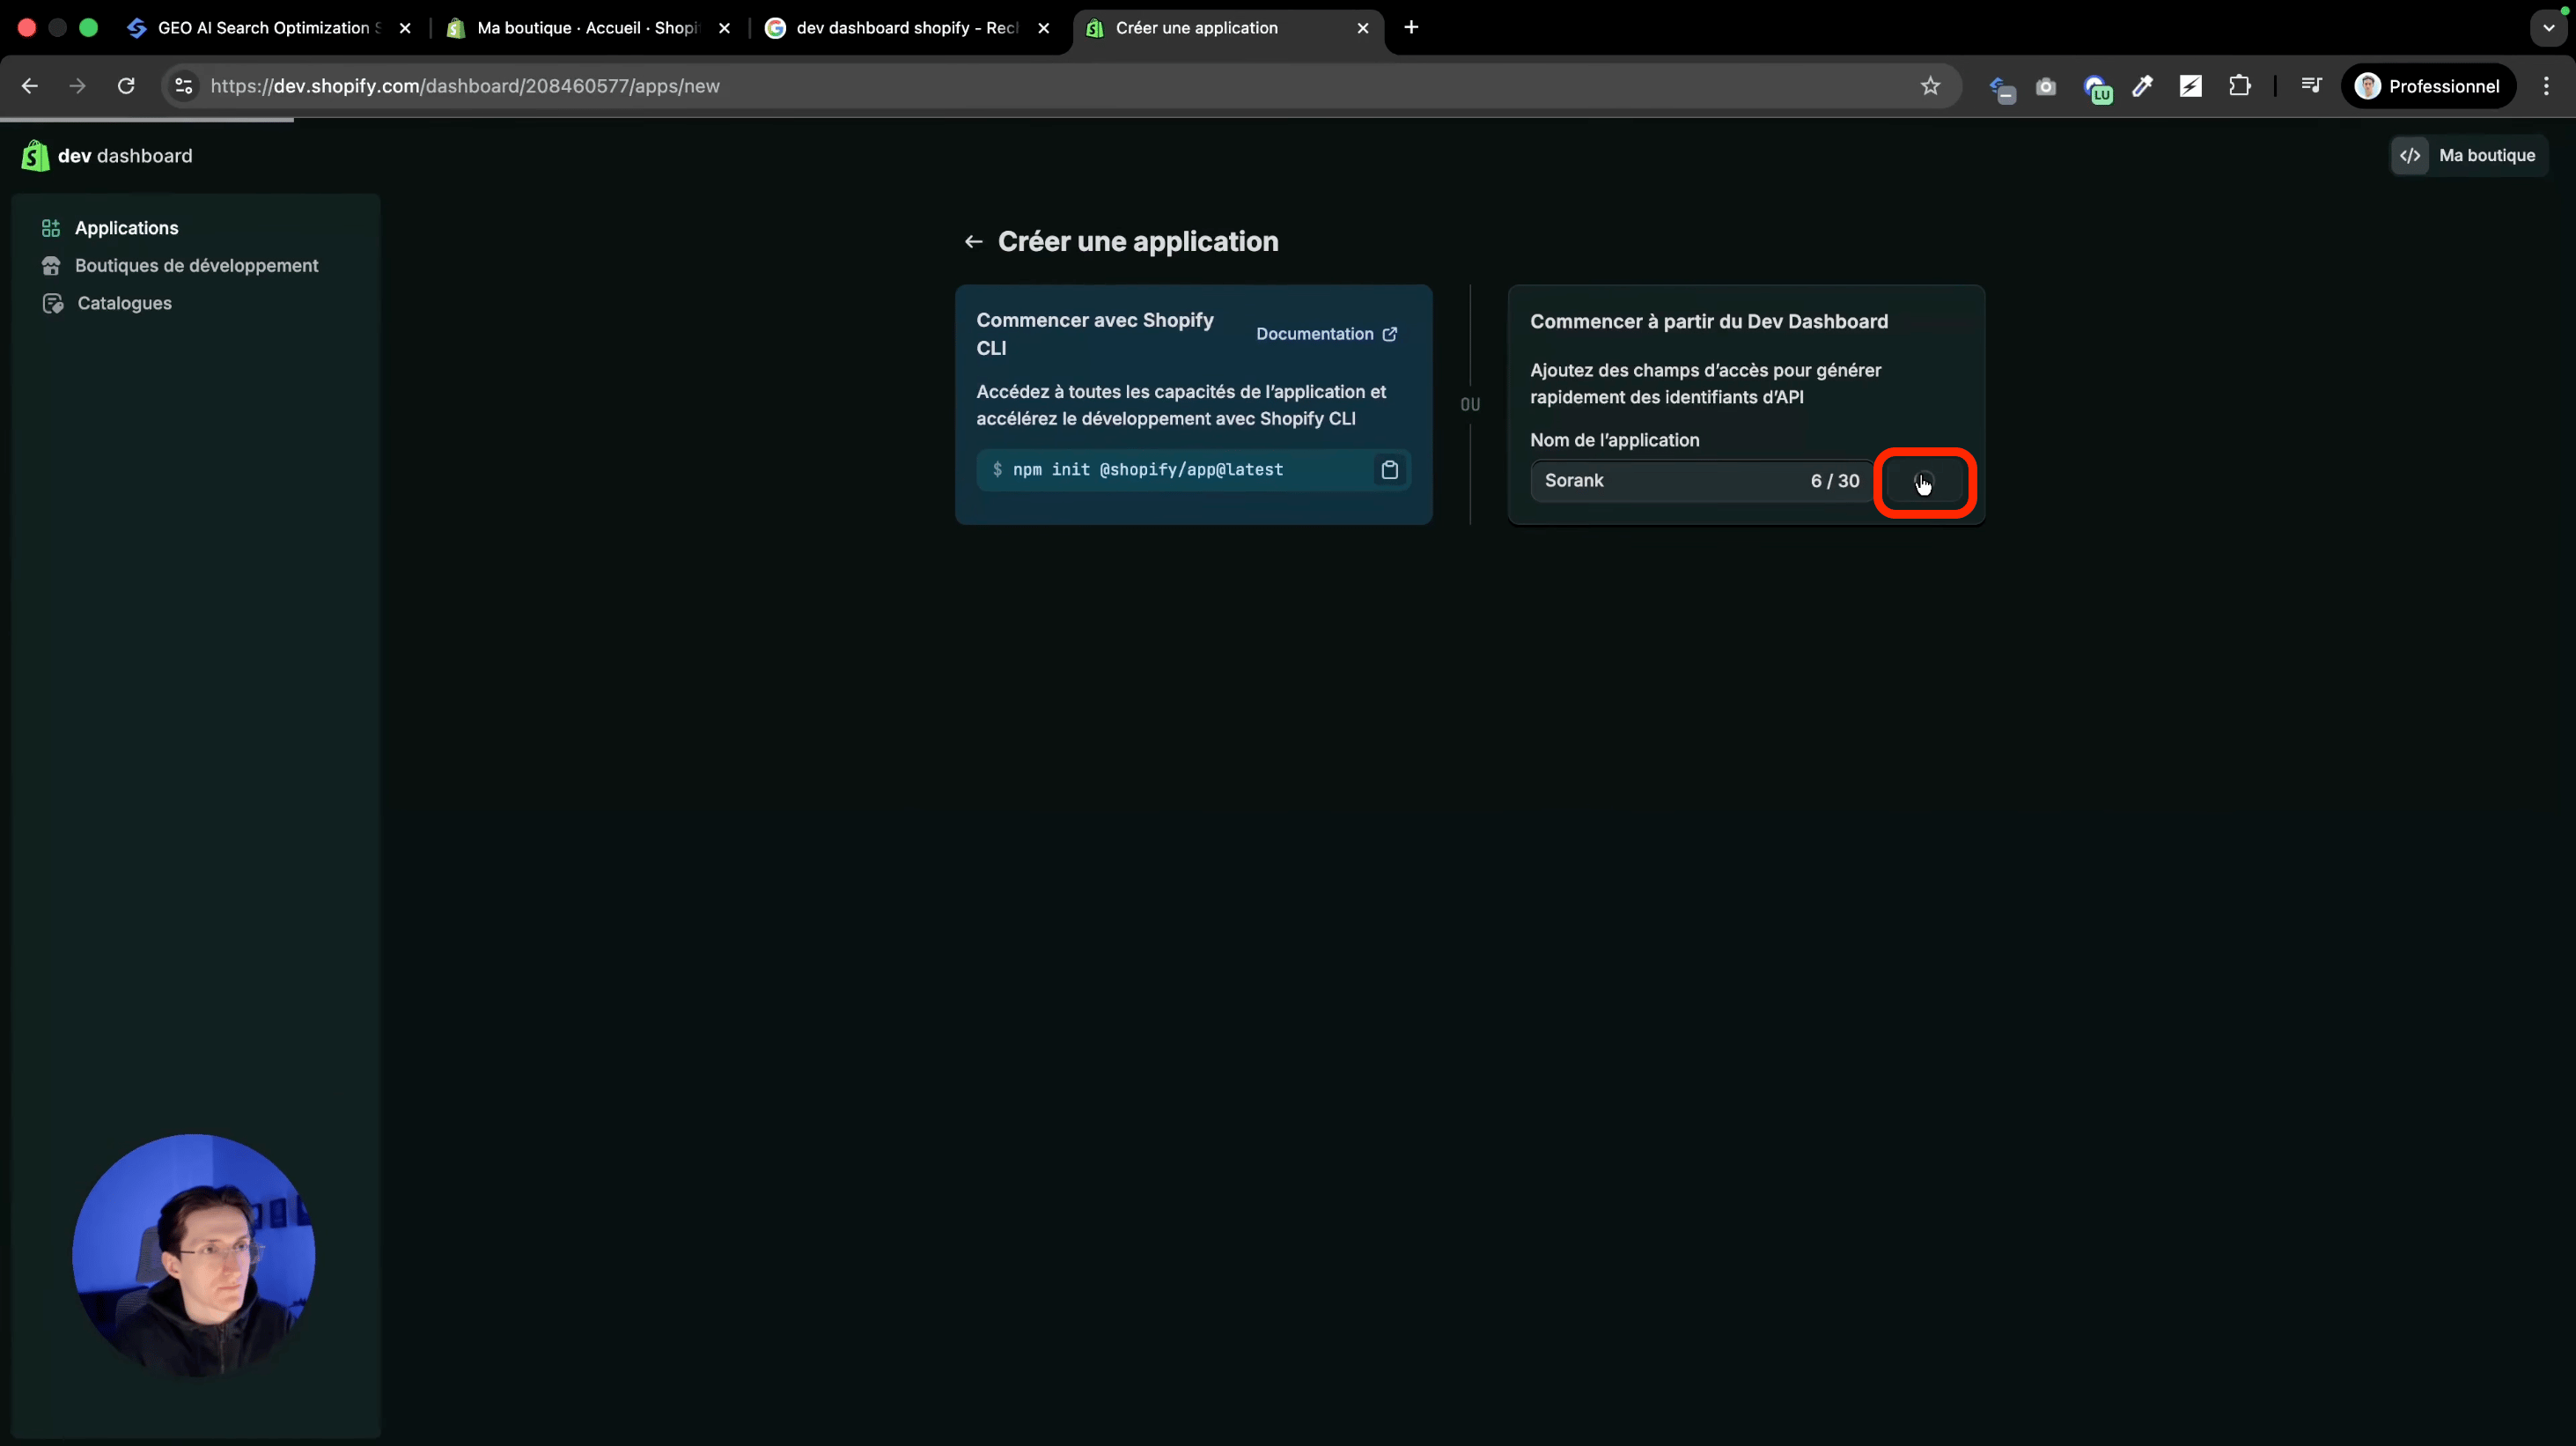 The app creation form where you name your application "sorank."
### Step 3: Set Up the App URL and Redirect URL
The app creation form where you name your application "sorank."
### Step 3: Set Up the App URL and Redirect URL
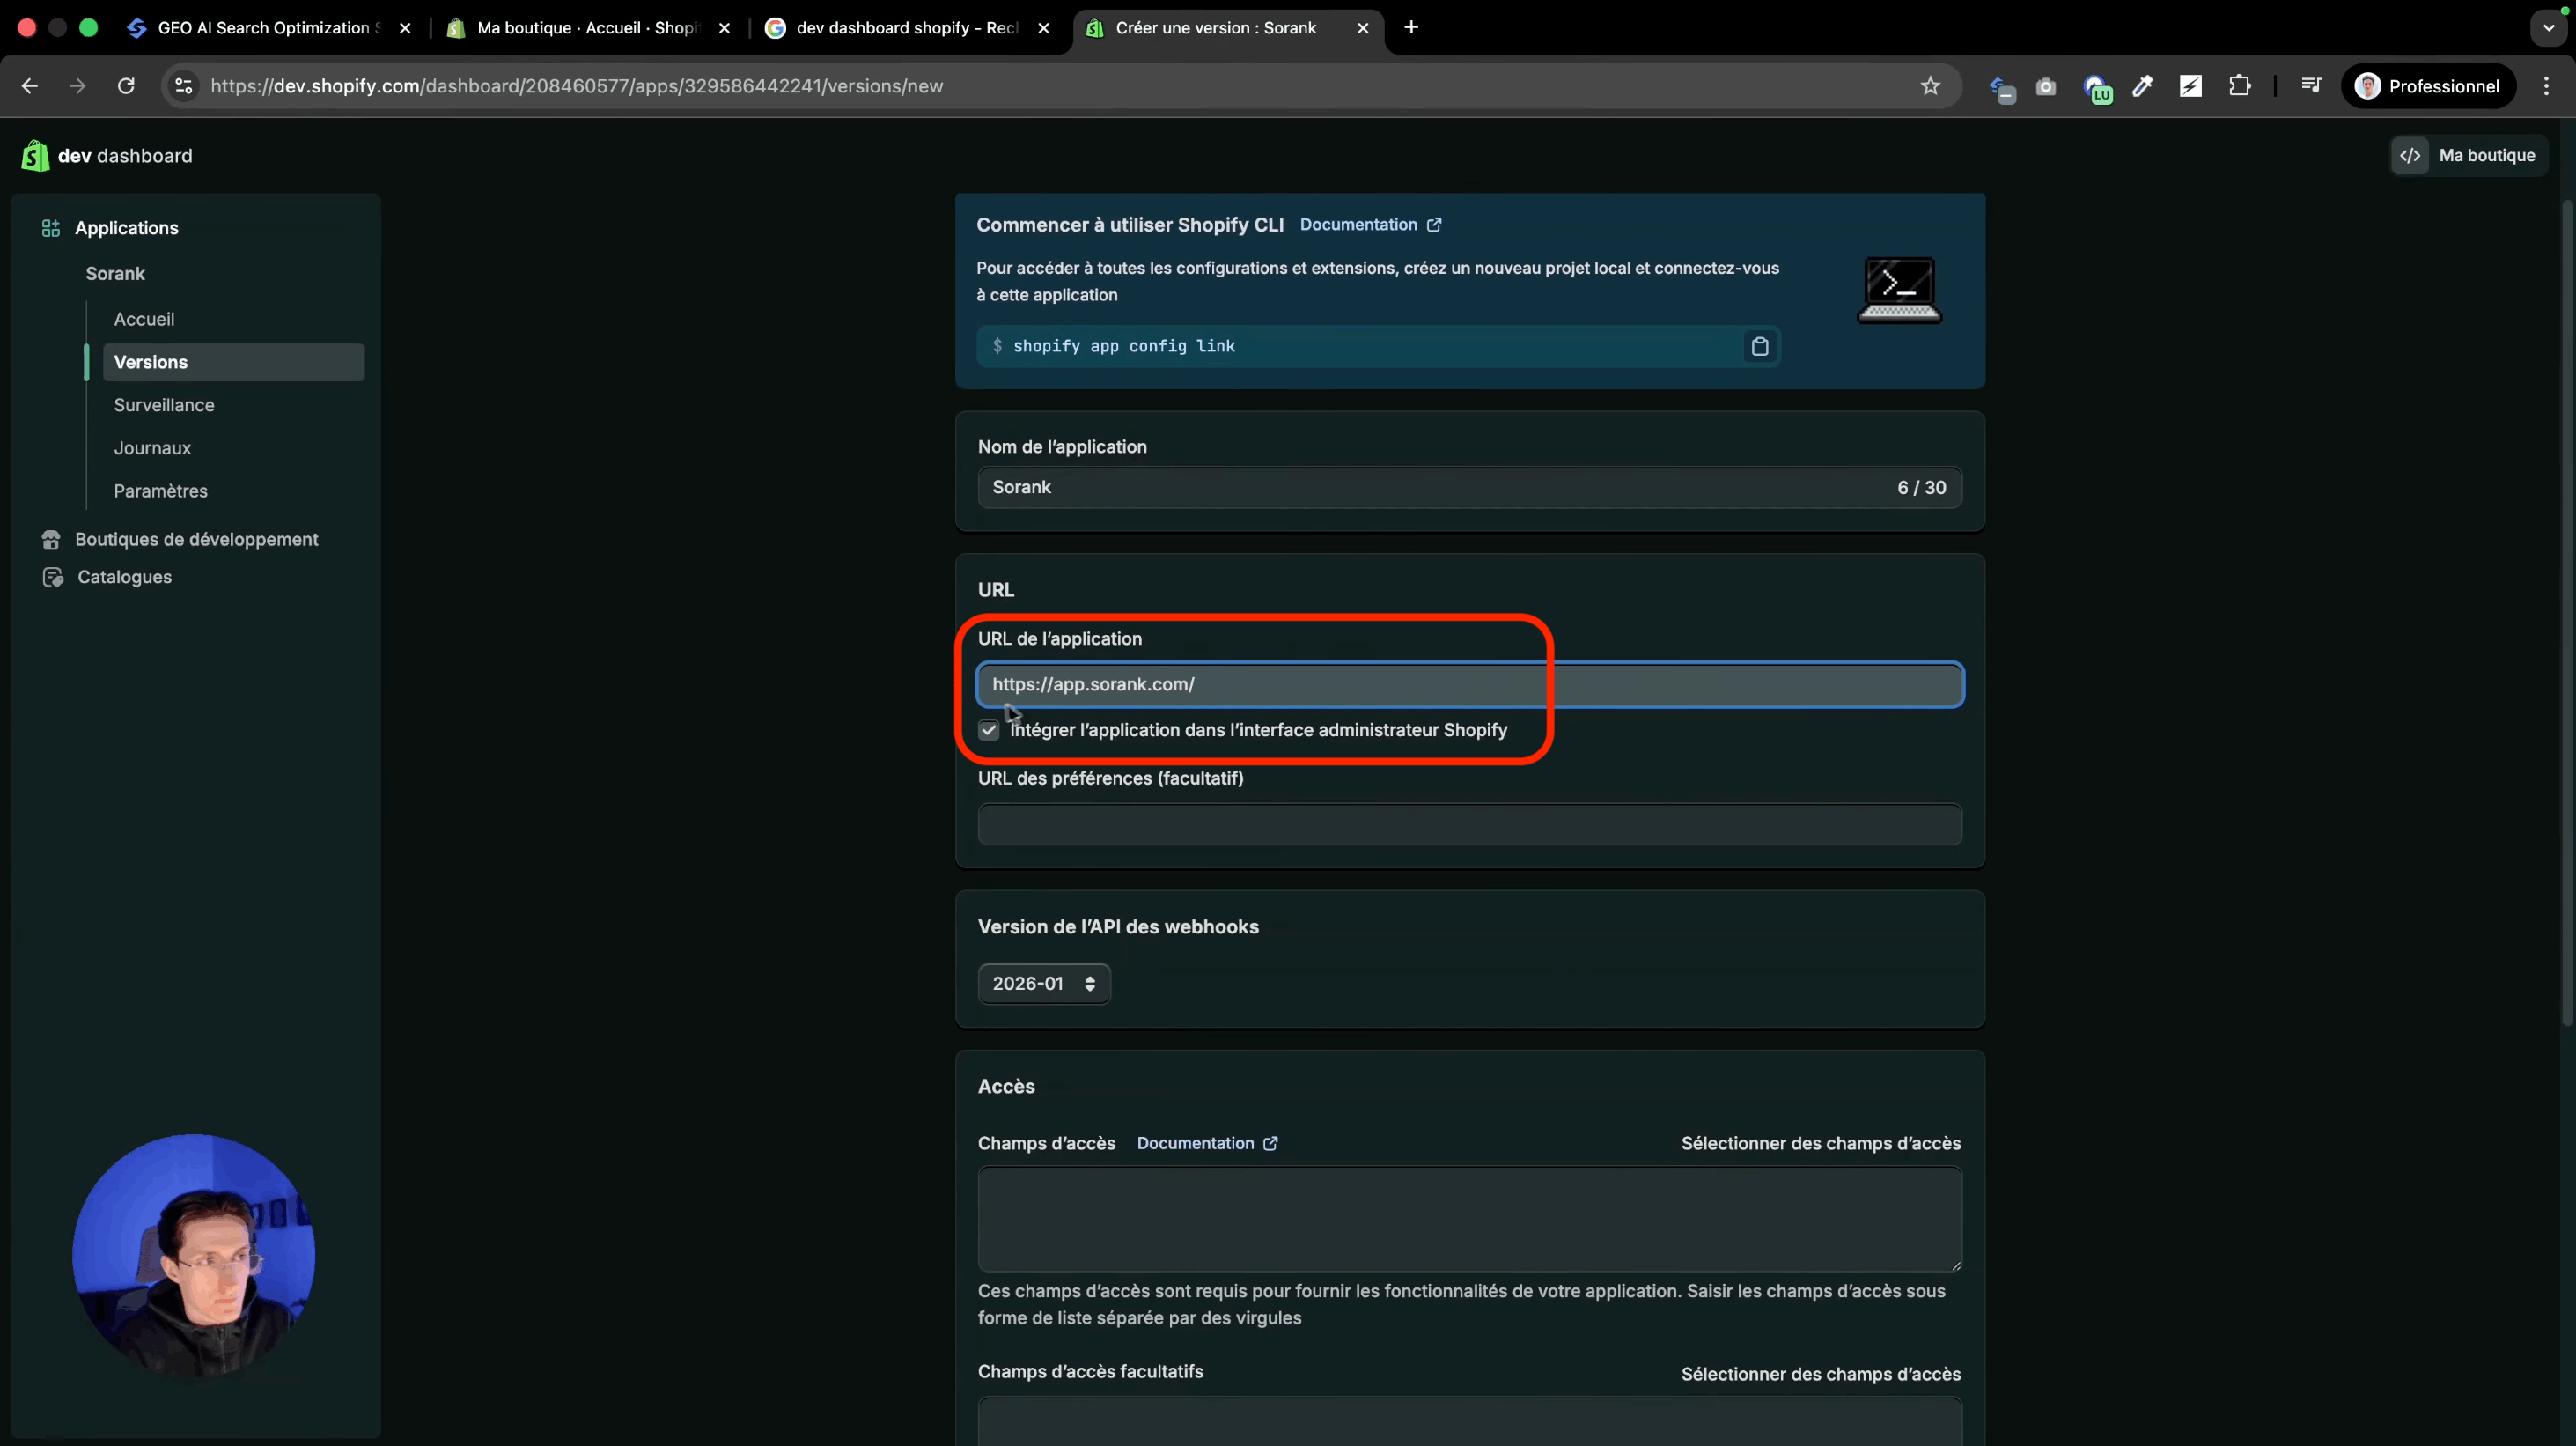 Add the url of Sorank website.
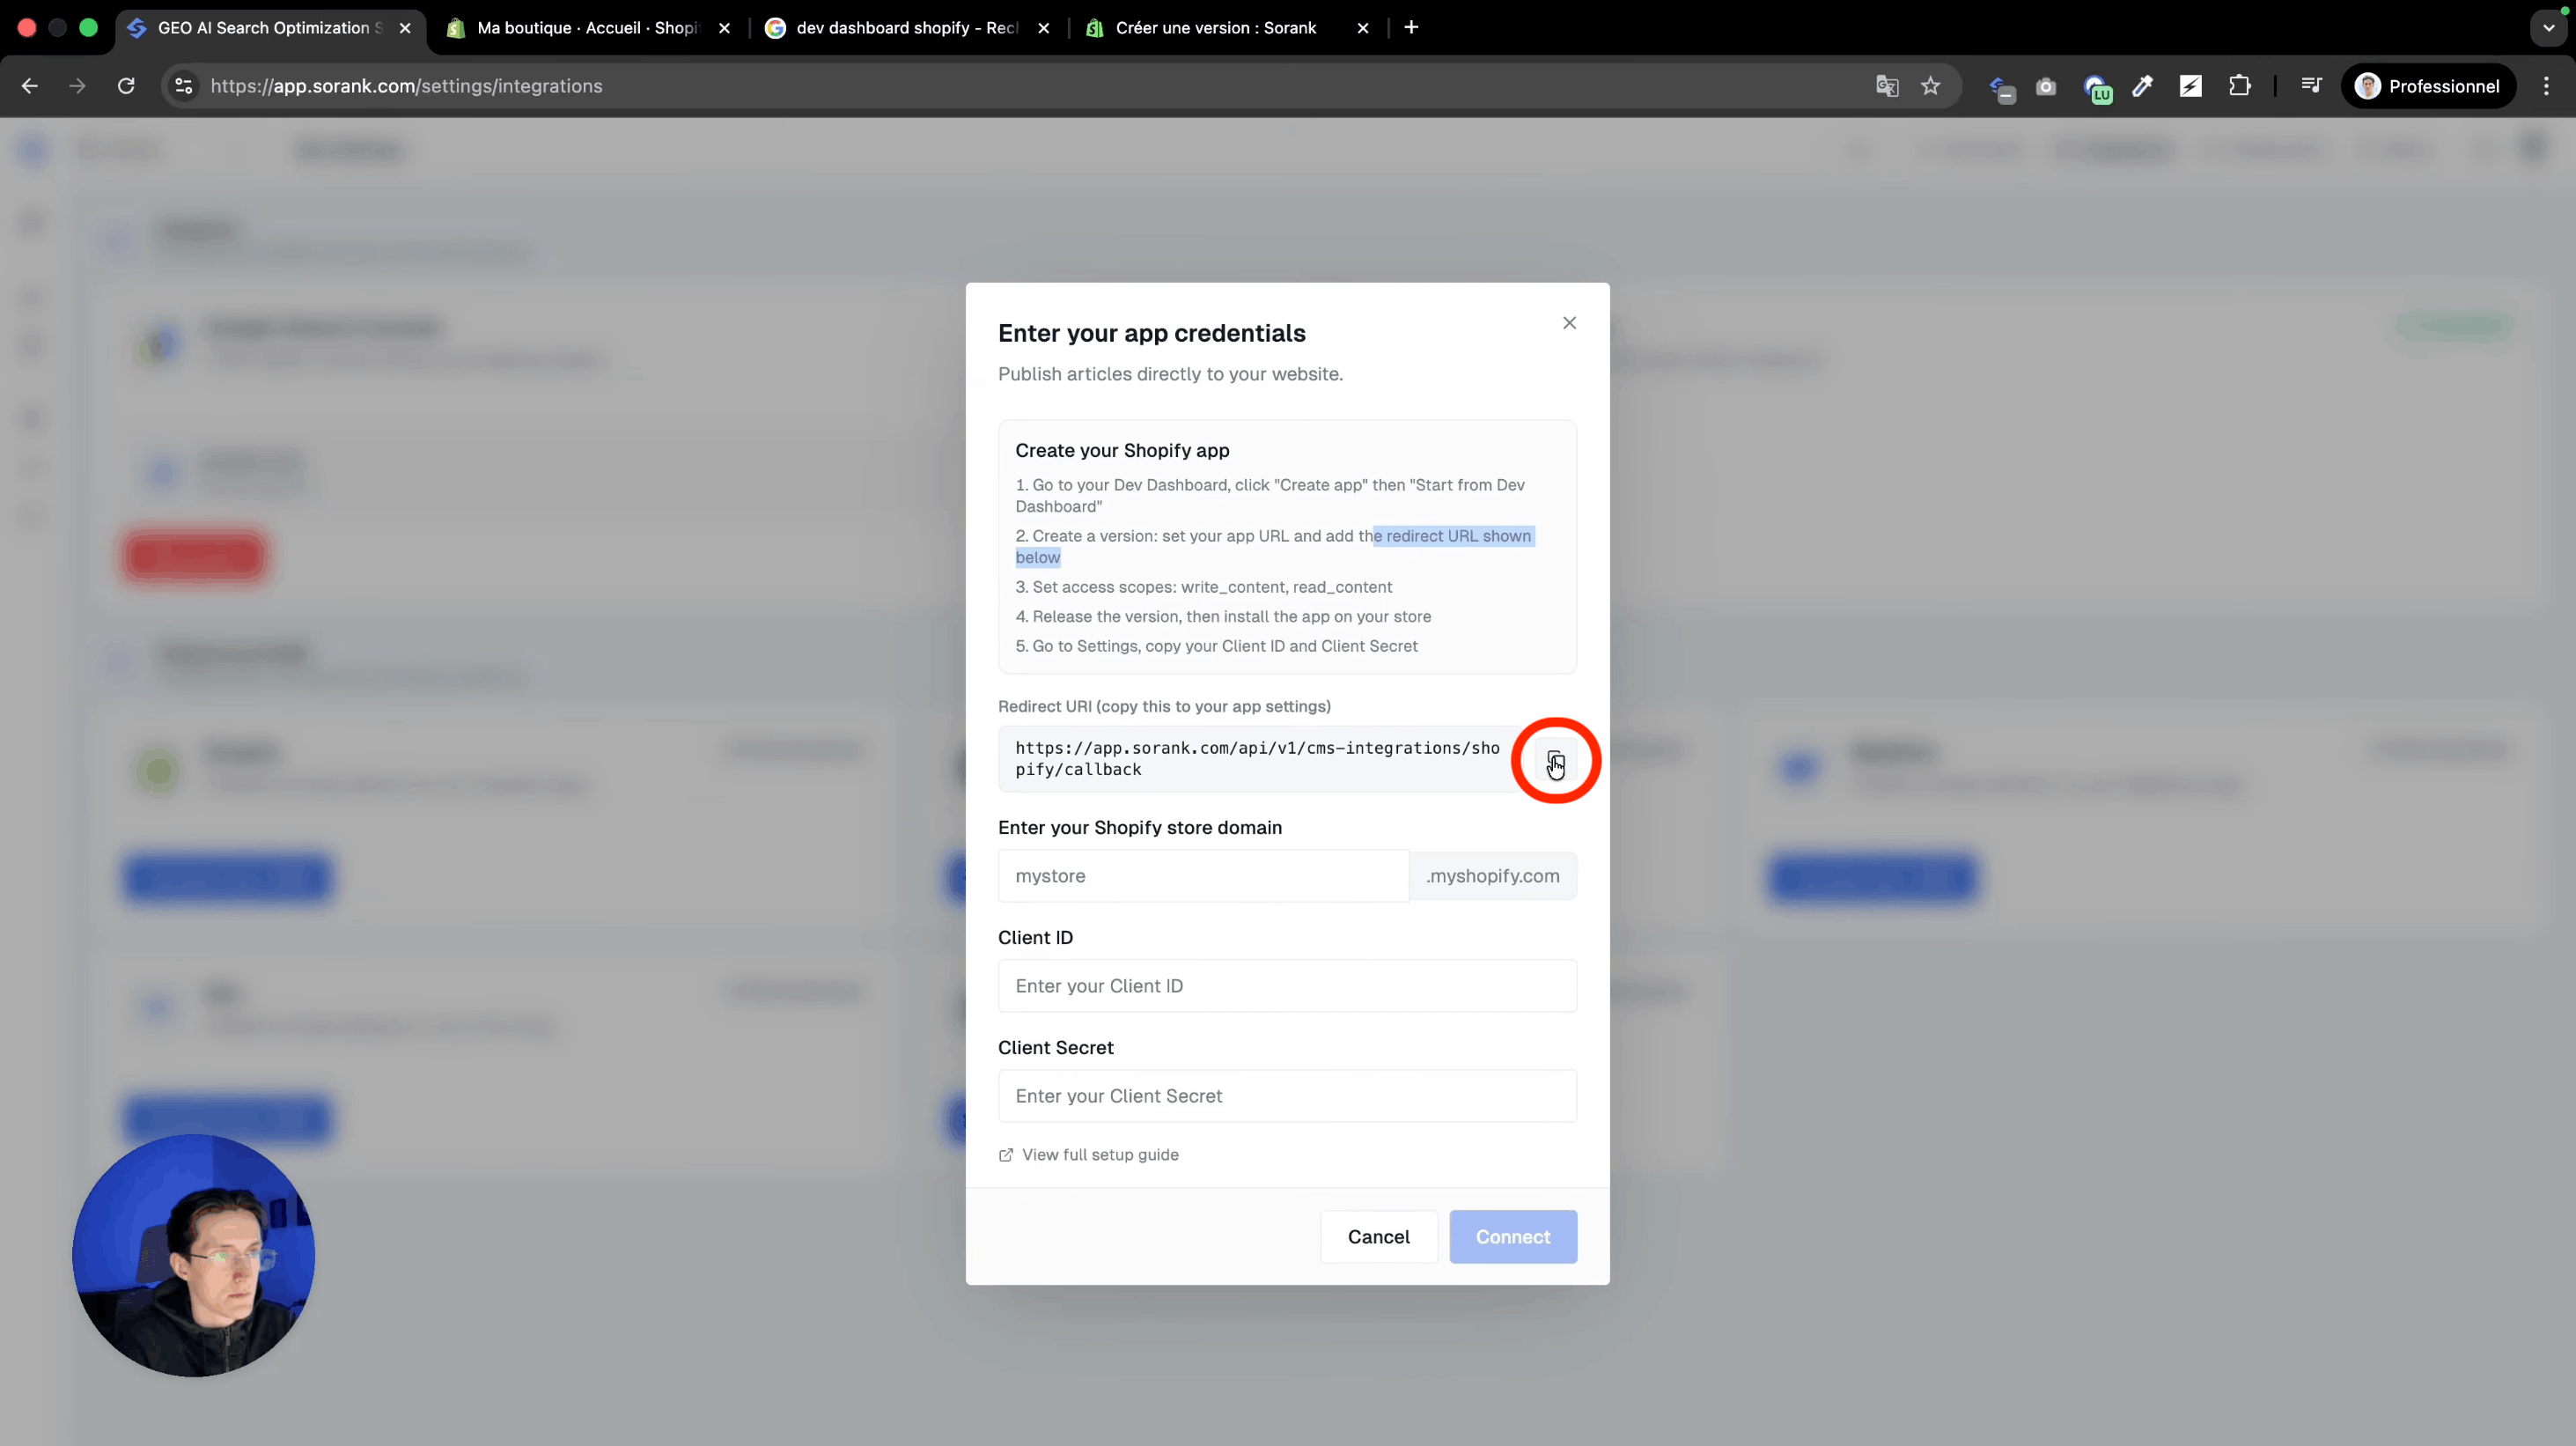 Copy the redirect url.
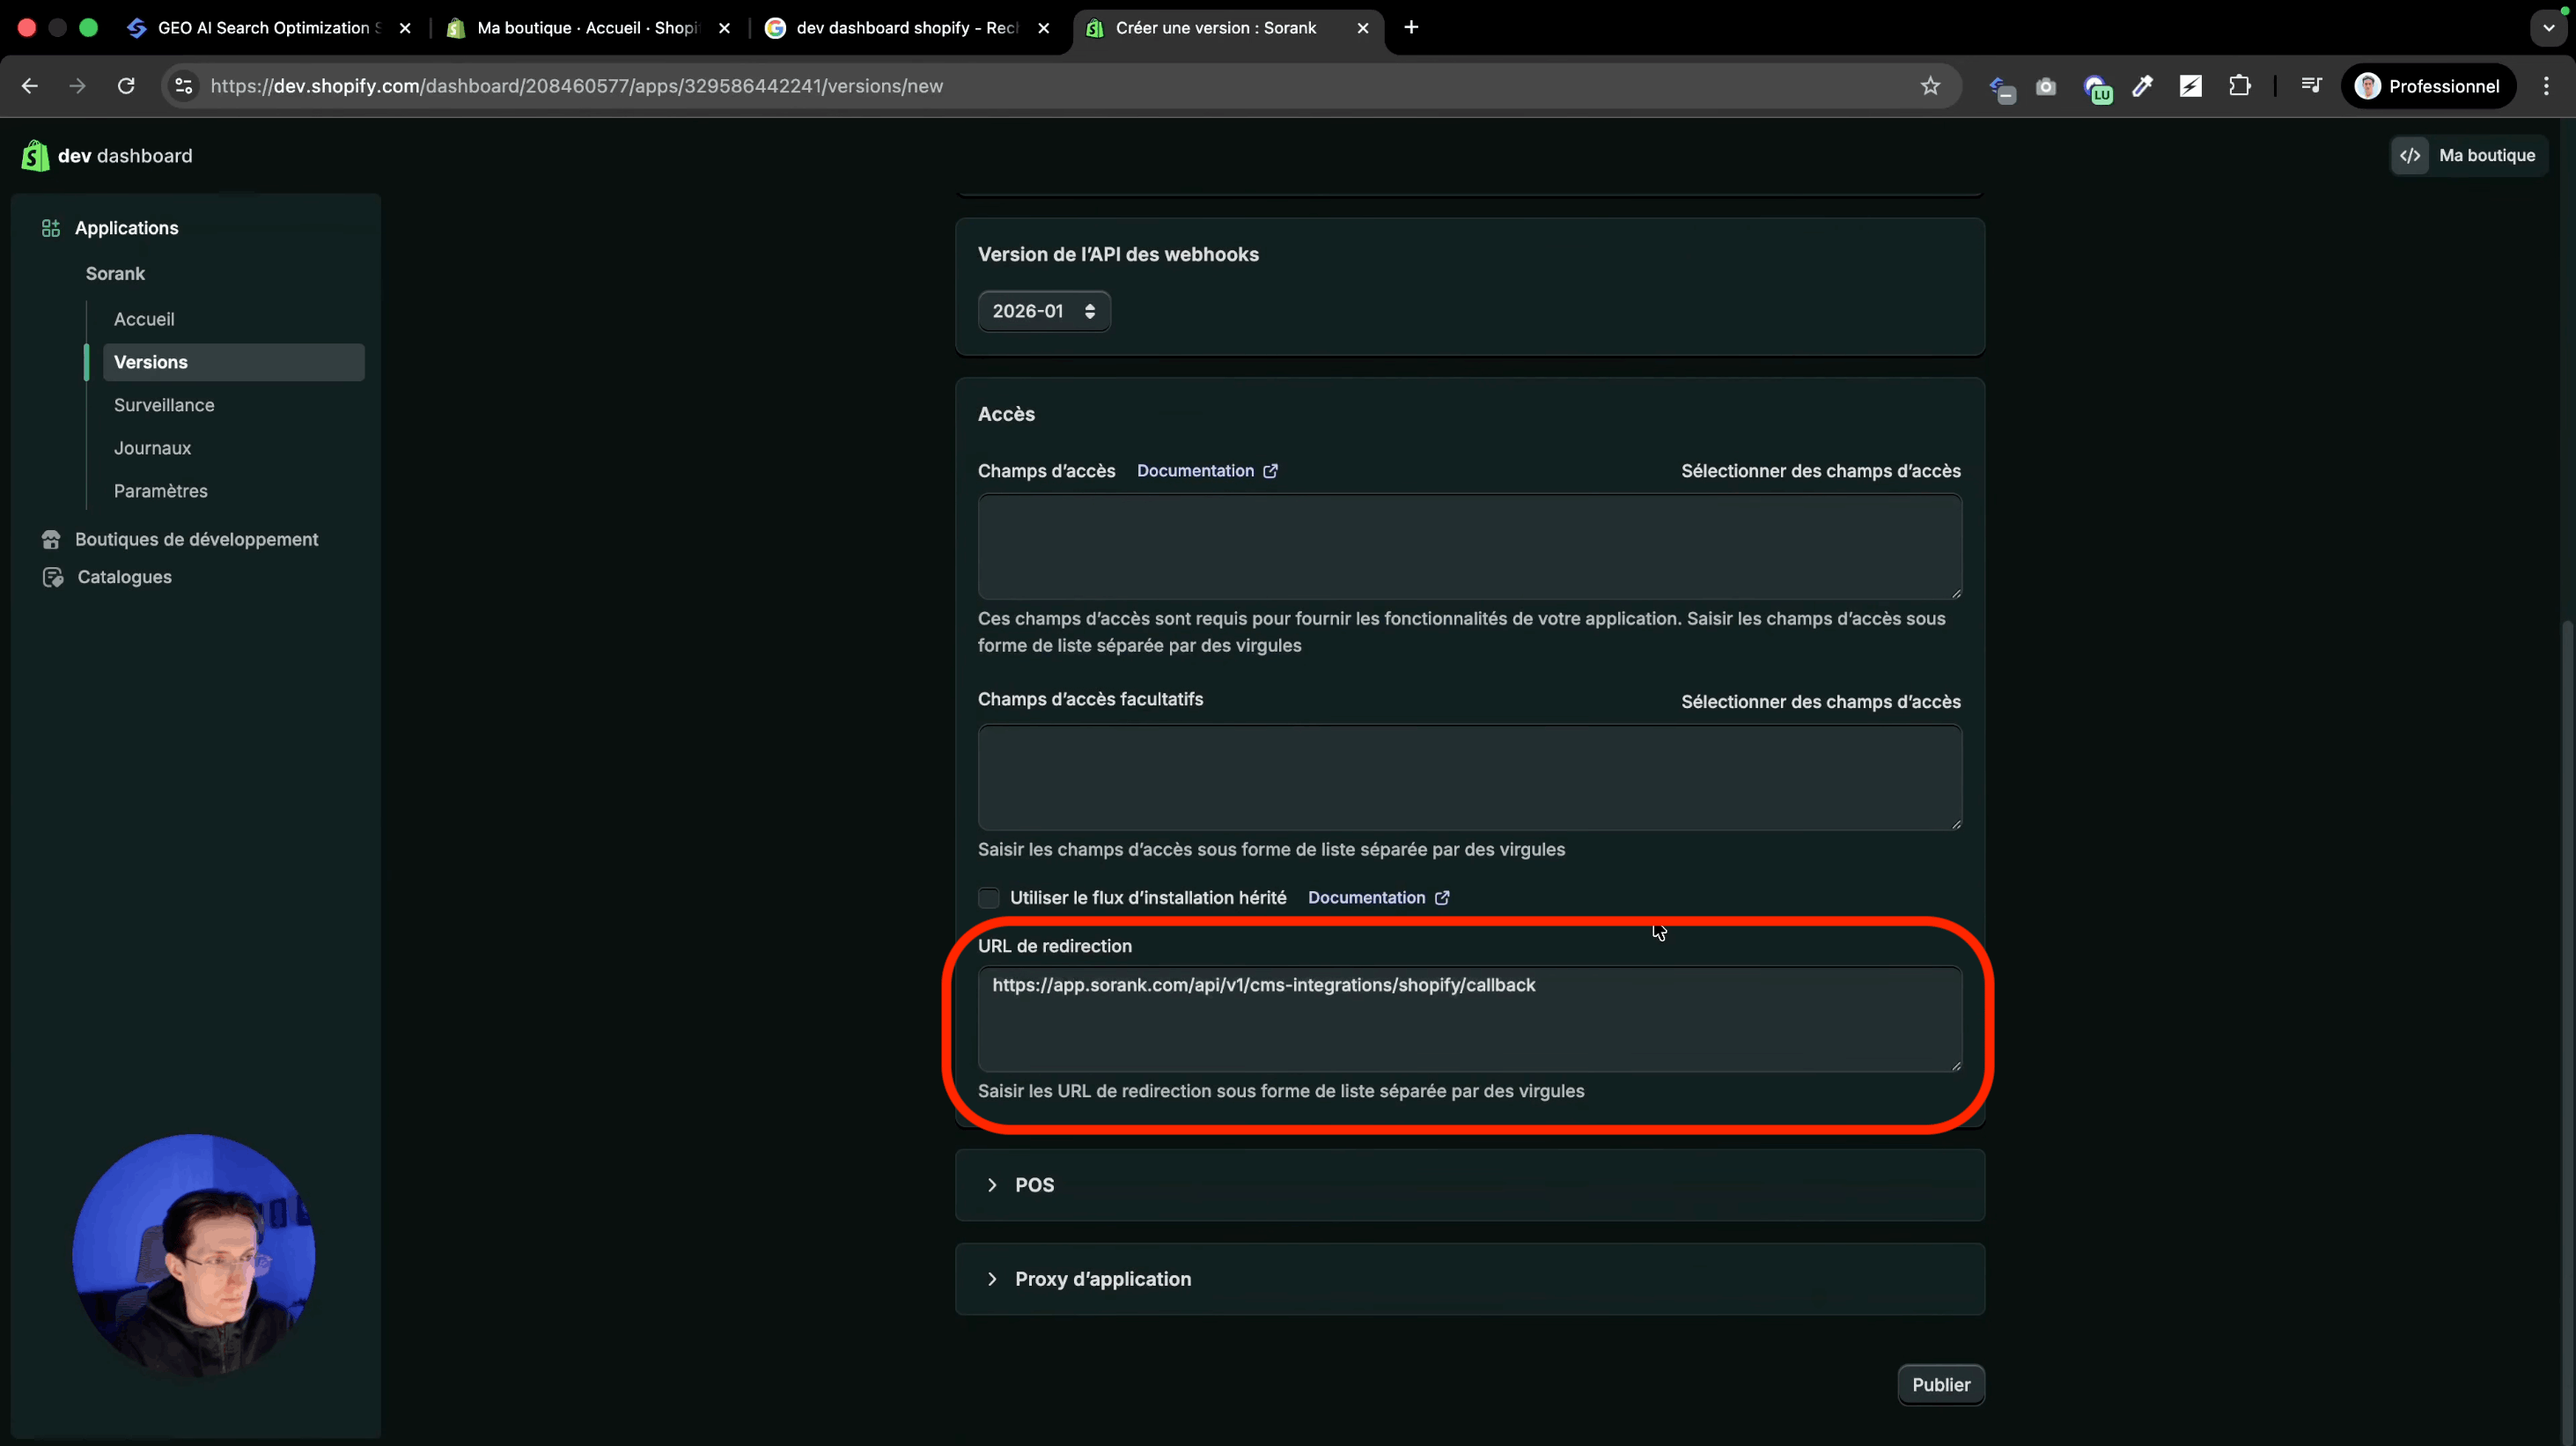 Paste the redirect url.
### Step 4: Select the Scopes
In your Shopify app, go to access fields and add the following scopes:
**Content**: "write\_content" and "read\_content"
**Files**: "write\_files" and "read\_files"
Click finish once all four scopes are added
Paste the redirect url.
### Step 4: Select the Scopes
In your Shopify app, go to access fields and add the following scopes:
**Content**: "write\_content" and "read\_content"
**Files**: "write\_files" and "read\_files"
Click finish once all four scopes are added
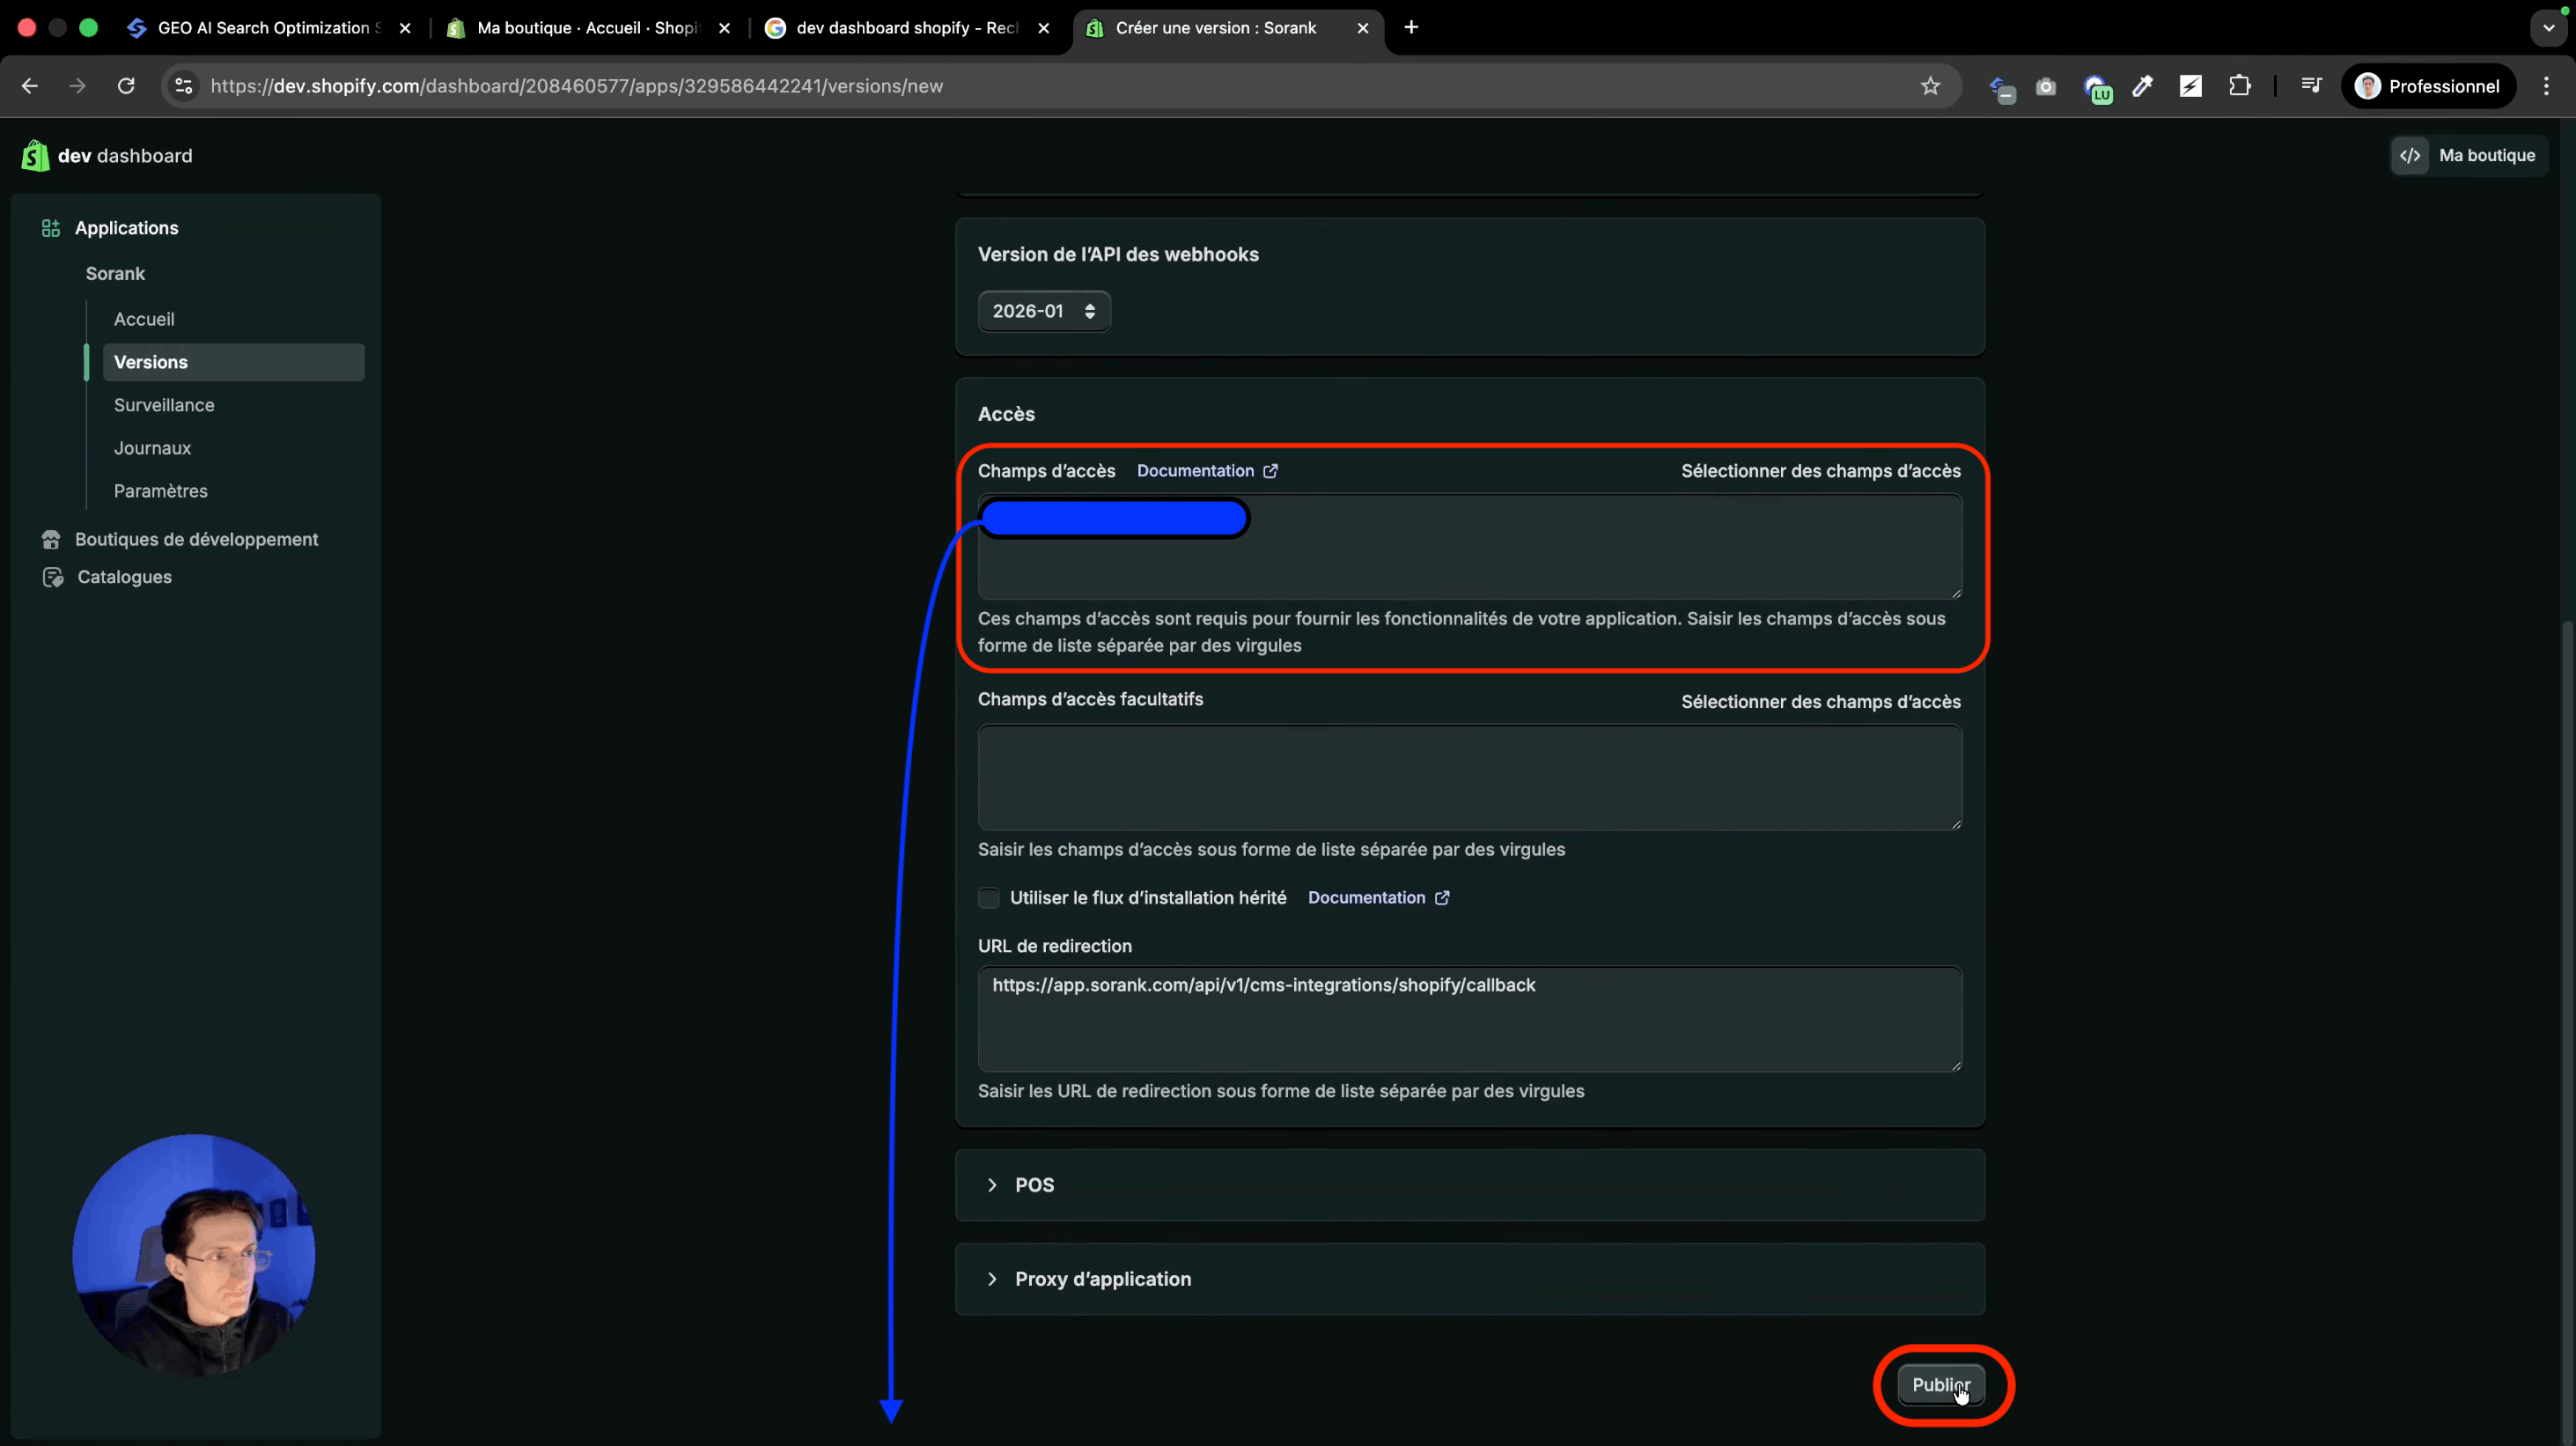 In your Shopify app, you will see the scopes added in the last step :
**Content**: "write\_content" and "read\_content"
**Files**: "write\_files" and "read\_files"
### Step 5: Publish and Install the App
Click publish in your Shopify app. The version name is optional. Once published, go to your Shopify store, then to Apps > Add. Select your app and install it.
In your Shopify app, you will see the scopes added in the last step :
**Content**: "write\_content" and "read\_content"
**Files**: "write\_files" and "read\_files"
### Step 5: Publish and Install the App
Click publish in your Shopify app. The version name is optional. Once published, go to your Shopify store, then to Apps > Add. Select your app and install it.
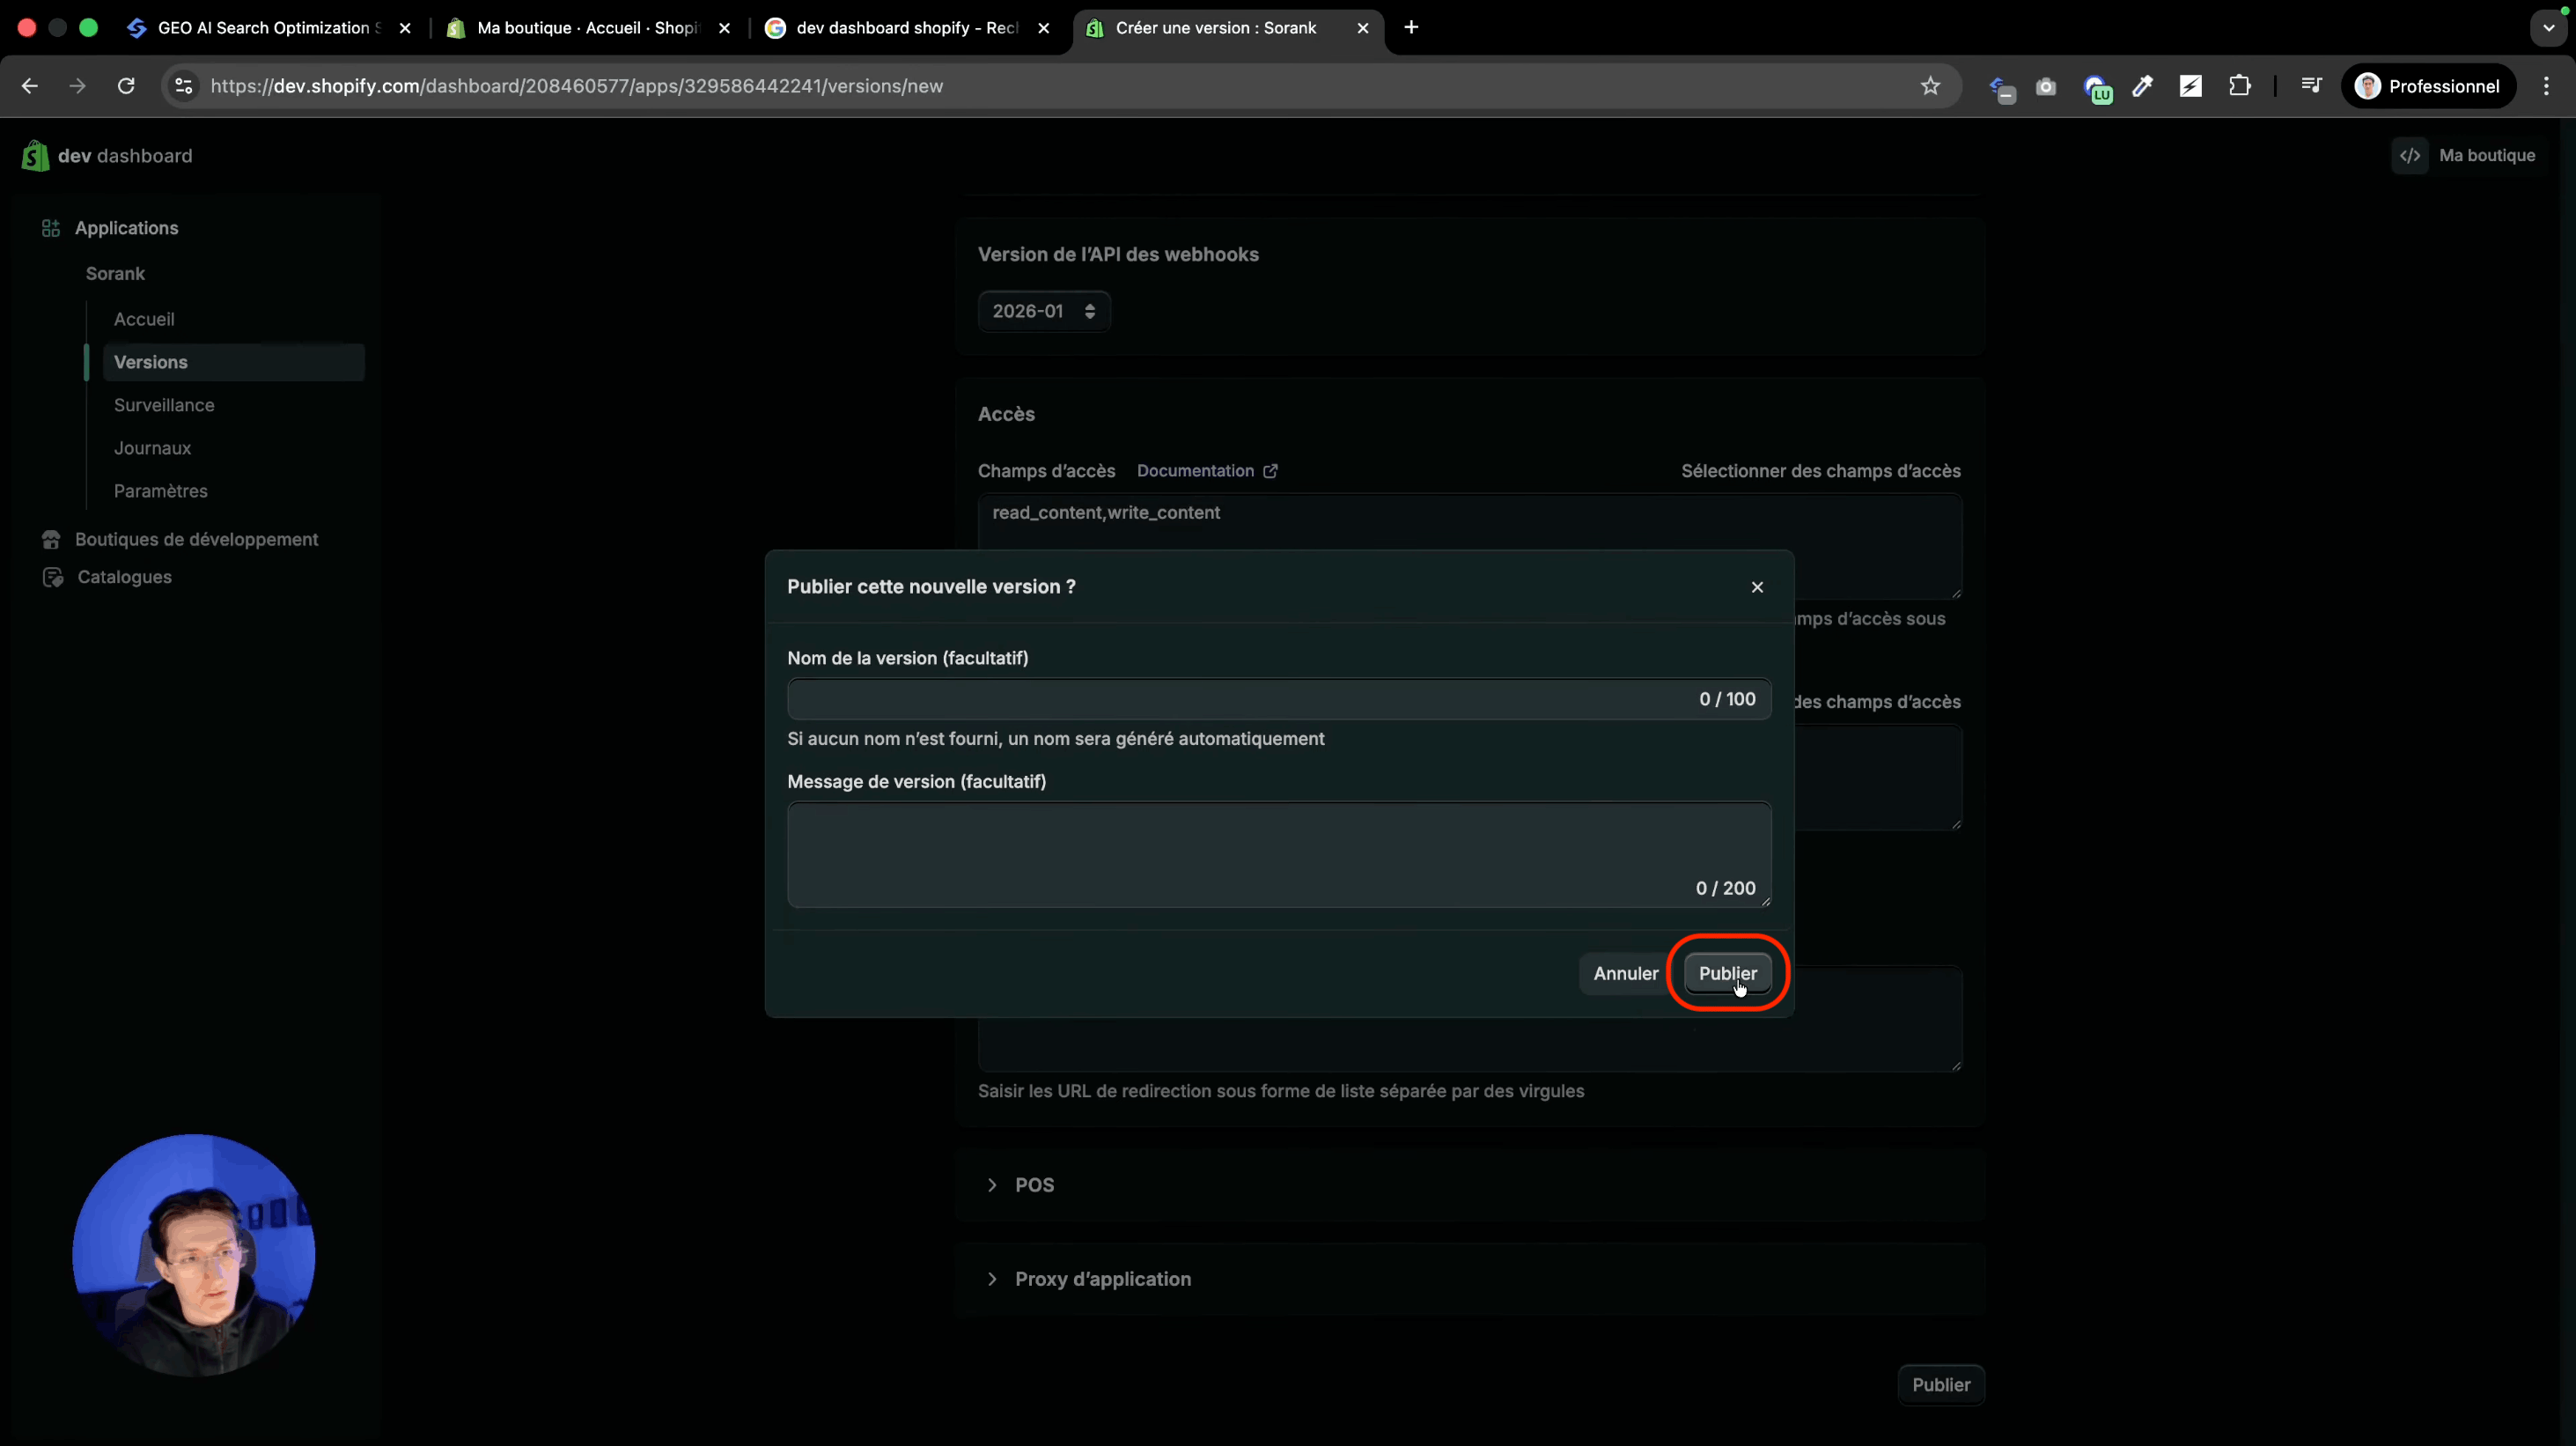 Click publish.
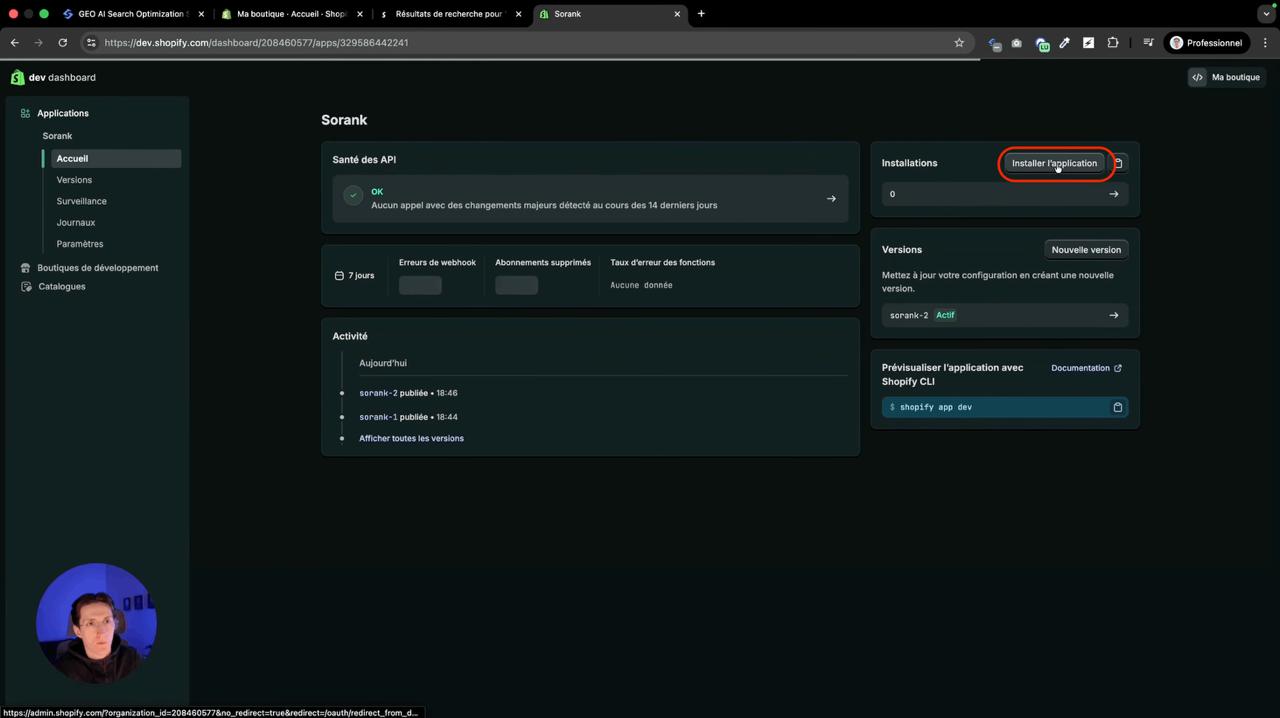 Click install.
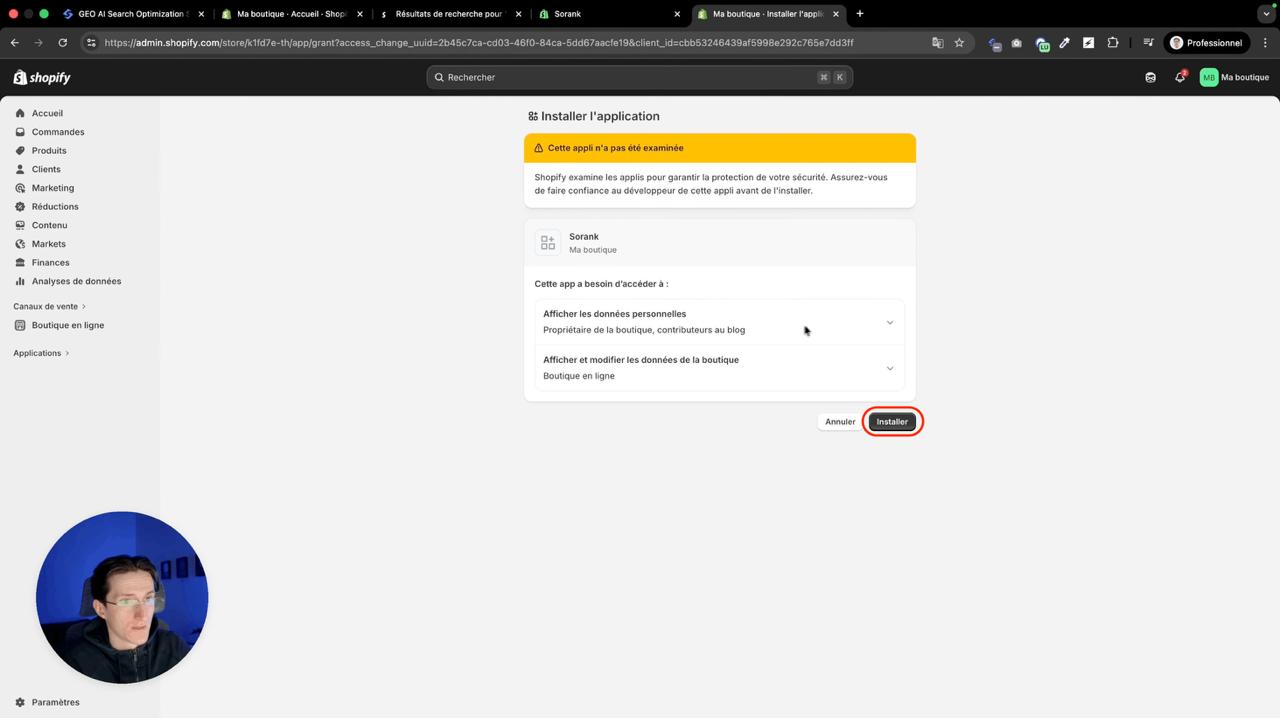 The Shopify app overview confirming the app is ready to install.
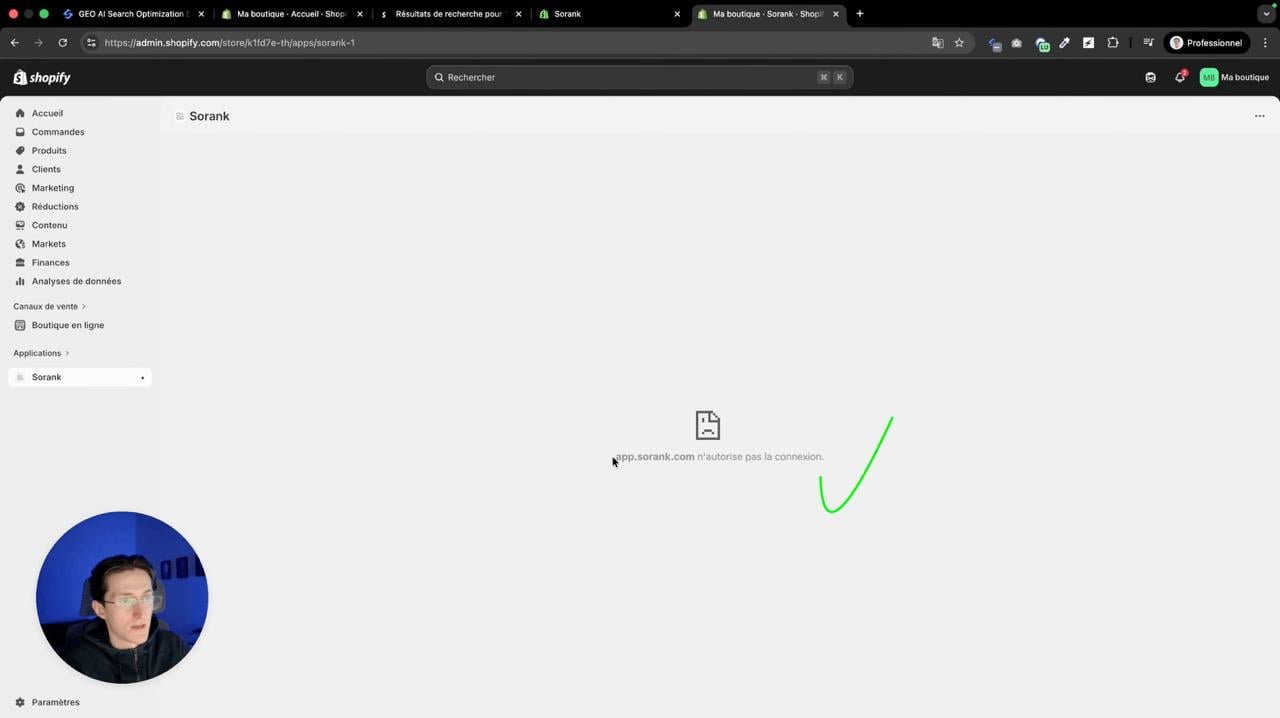 The confirmation message showing the app has been successfully installed.
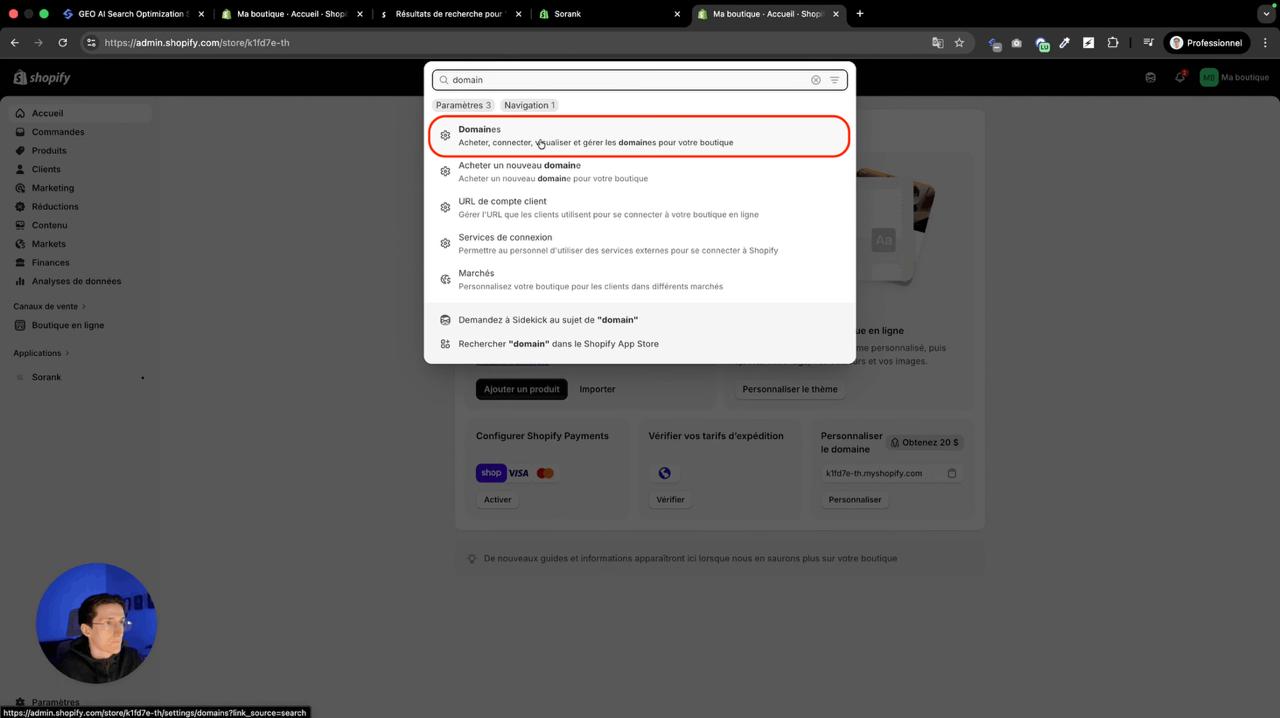 Find your myshopify domain from your Shopify store.
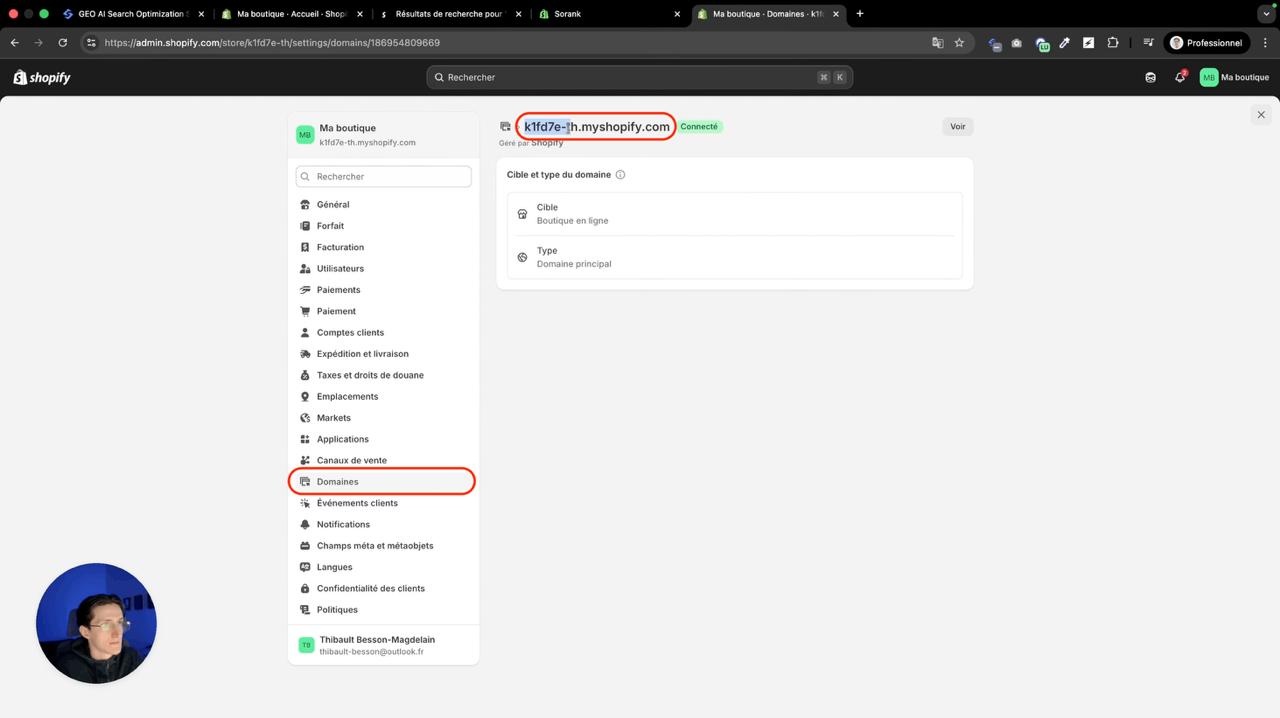 Get your myshopify domain from your Shopify store settings under Domain.
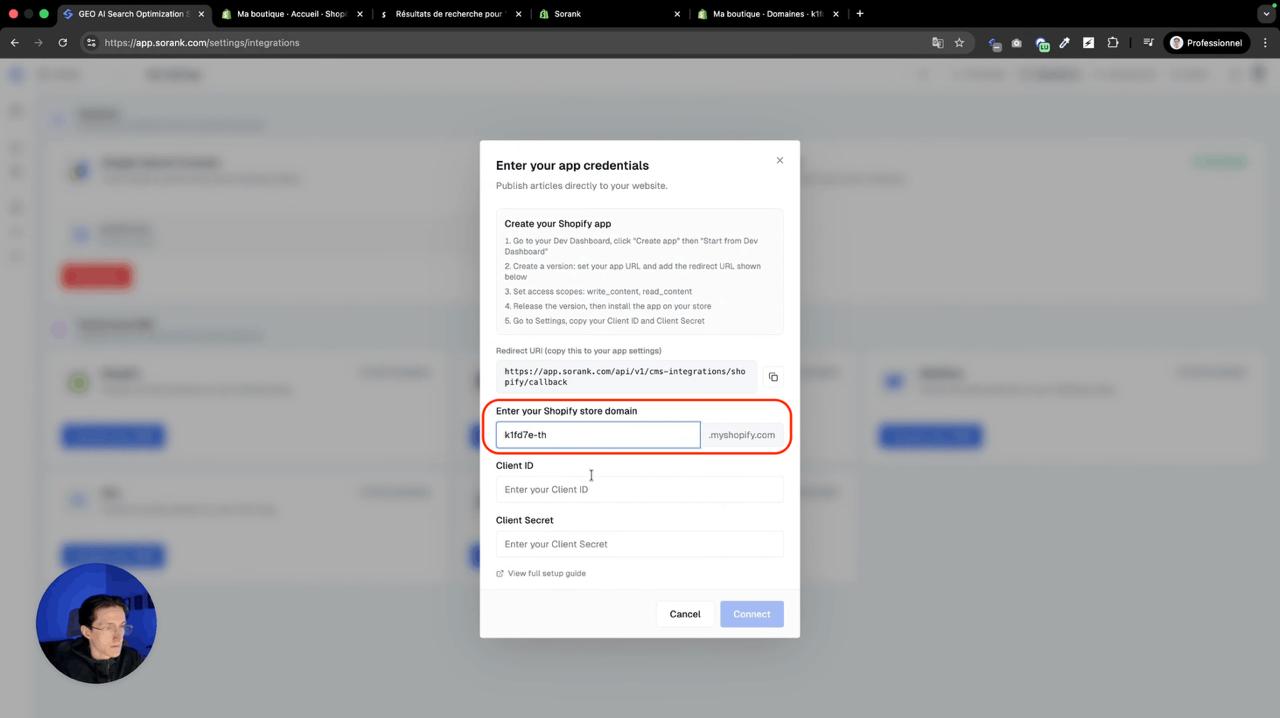 Paste it in Sorank.
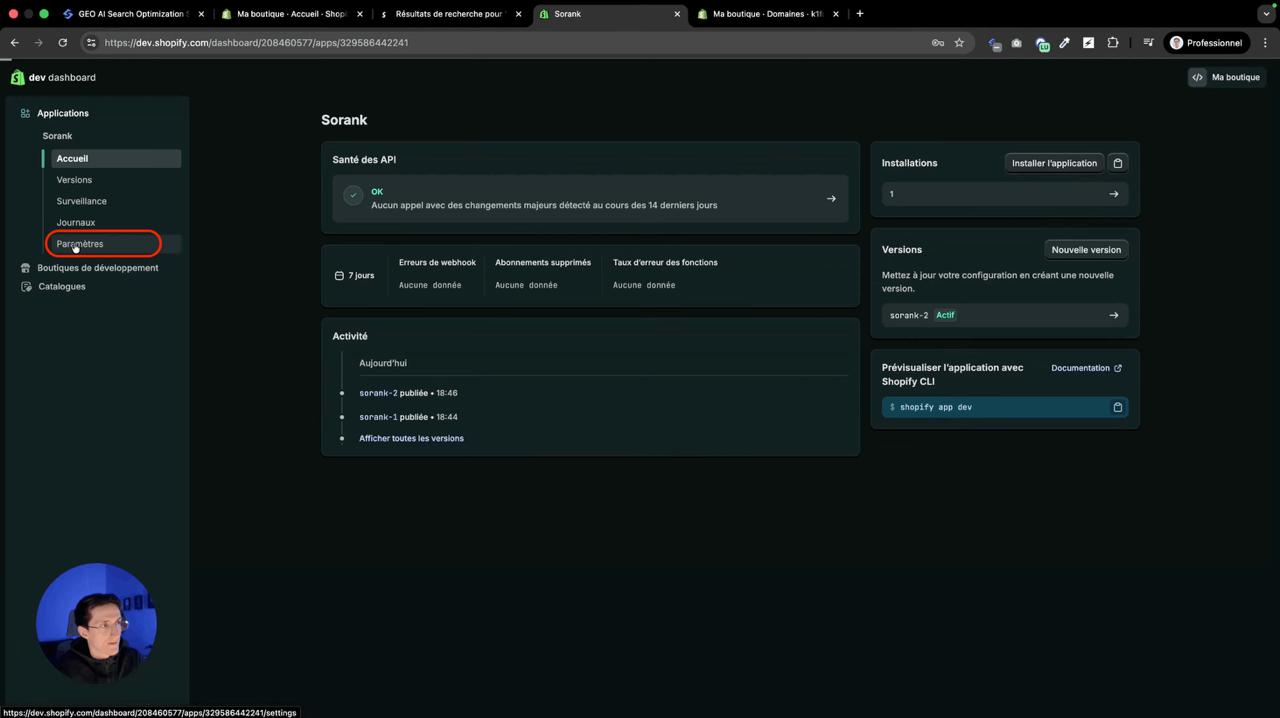 Go to settings in your Dev Dashboard
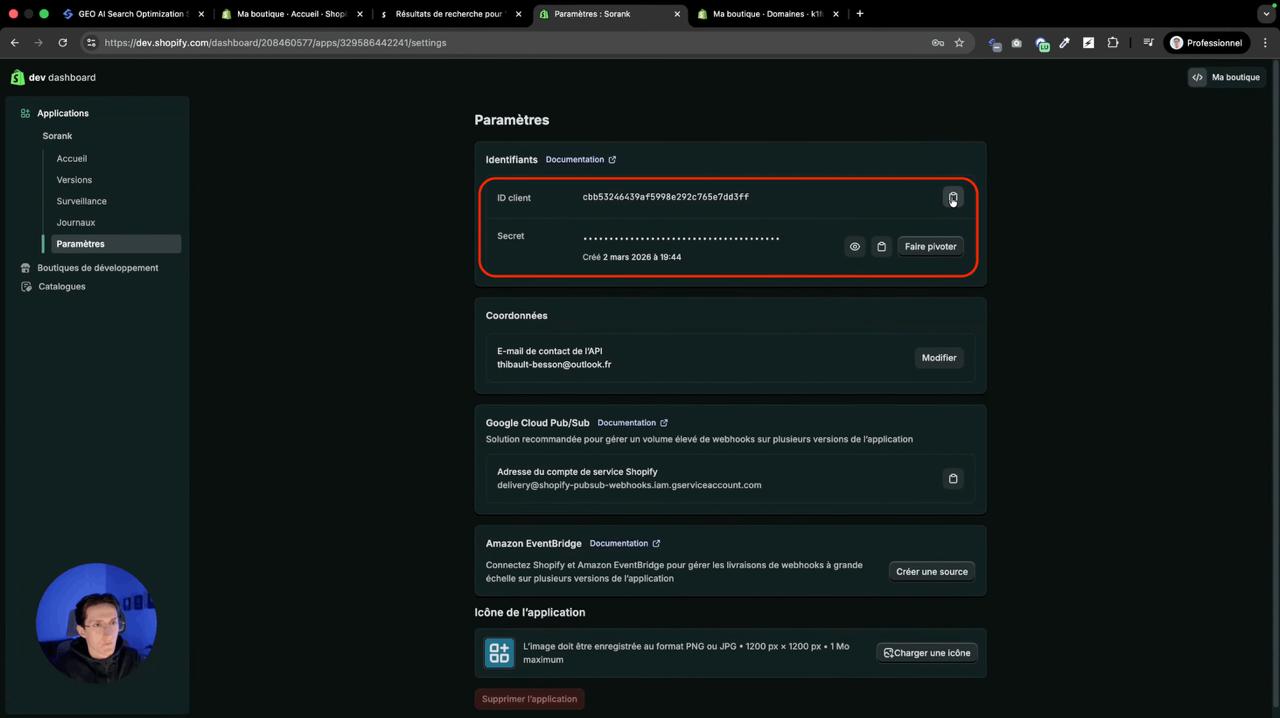 Get your Client ID and Client Secret from the Shopify Dev Dashboard in your app settings.
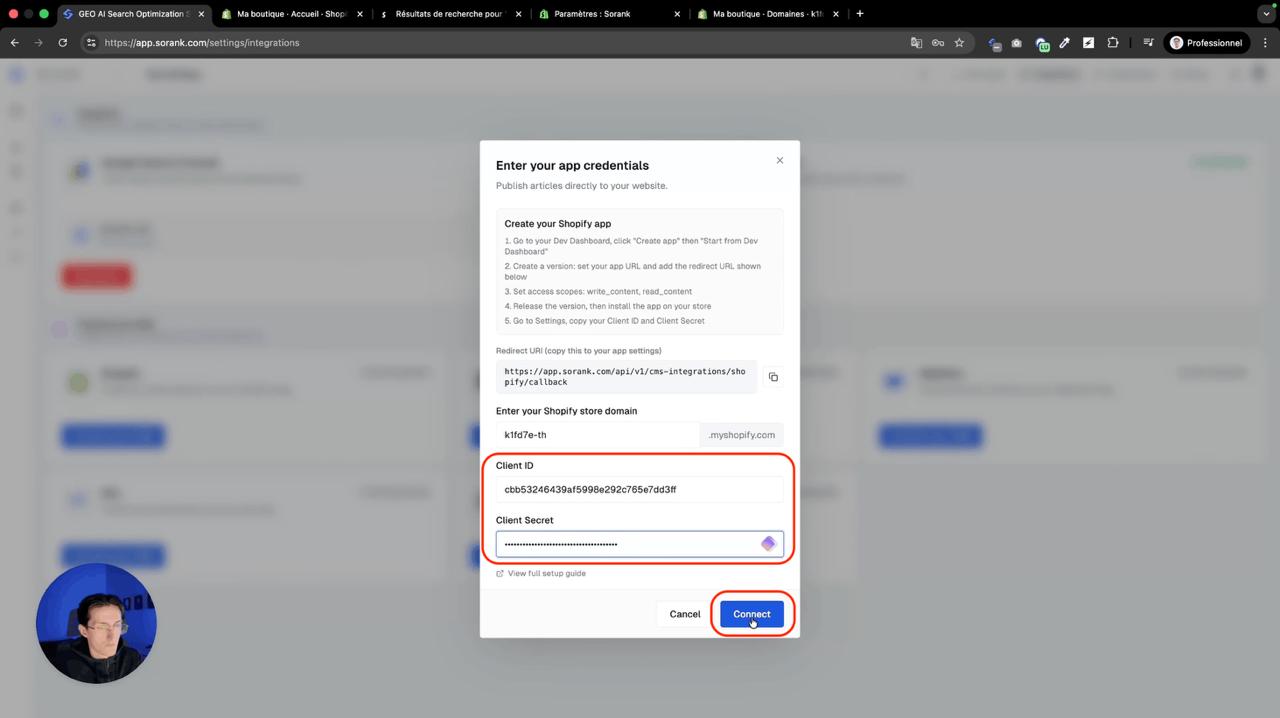 Paste it in Sorank fields.
### Step 6: Connect Shopify to Sorank
Get your myshopify domain from your Shopify store settings under Domain. Get your Client ID and Client Secret from the Shopify Dev Dashboard in your app settings. Paste everything in Sorank under Settings > Integration > Shopify and click Connect.
Paste it in Sorank fields.
### Step 6: Connect Shopify to Sorank
Get your myshopify domain from your Shopify store settings under Domain. Get your Client ID and Client Secret from the Shopify Dev Dashboard in your app settings. Paste everything in Sorank under Settings > Integration > Shopify and click Connect.
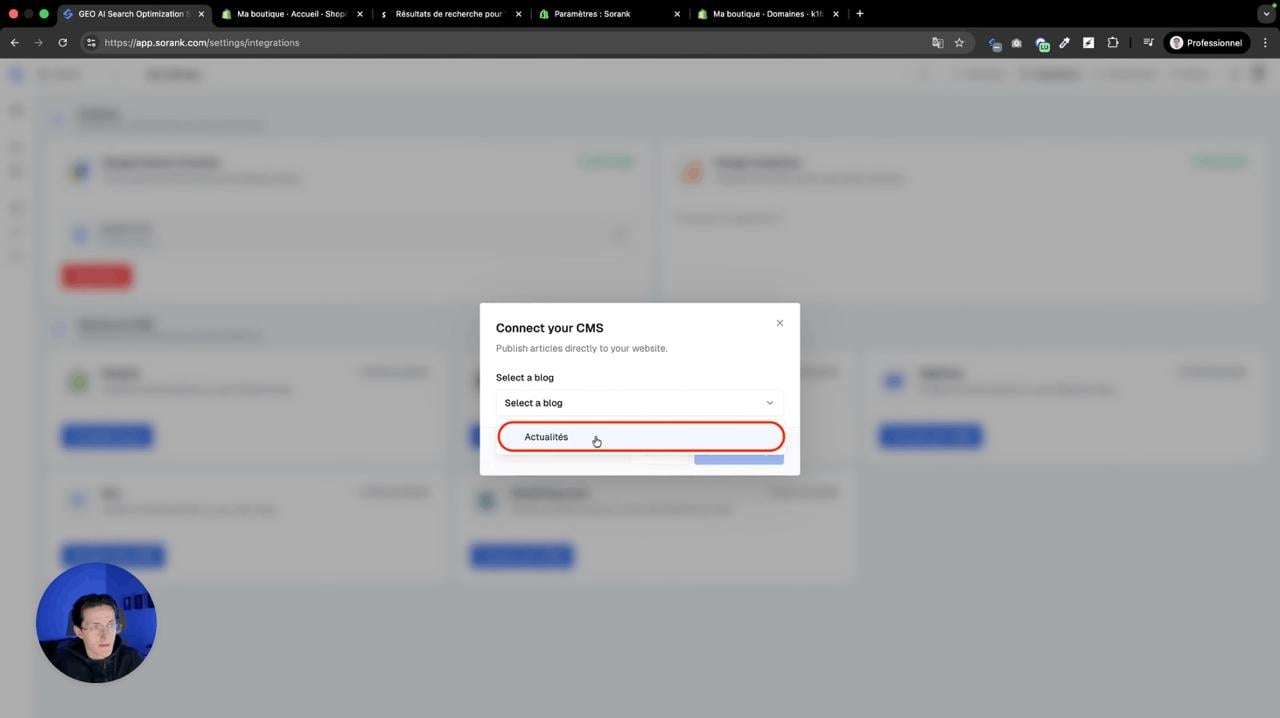 Select the blog on your store where you want to publish your articles.
### Step 7: Select Your Blog and Publish
Select the blog on your store where you want to publish your articles. Click "Confirm setup." Go to SEO Articles in Sorank and click Publish. Your article will appear in Content > Blog Posts on Shopify with all images, headings, internal links, and calls to action.
Select the blog on your store where you want to publish your articles.
### Step 7: Select Your Blog and Publish
Select the blog on your store where you want to publish your articles. Click "Confirm setup." Go to SEO Articles in Sorank and click Publish. Your article will appear in Content > Blog Posts on Shopify with all images, headings, internal links, and calls to action.